EasyManua.ls Logo

SMART LightRaise User Manual

SMART LightRaise
73 pages
To Next Page IconTo Next Page
Page #1 background imageLoading...
Page #1 background image
Installation Guide
Installation and Users Guide

Table of Contents

Other manuals for SMART LightRaise

Question and Answer IconNeed help?

Do you have a question about the SMART LightRaise and is the answer not in the manual?

SMART LightRaise Specifications

General IconGeneral
TechnologyDLP
ResolutionWXGA (1280 x 800)
Aspect Ratio16:10
Lamp Life (Normal)3000 hours
Audio10W Speaker
Multi-user SupportYes
Brightness3000 ANSI Lumens
Input PortsHDMI, VGA, USB
Output PortsVGA, Audio Out
CompatibilityWindows, macOS
FunctionInteractive projection
Weight5.5 kg

Summary

Registration Benefits

Important Information

Other Precautions

A Note about This Guide

Console Purchased Separately

Boom Purchased Separately

General Operating Environment

Introducing the SMART LightRaise Projector Mount

Supported Projectors

Details the requirements for compatible projectors and lists supported models.

Room Dimensions and Requirements

Specifies room size, ceiling height, and wall space needed for installation.

Installation Overview

Room Specifications

Details recommended room dimensions, ceiling height, and console placement options.

Wall Specifications and Mounting Information

Tools Required

Lists necessary tools and hardware for wall mounting and installation.

Removing an Existing SMART Board Interactive Whiteboard

Order of Installation

1. Mounting the Wall Brackets

Marking the Wall and Mounting the Console Bracket

Instructions for marking the wall and attaching the console bracket to various wall types.

2. Installing the Boom

Attaching the Boom

Steps to slide the boom into the pivot base, secure struts, and raise it to the operating position.

Finishing the Boom Installation

Completes boom setup by extending, securing, and covering components.

3. Installing the Console

Mounting the Console

Guides on hanging the console onto its bracket and securing it with fasteners.

Installing the Cable Cleats

Instructions for attaching cable cleats for tidy storage of external computer cables.

4. Connecting the Cables

5. Installing the SMART Board Interactive Whiteboard and Projector

To mount the board on the hanger bracket:

Instructions for lifting and securing the SMART Board onto the hanger bracket.

To equip the SMART Pen Tray:

Steps for fitting the eraser cup and placing styluses in the SMART Pen Tray.

To install and connect the projector:

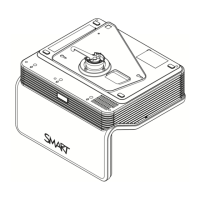
Guides on attaching the projector to the mount and connecting its cables.

6. Finalizing the Installation

Making the Final Connections

Connects power and network cables, positions peripherals, and powers on the system.

Adjusting the Computer

To install SMART Board software:

Steps to install SMART Board software from the CD-ROM.

To set the resolution on a computer using the Windows operating system:

Guides on adjusting computer display resolution to match projector settings.

To adjust the energy-saving settings for the Windows operating system:

To set the resolution on a Macintosh computer:

Operating the SMART LightRaise Projector Mount

Interpreting the Control Panel Indicators

Explains the meaning of various indicator lights on the control panel.

Using the SMART LightRaise Projector Mount

Basic operation for starting and shutting down the projector mount.

To shut down the LightRaise projector mount:

Procedures for powering down the projector mount and its cool-down sequence.

To restart the LightRaise projector mount:

How to turn the projector mount back on after shutdown.

Automatic Shut-Off Feature

Details the automatic power-down function based on computer inactivity.

Changing the Volume Level

Changing the Projector's Input Source

Using Your SMART Board Interactive Whiteboard

Using an External Computer

Activating Your Video Port

Servicing the SMART LightRaise Projector Mount

Lowering the Boom

Instructions for lowering the boom to remove or service the projector.

Upgrading Your Firmware

Customer Support

Contacting SMART Technical Support

Contact details and information needed for technical support.

Product Warranty

Appendix A: Console Functional Diagram

Appendix B: Console Running Wire List

Related product manuals