30 SMART LightRaise Installation and User's Guide
Finishing the Boom Installation
To complete the boom installation, you'll need to:
•
extend the boom to its full length and secure it
•
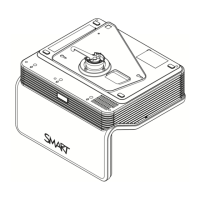
attach the projector mount and the tie wrap
•
stretch the cables along the telescoping beam and snap on the top covers
•
raise the boom to its operating position and snap on the lower covers
•
attach the wall-bracket covers
Tools required: Hardware required:
•
3
/
32
" hex key (from boom accessory
kit)
•
TORX key (from projector accessory
kit)
•
a plastic cutting tool (hacksaw or tin
snips (for SMART Board 560
interactive whiteboard)
•
concrete drill and bit, if installation is
on a concrete wall
•
Phillips #2 hand screwdriver
•
projector mount (from your projector kit)
•
3 TORX M4 x 25 mm tamper-resistant
fasteners
•
2 inside star washers
•
tie wrap mount (from boom accessory kit)
•
projector cable bundle (from boom carton)
•
tie wraps
•
boom covers
•
wall bracket covers (from boom carton)
•
fasteners for your type of wall:
•
walls with studs: drywall anchors and
#8 x 1¼" truss head screws
•
concrete or cinderblock walls: concrete
screws
To extend the boom and secure it:
1
Slide the telescoping beam out of the main beam.
Main Beam
Telescoping Beam
Strut Slide
Main Beam End Plate
Struts