Chapter 2 Installing the display
smarttech.com/kb/171555 32
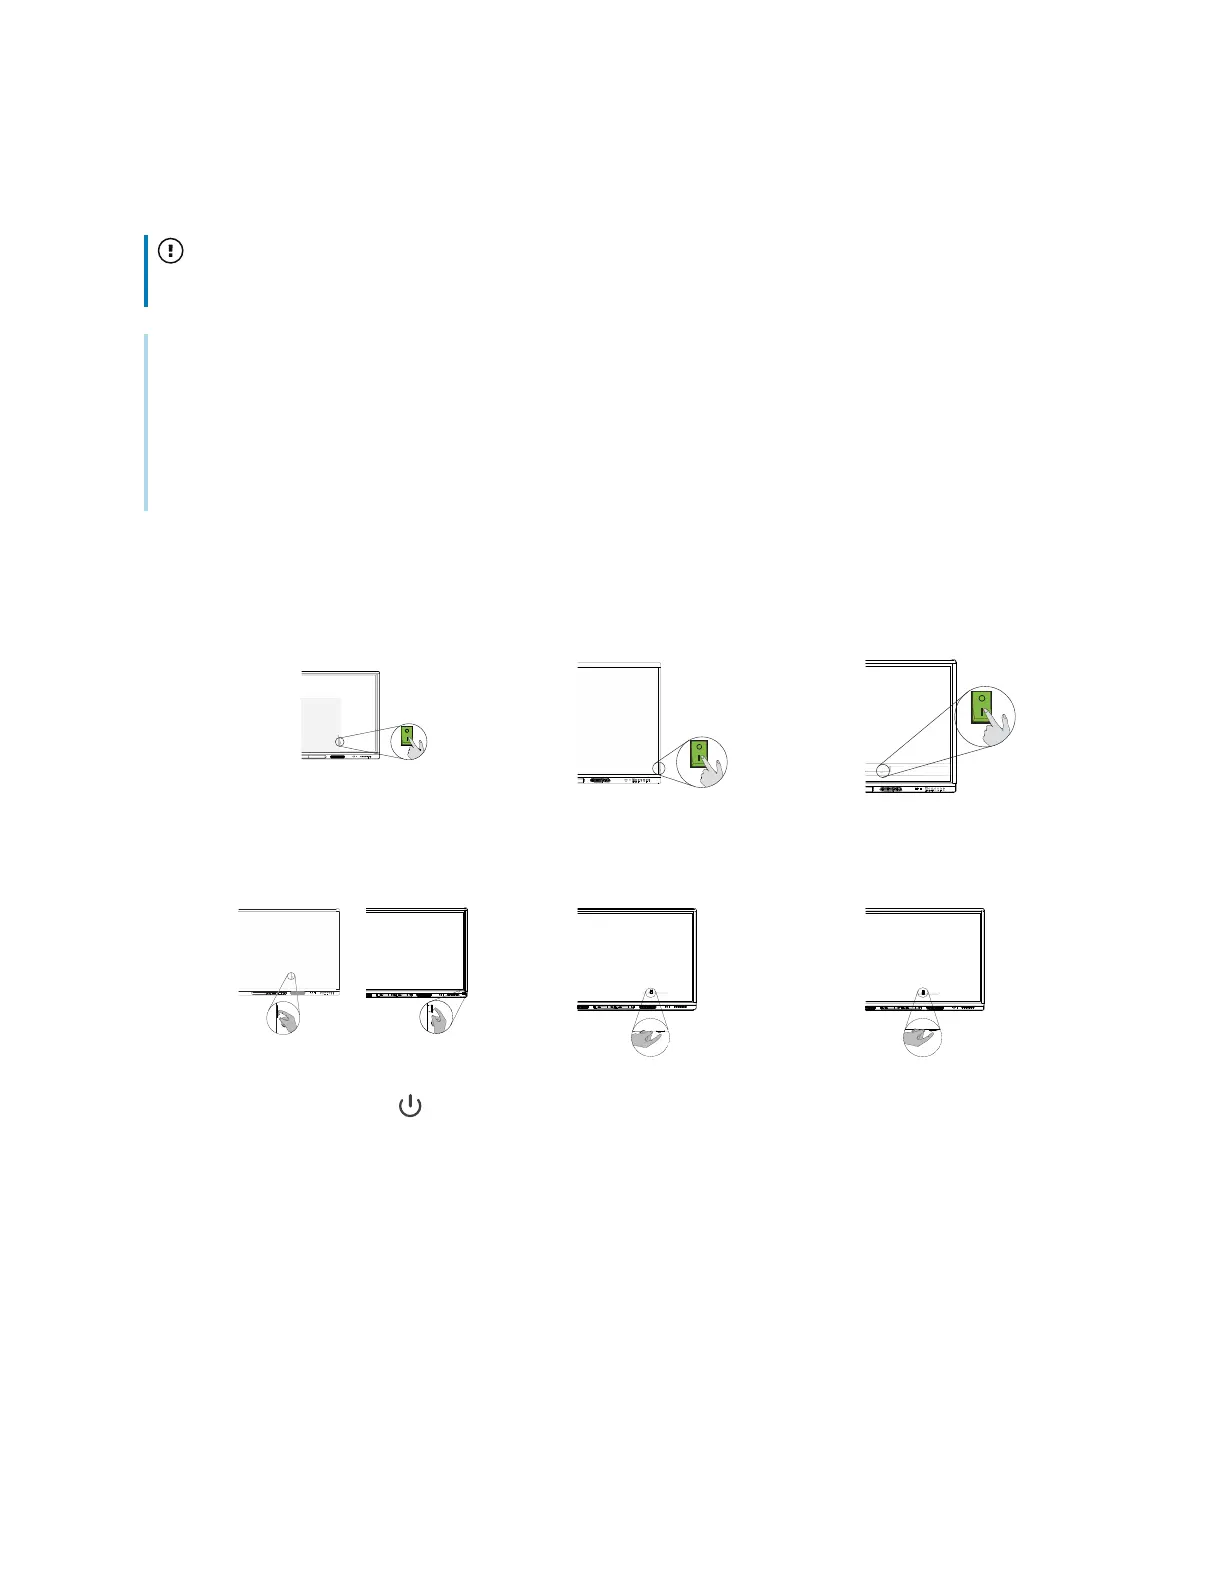
To turn on and set up the display for the first time
Important
Install the OPSPC module before you turn the display on.
Notes
l
Touch is not available right after waking up the display or turning it on. Wait a few seconds and
then the display will respond to touch.
l
If a USB drive is connected to the display’s service port, do not remove the USB drive. The USB
drive contains an important firmware update.
1. Flick the switch beside the AC power inlet to the ON(I) position.
o
SMARTBoard MX (V2, V2-C, and V3) series
55" models 65" models 75" and 86" models
o
SMARTBoard MX series
65" models 75" models 86" models
2.
Press the Power button on the front control panel or remote control
3.
Select your preferred language, and then tap Next.
4.
Select your country, and then tap Next.
5.
Select your time zone, and then tap Next.
6.
Set the date, and then tap Next.
7.
Set the time, and then tap Next.
8.
Name the display, and then tap Next.
 Loading...