38
Hammer in the femoral component (see page
44 ff) using the impactor. Here too, continu-
ous pressure must be maintained and
excess cement removed.
Important
Make sure the posterior femoral condyles do
not come into contact with the tibial compo-
nent when impacting the femoral component.
We recommend covering the tibial compo-
nent with a compress.
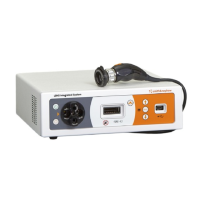
Before the femoral component cement has
set, the plastic lug that protects the box
from cement infiltration must be removed.
Final check
Use the tibial insert trial for a final trial
reduction prior to definitive assembly of the
tibial insert.
Before the cement has set, remove any
excess cement in extension.
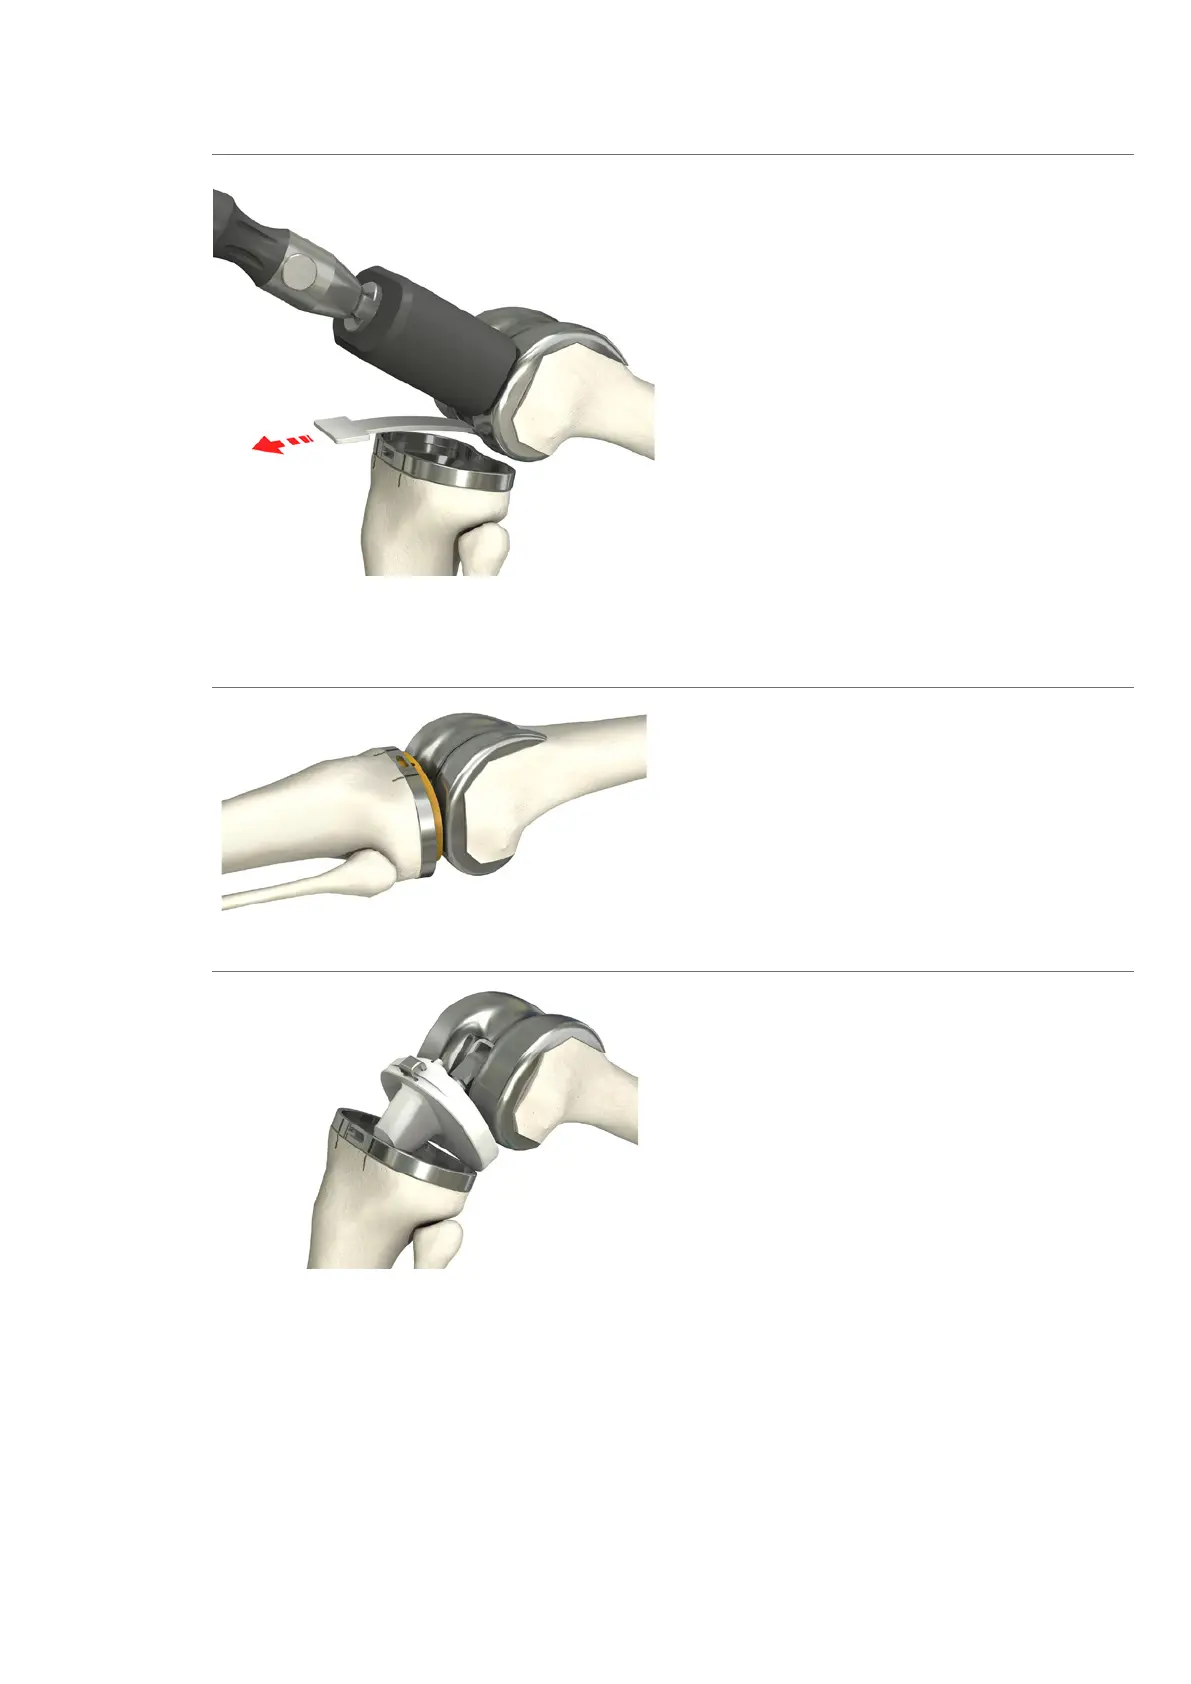
Insertion of tibial insert
The tibial insert of the corresponding size
(see page 44 ff) can only be inserted when
the cement has fully hardened.
In the 90° flexed position, place the tibial
insert on the femoral component rotation peg
and slide into the tibial component by hand.
Important
Note the correct anatomical alignment. It is
important to make sure no soft tissue is
trapped between the tibial insert and the
tibial component.
Handle the tibial insert carefully, to prevent
the anterior metal clamp from falling out.