22
Semi-Flush fixing the control panel
The xings must support a fully assembled Control panel. The
SENTRI4 panel with batteries weigh 22.2Kg.
e. Stick the adhesive backed foam pad supplied to cover gaps around the centre key-
hole xing point in the back box. This is done to seal any gaps to prevent ingress.
f. Terminate each cable at the entry point leaving 400mm tail wire length and mark
each core to identify its nal connecting point.
Where mains cable is to remain disconnected, its tail ends must be
insulated to prevent dangerous conditions arising in the event of
accidental switching On of the mains supply.
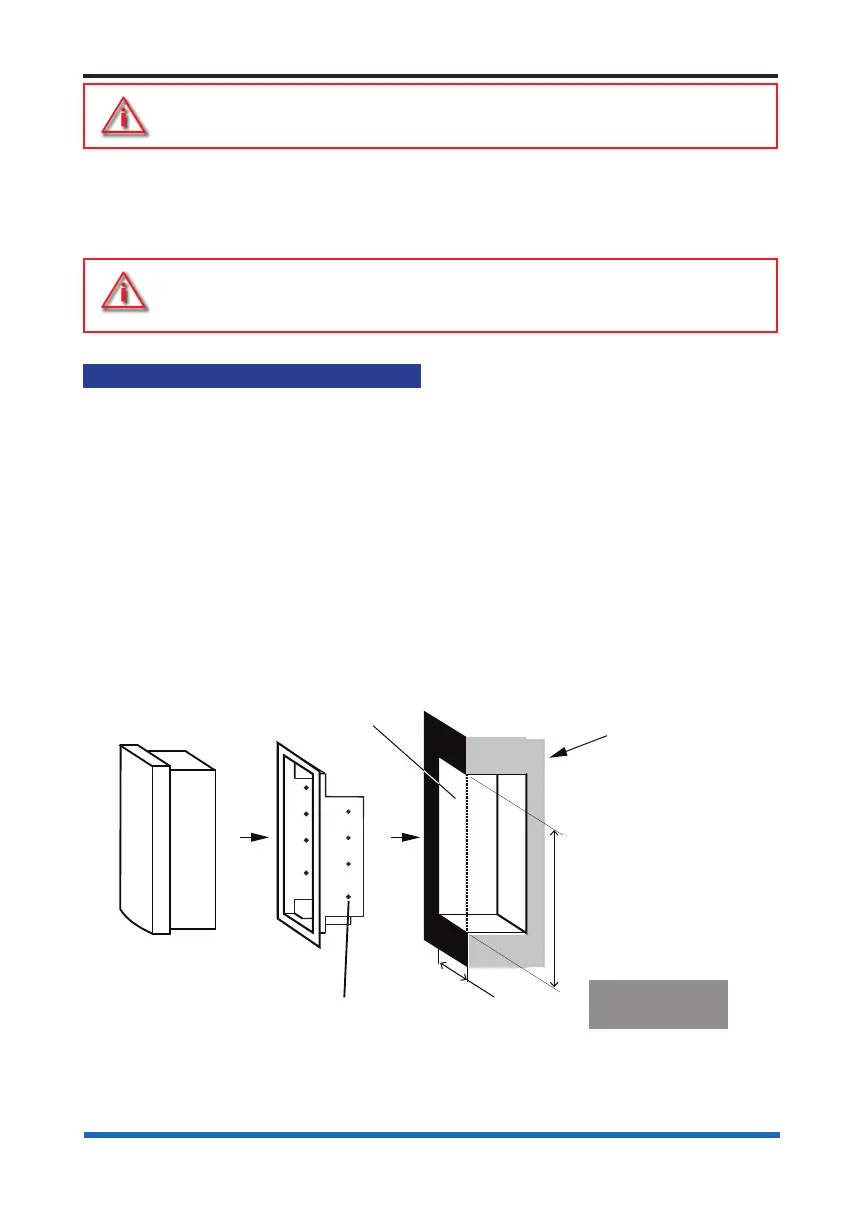
Semi-Flush xing the control panel
The control panel may be semi-ush mounted using a semi-ush surround
(SENTRI4-FLUSH).
a. Check the contents of the semi-ush surround package.
b. Cut out an aperture in the wall to allow the semi-ush surround to be tted, see the
diagram below for dimensions of the aperture in the wall.
c. Using the xing holes on the surround secure it into the aperture side walls.
d. Knock out the appropriate top or rear cable points on the control panel back box.
e. Route the cables through the cable entry points into the back box and at the same
time insert the back box into the semi-ush surround.
f. Fit the back box to the semi-ush surround using the 5 - 5mm xing-screws
supplied in the spares pack.
Control Panel
Cross section of
the wall to which
the panel is to be
semi-flush mounted
Flush
Surround
5mm diameter
fixing holes
Aperture Height:
- Control panel510mm
Aperture Width:
- Control panel390mm
Aperture depth
- 132mm
Control panel
semi-flush surround
The semi-flush surround
fits inside the cut-out
aperture.