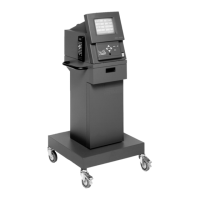
Introduction
1-19
Connecting the Optional Temperature Probe to the
Vehicle
1. Connect the temperature probe.
The dipstick may be hot. Route the temperature probe
clear of any moving parts.
2. Check the engine oil level. If needed, add oil of the
proper grade and viscosity to bring the level up to the
full mark.
3. Remove the engine oil dipstick.
4. Align the thermocouple end of the temperature probe
with the measurement end of the dipstick. Straighten
the probe while following the dipstick up to the point
where the dipstick seats in the dipstick tube. Adjust the
moveable rubber stop on the probe to this location.
— This presets the probe depth to ensure that the
thermocouple submerges in oil to the same level as
the dipstick. This is necessary for accurate readings.
5. Insert the probe into the dipstick tube until the rubber
stop comes in contact with the dipstick tube.
✓
Since the
DGA 1000 Gas Analyzer
was released, two
types of oil temperature probes have been used (Euro
and US probe).
— Euro probe, part number 6004E9312-99, is no longer
available. Order the US probe and adapter.
— US probe, part number 6004-0407-04
— US probe, part number EAX0035L10A, adapter cable
is used for older
DGA 1000 Gas Analyzer
units.
Temperature Probe Tips
The engine should be at normal operating
temperature.
Typically, 185°F (85°C) is nominal oil temperature,
149°F (65°C) is low, and 221°F (105°C) is high, on an
engine operated under moderate loads and moderate
speeds. Generally, engine oil temperature does not
reach a nominal value at engine idle speeds. Proper oil
temperature depends on the engine operating
conditions, but can be considered acceptable if it is
within this low to high range.
✓
When the analyzer set-up is completed, refer to
Chapter
2–Analyzer Screen Display Features
to continue with
Vehicle set-up. To perform gas measurements, refer to
Chapter 3–Vehicle Testing
.
 Loading...