This document is a service manual for Snapper Models LE317 and LE319 Single Stage Snow Throwers, covering both recoil and electric start models. The manual provides comprehensive information on the operation, maintenance, and repair of these snow throwers.
Function Description:
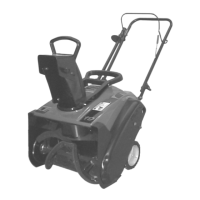
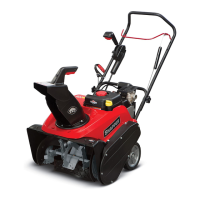
The Snapper LE317 and LE319 are single-stage snow throwers designed to clear snow from various surfaces such as decks and porches. They are powered by a 3 horsepower, 2-cycle engine. The primary function of these machines is to throw snow, with a throwing distance ranging from 3 to 20 feet, depending on the discharge deflector setting and snow conditions. The auger system, which includes flighting and a scraper blade, is responsible for gathering and propelling the snow through the discharge chute. The unit is propelled forward by the auger flighting contacting the ground when the upper handle is lifted slightly and the auger clutch control is engaged.
Important Technical Specifications:
- Models Covered: LE317 & LE319
- Engine Type: 3 Horsepower, 2-cycle engine
- Starting Methods: Recoil start and Electric start (optional)
- Clearing Width: 17 inches (LE317) or 19 inches (LE319)
- Snow Throwing Distance: 3 to 20 feet
- Fuel Capacity: 1.25 quarts
- Operational Time per Tank: 1 1/4 to 1 3/4 hours
- Fuel Mixture: 50:1 ratio gasoline/oil mixture (regular grade leaded or unleaded gasoline with Snapper special formulated 2-cycle engine oil).
- 1 gallon gasoline: 2.56 ounces 2-cycle oil
- 2 gallons gasoline: 5.12 ounces 2-cycle oil
- 3 gallons gasoline: 7.68 ounces 2-cycle oil
- 4 gallons gasoline: 10.24 ounces 2-cycle oil
- 5 gallons gasoline: 12.80 ounces 2-cycle oil
- Spark Plug: Champion CJ-8Y, with a gap of 0.030 inches.
- Drive Belt (Replacement Part Number): SNAPPER P/N 24618
- Electric Start Kit (Optional): #60608 (for 17" Snow Thrower only)
- Scraper Blade Kit (Replacement Part Numbers): #61235 (17") and #61236 (19")
- High Altitude Adjustment Kit: Available from authorized Tecumseh Service Outlet for operation above 4,000 feet.
Usage Features:
- Controls:
- Primer: Located at the center of the control panel, used to inject fuel into the carburetor for initial startups.
- Choke: Red knob on the L.H. side of the machine, moved to the right to choke for initial engine startups.
- Ignition Switch & Key: Located at the center of the control panel, used to turn the engine on or off. The key should be removed when leaving the unit unattended.
- Pull Rope & Knob: Located below the primer and keyswitch, used for recoil starting.
- Electric Start Button (If Equipped): Black button on the R.H. side of the control panel, used to activate the electric starter. Requires a 110-volt AC receptacle connection.
- Auger Clutch Control: Wire form on the top side of the upper handle. Rotating it downward engages the auger; releasing it stops the auger.
- Upper Handle: Used to control the unit's motion. Lifting it slightly (approx. 1 1/2") and engaging the auger clutch control causes the auger to contact the ground and propel the unit forward.
- Chute Rotator Handle (Unit Lift Handle): Located above the top cover, used to change the snow discharge direction (left to right). The intermediate cross bar can also be used to lift the unit off the ground.
- Discharge Deflector: Attached to the top of the discharge chute, used to control snow throwing distance (3 to 20 feet) by pivoting it upward (greater distance) or downward (shorter distance) after loosening a wing nut.
- Operational Techniques:
- Snow Direction: Throw snow downwind to maximize distance.
- Wide Areas: Start in the middle and throw snow to the right or left, then reverse direction on the return pass.
- Corners: Reposition the deflector downward when approaching building corners to prevent snow from swirling back into the operator's face.
- Heavy/Deep Snow: Take narrowed or slower cuts.
- Chute Clogging: If the chute clogs, release the auger clutch control, stop the engine, and then push the upper handle downward to raise the auger housing off the ground. Releasing the handle allows the auger housing to free fall, which should discharge the plug. Re-activate the auger drive to blow out the plug. WARNING: Never place hands in the discharge chute without turning off the engine and removing the spark plug wire.
Maintenance Features:
- Seasonal Maintenance (End of Season):
- Add fuel stabilizer to the last tank of fuel.
- Drain the fuel tank, then run the engine until it stalls to eliminate remaining fuel from the fuel line and carburetor. This prevents gum and corrosion buildup, which can make starting difficult next season.
- Flush out the chute ring (under the top cover) with a garden hose to remove sand and grit that can impede rotation.
- Replace the spark plug (Champion CJ-8Y, gap 0.030").
- Lubricate the Idler Arm Pivot with WD-40™.
- Lubricate the Clutch/Brake Arm Pivot.
- Lubricate the Auger/Clutch Control Handle Pivots with a light coat of SAE 30 Engine Oil.
- Regular Checks:
- Visually inspect guards and covers for proper position and tightness.
- Check auger clutch control for obstructions.
- Ensure auger housing is free of obstructions.
- Verify chute rotation is free, holds position, and does not rotate beyond 100° of centerline.
- Check deflector for free pivoting and secure locking.
- Check rubber flightings condition; replace if badly worn to maintain self-propelling action.
- Check scraper blade condition; replace if cracked, broken, or severely worn to ensure clean path and prevent damage.
- Auger Clutch/Brake Adjustment:
- Adjust if the drive belt slips or the auger does not stop within 5 seconds of releasing the control.
- Proper spring extension for the control cable should be 1/2" to 3/4".
- Adjustment involves loosening the idler and moving it downward in its slot, then rechecking spring extension.
- CAUTION: Do not shorten the control cable to compensate for belt wear, as this can reduce brake effectiveness.
- Drive Belt Replacement:
- Replace if the belt is badly worn, cracked, broken, or if auger clutch adjustment no longer improves performance.
- Involves removing the belt cover, loosening the idler, removing the belt from the auger drive pulley, and detaching the belt guide.
- Carburetor/Engine Speed Adjustments:
- Factory settings are generally satisfactory. For carburetor adjustments, consult an authorized Tecumseh Service Outlet.
- For high altitude operation (above 4,000 feet), install a High Altitude Adjustment Kit.
- CAUTION: Never tamper with the engine governor, as over-speeding can be dangerous and will void the engine warranty.
- Troubleshooting: The manual includes a detailed troubleshooting chart to diagnose and resolve common issues such as engine not starting, engine stalling, loss of self-propelling action, poor snow throwing, and difficult chute rotation.
- Overhaul & Repair: Detailed instructions are provided for overhauling and repairing the auger housing and drive system, including replacing components like the scraper bar, auger flighting, bearings, drive belt, and idler spring. Specific steps are outlined for drilling out rivets, removing and installing parts, and reassembling the unit.
- Engine Accessories Installation: Instructions are provided for installing the High Altitude Jet and the Electric Starter Kit.