Page 3 - 13SL26/30SL
DISASSEMBLY
1. Remove the head caps from the barrel tube.
2. Mark which end of the barrel tube the head cap was removed from.
3. Withdraw the entire shaft assembly from either end of the barrel tube.
4. Remove the rod wipers, rod seals and static O-rings from the head caps.
5. Discard all the seals.
6. Unscrew the #1 shaft from the #2 shaft and remove the piston.
7. Remove the piston seal and static O-ring from the piston and discard.
CLEANING AND INSPECTION
1. Wash all the metal parts in cleaning
solvent and blow dry with ltered com-
pressed air.
2. Inspect all the threaded components
for stripped or damaged threads.
3. Check the inside surface of the barrel
tube for scouring or excessive wear.
4. Check the piston and head caps for
scouring or excessive wear.
5. Inspect the surface of both shafts for
scouring or excessive wear.
ASSEMBLY AND INSTALLATION
1. Install a new piston seal and static O-
rings.
2. Install the piston on the #1 shaft.
3. Thread the #2 shaft unto the #1 shaft
and tighten securely.
4. Lubricate the piston seal with clean
hydraulic uid and install the shaft as-
sembly in the barrel tube.
5. Lubricate and install new rod seals and
static O-rings on the head caps.
6. Lubricate and install new rod wipers on
the head caps.
7. Install head caps on the barrel tube
and tighten until the mounting holes
are in line.
NOTE: Head caps must be re-installed on
the same end from which they were re-
moved.
8. Install the ttings on the ends of the
cylinder.
9. Position the cylinder assembly on the
chassis and install the cap screws and
locknuts but do not tighten.
10. Tighten the nut and bolt in front of the
cylinder that goes through the frame
and then tighten the cylinder mounting
cap screws.
11. Install the cylinder rod ends.
12. Set rod ends to align front wheels.
13. Connect the hose assemblies to the ttings.
14. Operate the steering circuit several times throughout its entire range of travel to expel trapped
air and check for leaks.
15. Check and adjust front wheel tracking if required.
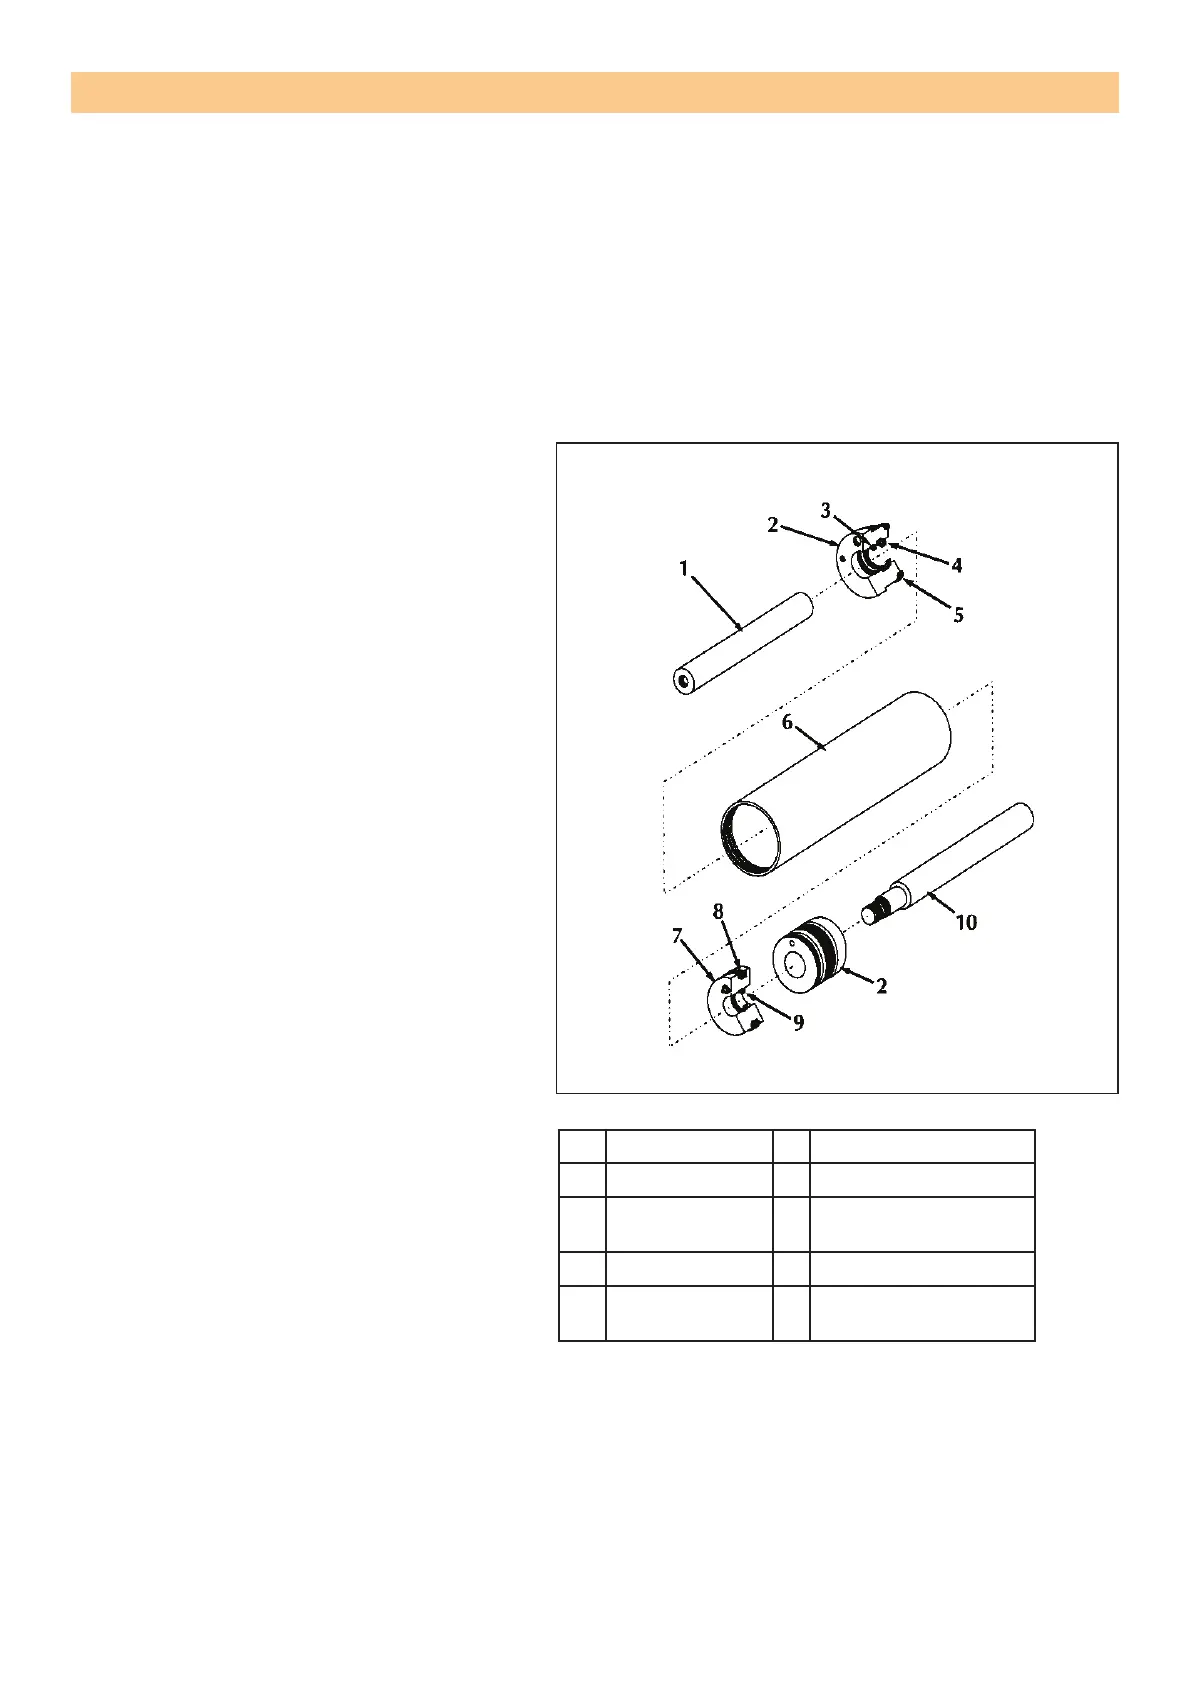
Figure 3-8: Steering Cylinder assembly
1 #2 Shaft 2 Head cap (2)
3 Rod wiper (2) 4 Rod seal (2)
5 Static O-ring
(2)
6 Cylinder barrel
7 Piston 8 Piston seal
9 Piston static
O-ring
SERVICE AND REPAIR
 Loading...