August 3, 2019 26
Batteries:
Supported Battery Chemistries (48V configuration required for all chemistries)
• Lead Acid
o AGM, Gel, Wet
• Lithium
o NMC, LiPo4
• NiFe (Note: must use a 37 series cell configuration, 44.4V Nominal)
o Set Absorb and Equalization to 59.0V, 8 hours, and days = 1 (every day). Float = 53.7V
Programming Battery Settings
f. Battery Size
i. This allows Sol-Ark to know the size of the battery bank
ii. Main Menu → System Settings → Battery Setup → Batt → Batt Capacity
g. Battery Type
i. Navigate to the charge menu and set the values appropriate to your battery chemistry. The chart on
page (15) is good reference for lead acid batteries.
ii. Main Menu → System Settings → Battery Setup → Charge
h. Battery Discharge percentage
i. Allows the user to define the depth of discharge the system will allow before using the grid/generator to
the charge the battery bank. Solar is always the first priority in charging the battery bank.
ii. Main Menu → System Settings → Battery Setup → Discharge
Limiter Sensor Automatic Setup
1) Install limiter sensors as described on page 25 (shown on page 11 as well). Battery and grid connections also
required before starting auto-setup.
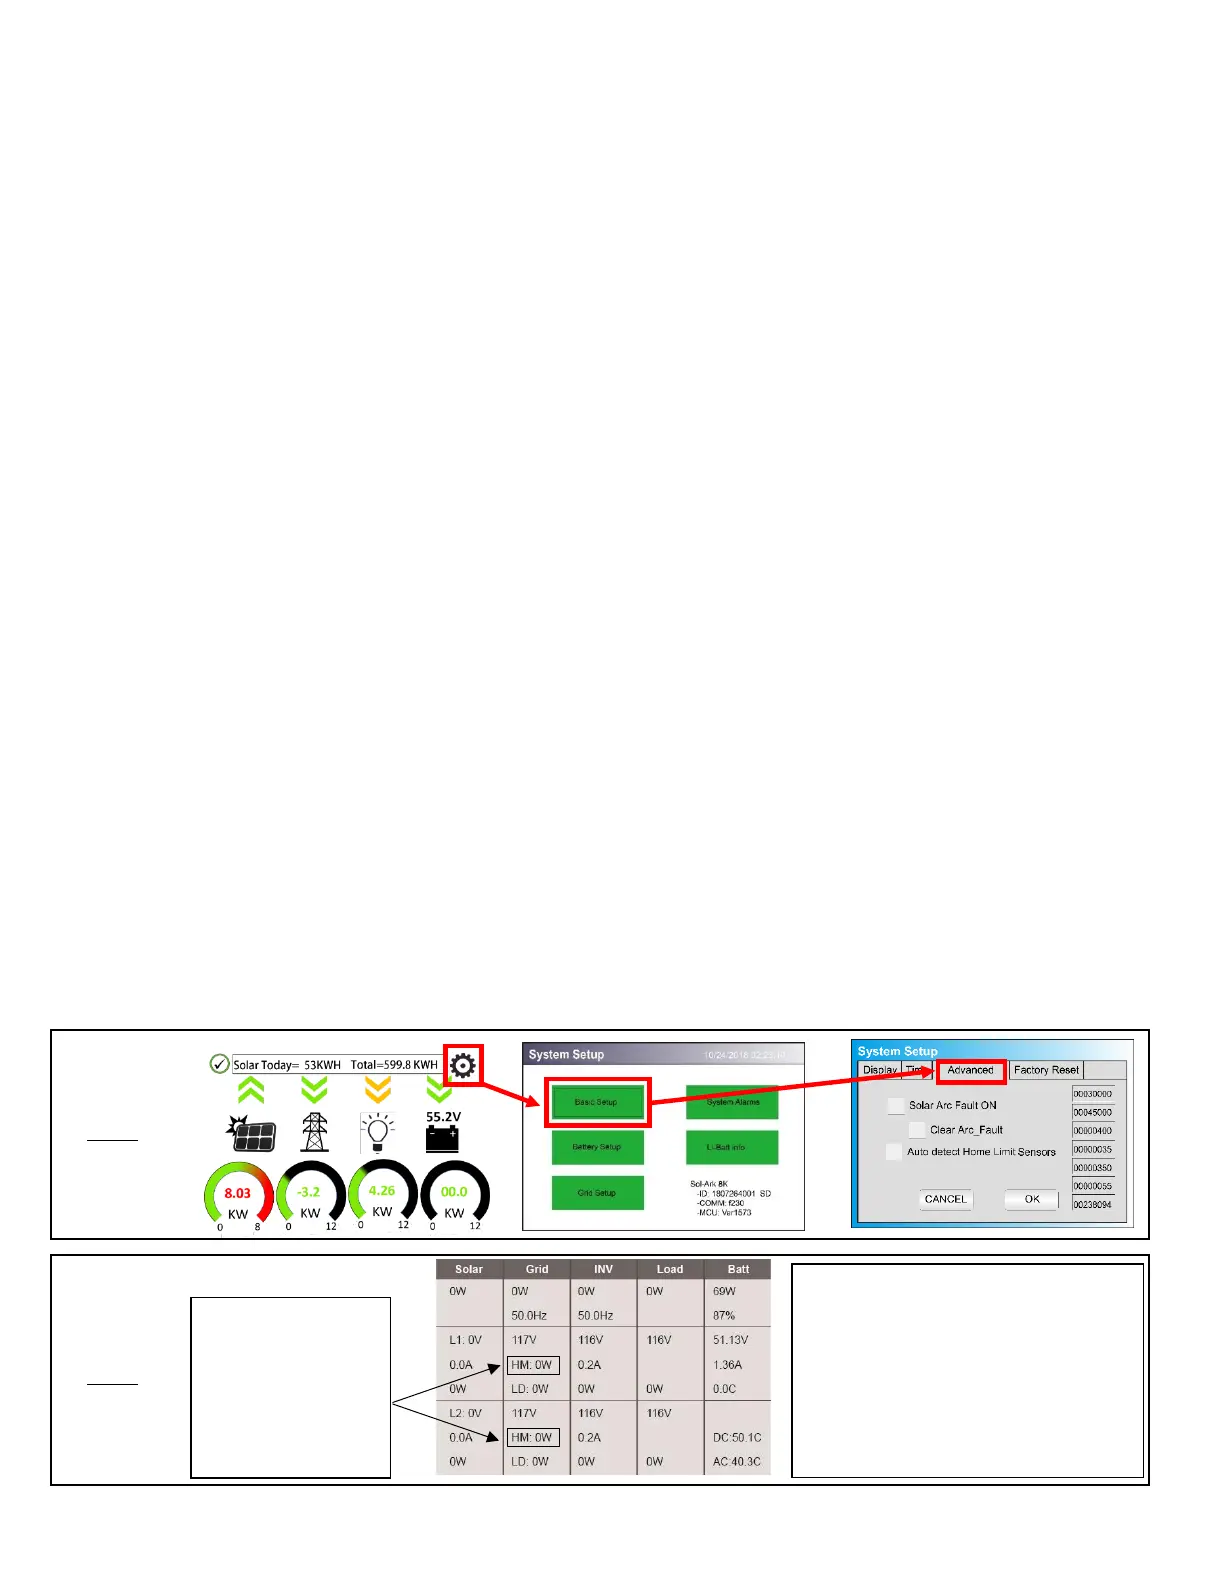
2) Navigate to the “Advanced” Tab of the Basic Setup screen (follow the directions below to get there).
a) Touch the gear icon → Touch the Basic Setup button → Select the Advanced tab (see Fig. G).
3) Select “Auto detect Home Limit Sensors” and press ok.
4) Wait for the Sol-Ark to finish its learning process (Sol-Ark will alternate sell back between legs and magnitude
automatically determining the correct settings for the sensors).
5) Verify sensors were correctly configured (see Fig. H).
Possible Limiter Sensor issues:
Sensors are facing wrong direction
Sensors are on the wrong wire(s)
Sensors are not fully closed on wire(s)
Sensor Polarity is wrong (White = + BLK = -)