Sola Neumasem Plus Drill Control
5
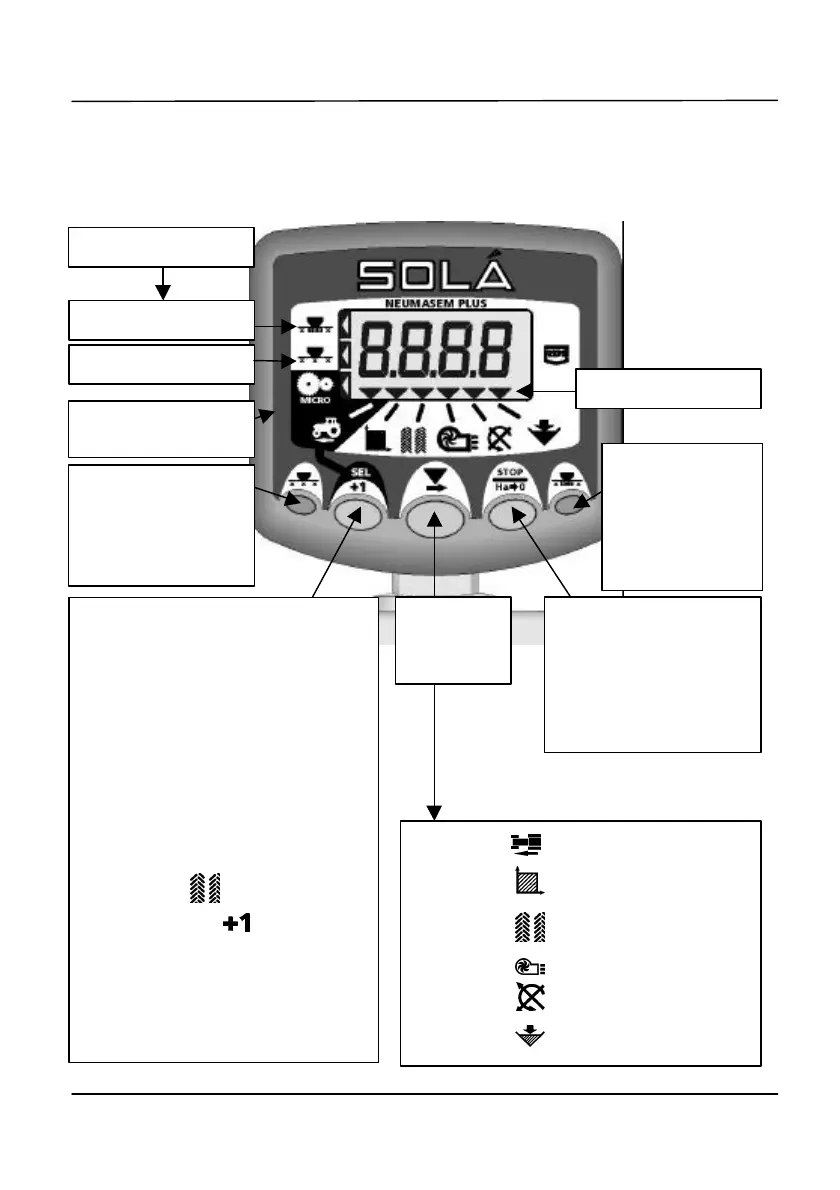
2. The Control Switches
There are five switches on the front panel used individually or in combination to select,
programme, or reset a function.
Select
Display
current bout number
HOLD to
to reset the currently
displayed Area Total
width.
Press to stop
seed
distribution to
left/right wing
switch.
Press to stop seed
distribution to
With channel 1 selected, press
and hold for 3 seconds to set
calibration for the 'Micro' metering
option (small seed).
Press and hold for 3 seconds
again to recalibrate for normal
metering.
When Area channel is selected,
press to select Area Total 1('tot.1')
or Area Total 2 ('tot.2').
Select the channel then
either PRESS to manually
advance the Bout Number
OR
HOLD continuously to select the
programming mode, and select
the tramline sequence.
Channel 1 Forward Speed
Channel 2 Area Total 1 or 2
Channel 3 Current/Tramline Bout
Channel 4 Fan RPM
Channel 5 Seed Shaft RPM
Channel 6 Hopper Level Low
'Micro' metering
calibration set
 Loading...