EasyManuals Logo

SolarEdge SE Series User Manual

SolarEdge SE Series
79 pages
To Next Page IconTo Next Page
To Previous Page IconTo Previous Page
Page #30 background imageLoading...
Page #30 background image
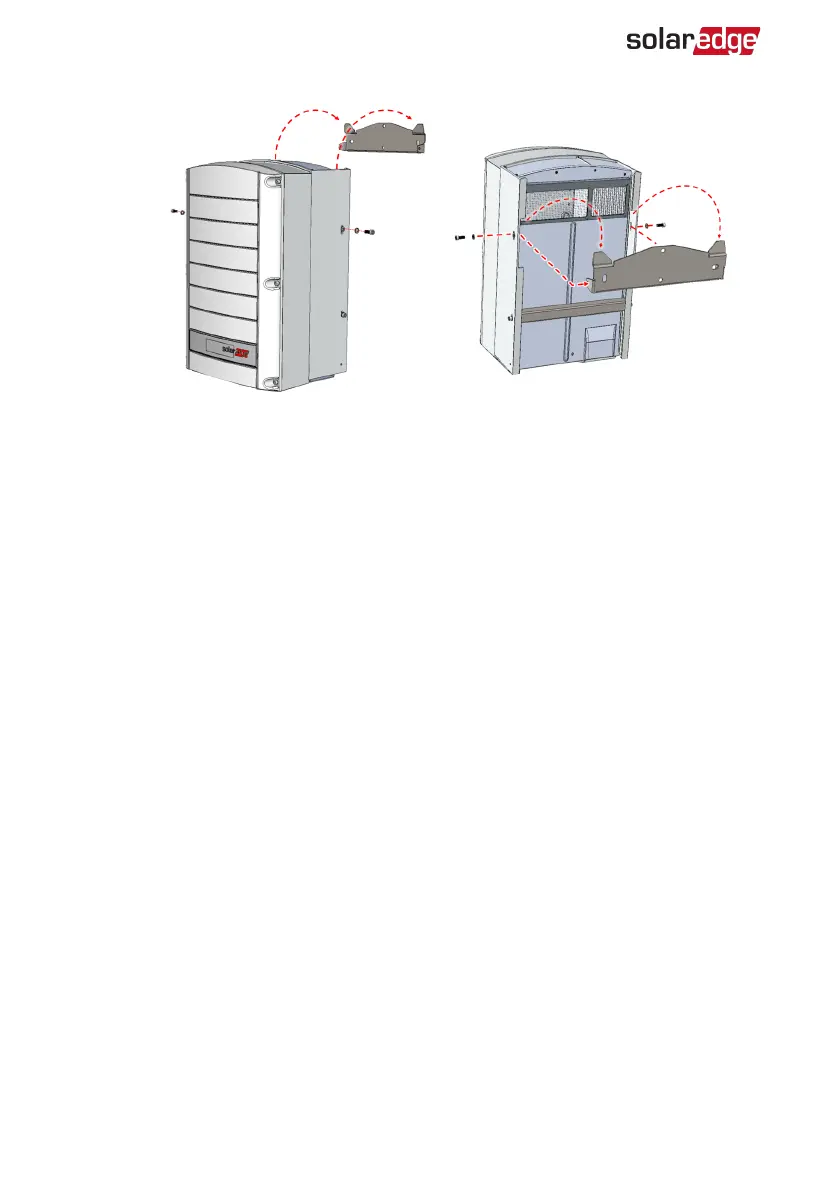
Figure 11: Hanging the inverter on the brackets
6. Verify that the inverter is firmly attached to the mounting surface.
Installing Inverter with DC Safety Unit
1. Position the mounting bracket against the wall/pole and mark the drilling hole
locations (refer to
Mechanical Specifications
on page 66 for inverter and mounting
bracket dimensions).
2.
Drill at least two holes and mount the bracket to the mounting surface. Verify that the
bracket is firmly attached to the mounting surface.
3.
Hang the inverter on the bracket (See
Figure 11
):
a. Lift the inverter from the sides, or hold it at the top and bottom. Do not lift
holding the DC Safety Unit as it may be damaged.
b. Lower the inverter onto the U-shaped indentations of the mounting bracket. Let
the inverter lay flat against the wall or pole
Three Phase Inverter with SetApp Configuration PN: SEXXK-XXXXIXXXX
29 Mounting the Inverter

Table of Contents

Questions and Answers:

Question and Answer IconNeed help?

Do you have a question about the SolarEdge SE Series and is the answer not in the manual?

SolarEdge SE Series Specifications

General IconGeneral
EfficiencyUp to 99%
Protection RatingIP65
CommunicationEthernet, Wi-Fi (optional), RS485
DimensionsVaries by model
WeightVaries by model
Rated AC PowerVaries by model
Max. DC PowerVaries by model
ModelSE Series (e.g., SE3000H, SE5000H)
AC Output PowerVaries by model
MPPT RangeVaries by model
Operating Temperature-25°C to 60°C
Warranty12 years standard, extendable to 20 or 25 years

Related product manuals