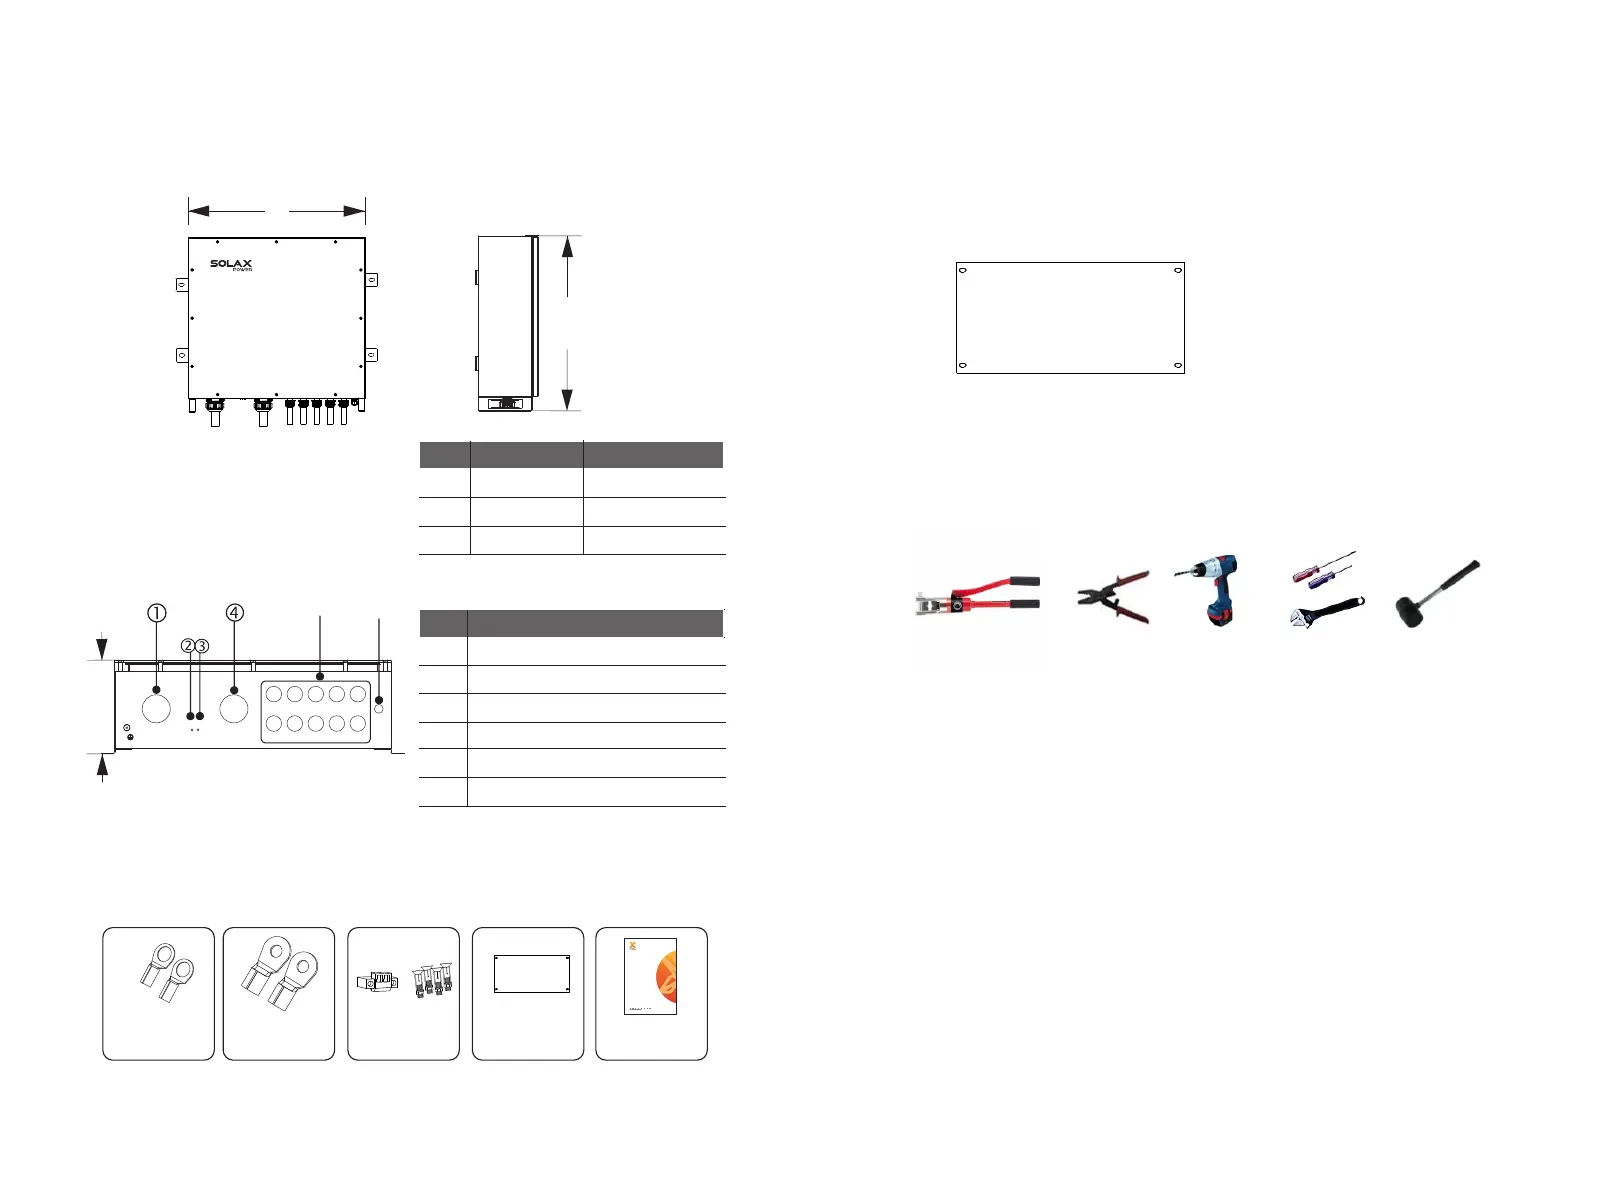
5.1 Demension & Terminals
C
B
Back View
5.2 Packing List
Check the delivery for completeness. Contact your dealer at once if anything is missing.
LOAD GRID
COM
EPS 1 EPS 2
EPS 6 EPS 7
EPS 3
EPS 8
EPS 4
EPS 9
EPS 5
EPS 10
⑤
⑥
1 Load terminal connected with load
2 LED (EPS proper functioning)
Object Description
3 LED (grid proper functioning)
6 Communication interface
5 EPS input
4 Grid input
5 X3-EPS Parallel Box Information
X3-EPS-BOX-P5-I
X3-EPS-BOX-P5-E
X3-EPS-BOX-P10-I
X3-EPS-BOX-P10-E
6 Mounting of X3-EPS Parallel Box
Dimensions for mounting
Ø
Installation tools
Ø
10
Step 1: Attach the corresponding expansion screw in the fitting to the wall.
a) In the attachment package, there is a marking board marking paper with
four holes on it, which is the same as the distance of the machine to install
four screws. You can use the marking board marking paper to find the
installation position of the machine.
b) After selecting the location of the installation machine, paste the marking
board marking paper on the wall to depict the location of the four screws,
and then knock the corresponding four expansion screws in the marking
board marking paper paste hole.
Step 2: Place the machine on the wall to match the expansion screw position and
lock the nuts on the four screws.
On the packing list there is a board marking paper made of cardboard to indicate
where the X3-EPS Parallel Box should be mounted on the wall.
11
A
cold-pressed terminal
P5 version (5-4) x 24
P10 version(5.-4) x 40
cold-pressed terminal
P5 (60-6) x 8,(38-6) x 2
P10 (22-6) x 8,(14-6) x 2
Green terminal x1
X3-ep s Parallel Box X3-EP S Parallel Box
& Parall el System
Installation Guide
Copyright Declaration
The copyright of this manual belongs to SolaX Power Network
Technology (Zhe jiang) Co., Ltd. . Any corporation or individual should
not plagiarize, partially copy or fully copy it (including software, etc.),
and no reproduction or distribution of it in any form or by any means.
All rights reserved.SolaX Power Co., Ltd. reserves the right of final
User manual
x1
Expansion boltx4
A 630mm 660mm
Object For P5 Versions For P10 Versions
B 613mm 650mm
C 220mm 230mm
Board marking paper
x1
Grid
EPS
Step 3: Match the invertr with wall bracket.

 Loading...


