58
Electrical Connection
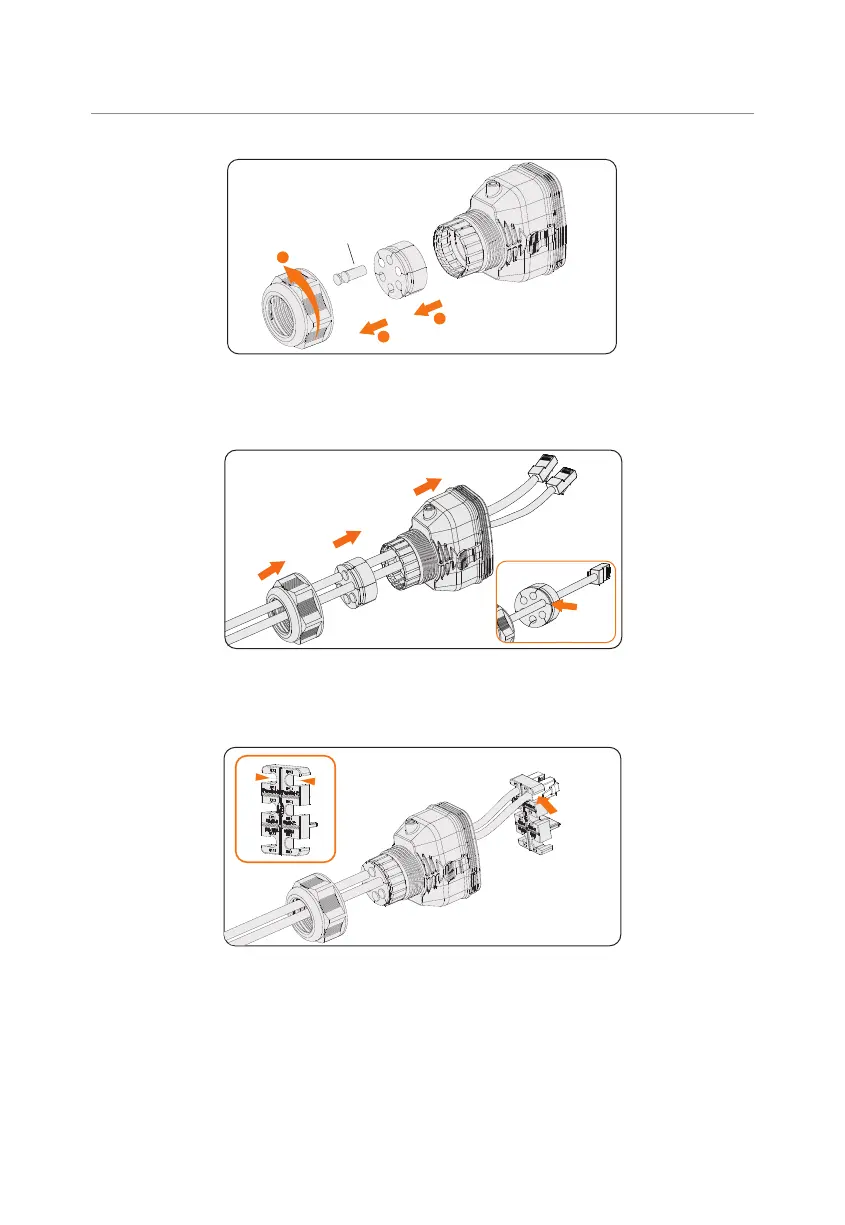
Remove
1
2
3
Figure 8-33 Disassembling the connector
Step 3: Thread the cable through the swivel nut, cable support sleeve, and connector
enclosure in sequence.
Figure 8-34 Threading the cables
Step 4: Install the network cables to Parallel-1 and Parallel-2 of cable fixture according to
the labeling.
Figure 8-35 Installing RJ45 terminal to the cable fixture
Step 5: Connect the assembled connector to COM 1 terminal. Ensure the cable fixture
tongue is well inserted into the slot of terminal. You will hear an audible "Click" if
it is connected securely. Lightly pull the cable for double check its connection.

 Loading...


