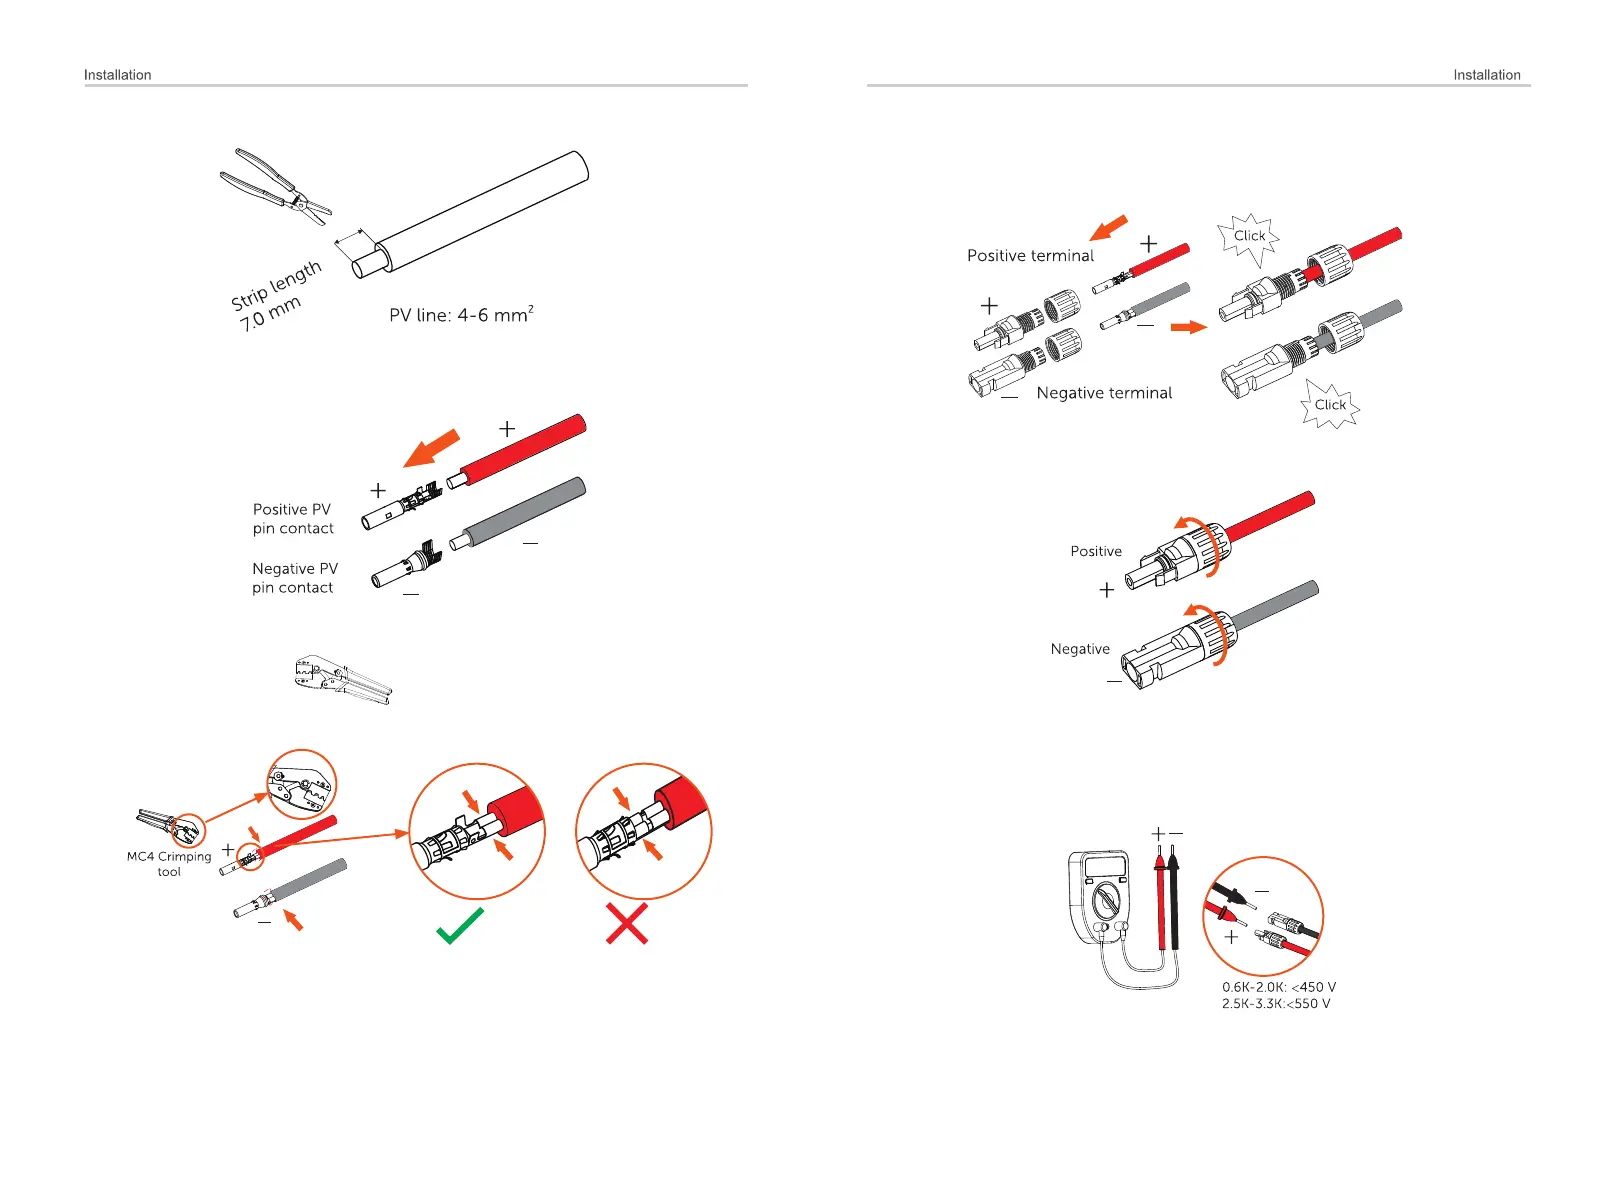
c) Insert striped wire into pin contact and ensure all conductor strands are
captured in the pin contact.
24
25
d) Crimp pin contact by using the .MC4 crimping tool
(recommended model: H4TC0001, manufacturer: Amphenol)
MC4 crimping tool
( )
2 2
4mm - 6mm
g) Use a multimeter to measure the open circuit voltage of the positive pole
and negative pole of the PV cable, and make sure the open circuit voltage
less than the permissive max input voltage (otherwise the machine may by
damaged);
f) Then screw down the cable nut.
Insert the wire into plug forcibly, when a "click" is heard or felt, the pin contact
assembly is seated correctly.
e) Separate the DC connector as two parts: the plug and the cable nut.

 Loading...