ORIGIN Installation Guide
Unpacking and Mounting Hardware
11
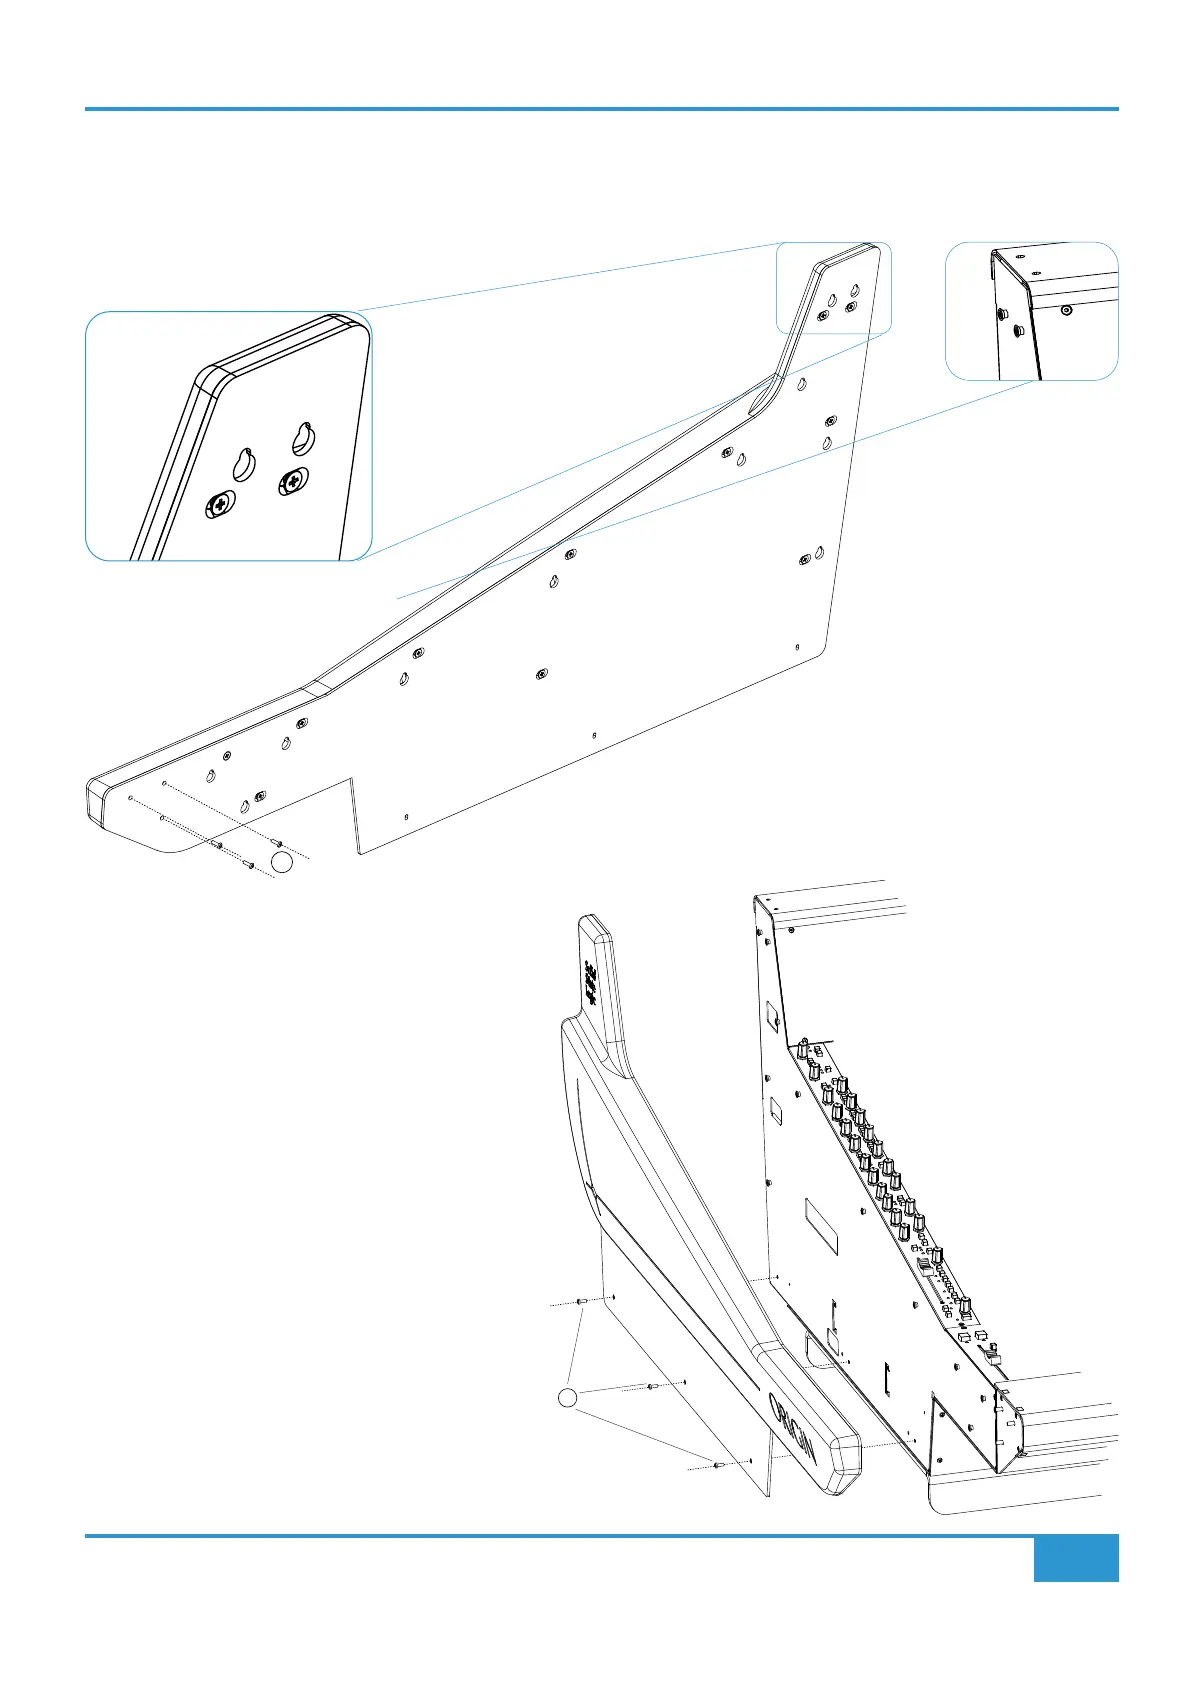
Fitting/Removing the Sculpted End Trim
If Sculpted End Trim has been ordered, this will normally be fitted prior to packing. It is possible to remove this end trim, for example
to reduce the overall width of the console, or to provide a surface to mate to third party furniture.
Removing the end trim starts with removing the three
cross headed screws that secure the front buffer/
armrest (1 in the diagram above) and the three 2mm
hex headed retaining screws (2 in the diagram on
the right) on the bottom edge of the trim. With these
six screws removed the trim can be gently slid up
vertically to align the keyhole slots with the locating
lugs and then removing the trim horizontally.
Fitting the trim is the opposite process, i.e. position
the trim keyhole locating apertures so they locate
onto the end of the console over the locating studs,
then gently slide the trim down vertically so that the
bottom three locating screw holes align with the
threaded holes in the end of the console, then screw
the trim in place with the three trim retaining screws
(2 in the diagram on the right) and the other three
screws inside of the front buffer/armrest (1 in the
diagram above).
2
Keyslots in sculpted end
trim interlock with studs
in end of ORIGIN console
frame