USE OF THE STORAGE CABINET AS300
D0716C-EN
Inserting an endoscope
Purge the channels and dry the endoscope using medical or compressed air.
For endoscope drying, purge each channel with medical or compressed air by placing the distal tip
above an anhydrous copper (II) sulphate paper (or alternatively blotting paper). Purge each channel
until no residual water traces come from the distal tip. Apply the same procedure for connector
drying.
Since certain AERs do not control the proper irrigation of the channels during the disinfection process,
check at this stage that all the endoscope channels allow the air to flow freely before inserting it in
the cabinet.
1. If using aseptic sheaths, open the protective envelope of the aseptic sheath and unfold it. Insert the distal
end (insertion tube) of the endoscope into the sheath up to the control handle.
2. Unfold the connector and connect the different connectors to the endoscope connection points. Check
that the silicone tube is not pinched. It is recommended to check that air can pass freely through the
connector to the endoscope connection points using a medical air gun before connection.
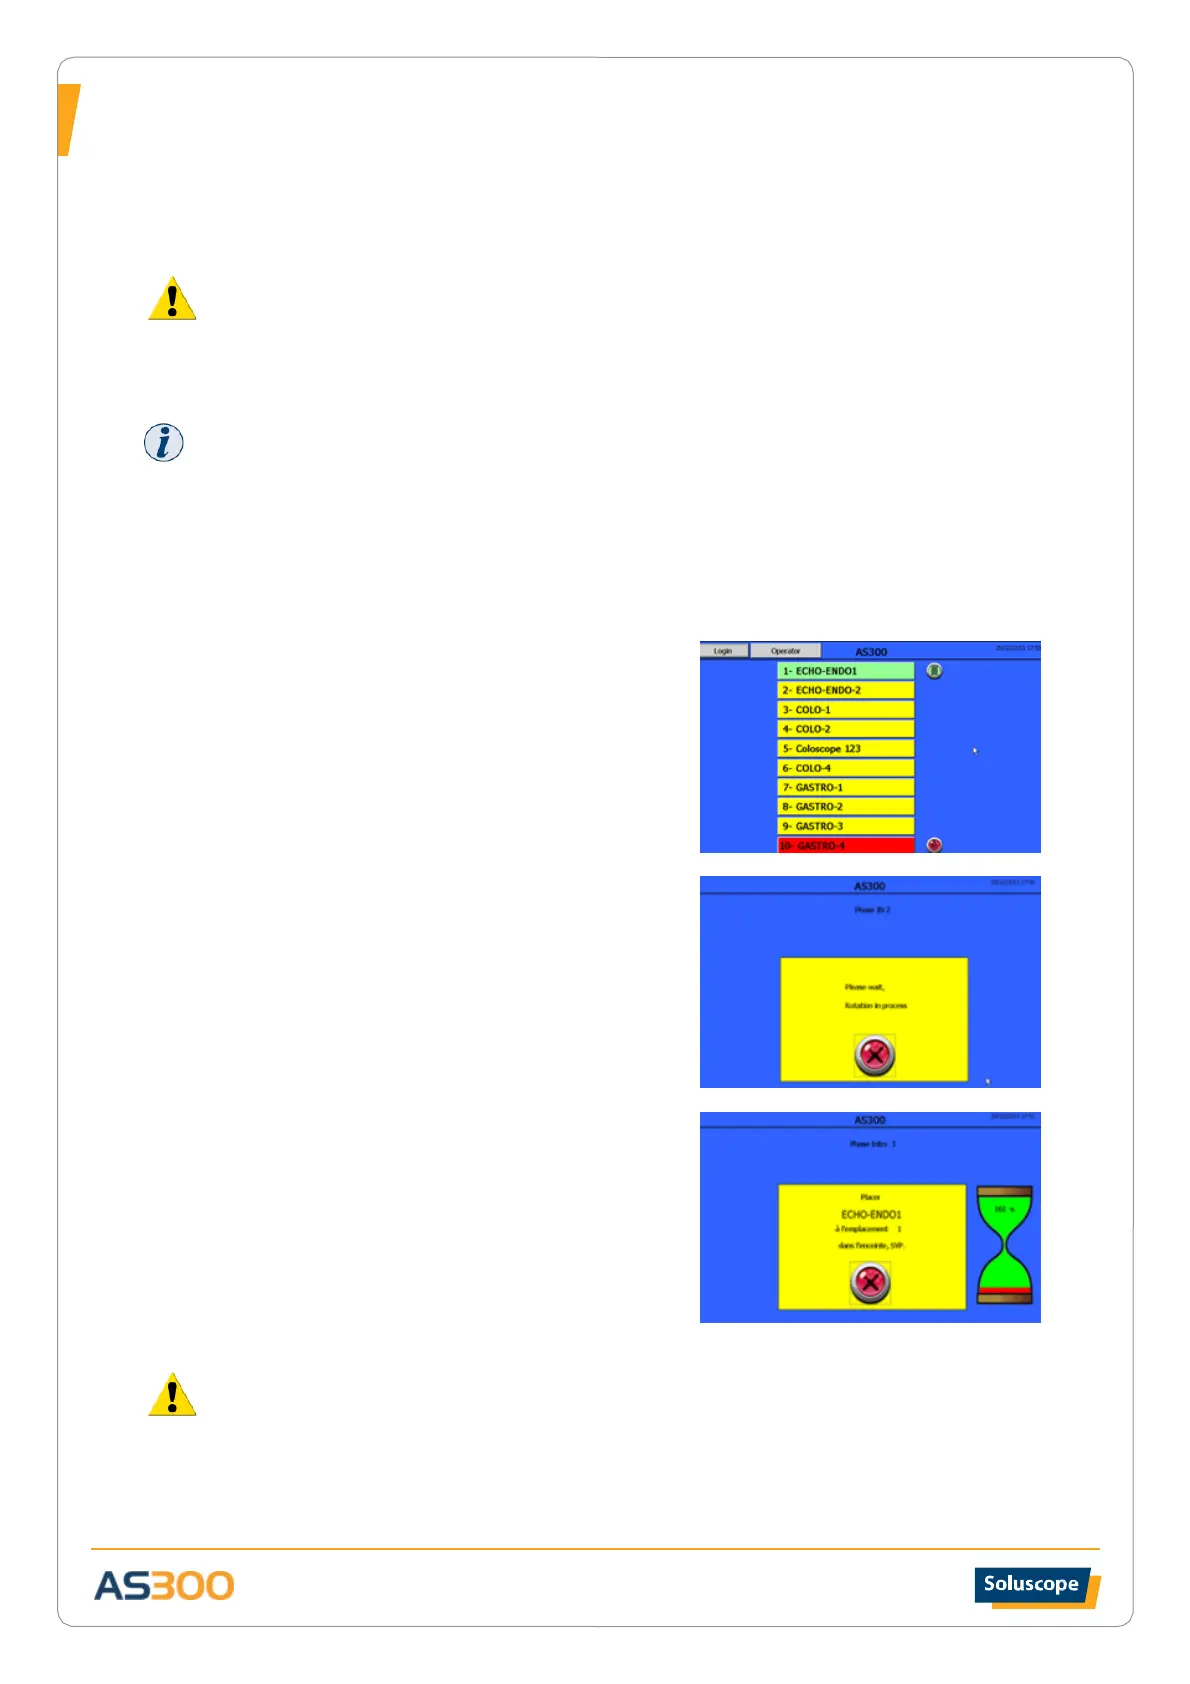
3. Start the identification process using the barcode reader (or
RFID system) and the badge associated with the Operator
level. After the beep, screen 1 appears.
4. Select the reference of the endoscope to be inserted from
the list by pressing the relevant button.
5. Wait for the carousel to come to a stop and the door to
open automatically. (Screen 2)
6. Insert the pre-connected endoscope into the AS300 cabinet
on the section of the rack presented when opening the
door. Mount the endoscope vertically with the optic in the
upper position. The sheath and the connection cable to the
cold light should hang down each side of the rack without
touching the bottom of the storage compartment. Then
connect the connectors to the air supply located on the
central cylinder underneath and to the right of the holder.
Visually check that air is circulating freely. Then fix the
aseptic sleeve onto the dedicated position.
7. Close the door and ensure that the carousel returns to its
original position.
SCREEN 1
SCREEN 2
SCREEN 3
If air does not circulate in the endoscope channels, this can increase the risk of bacterial
proliferation. In this case you must remove the improperly connected endoscope and reinsert it.
If you connect a different endoscope than the one intended to be on this position, the cabinet will not detect
the error. This will result in incorrect traceability for both endoscopes (the one intended to be connected and
the one connect instead).
Check connection between connectors and the endoscope before closing the door.