64
© 2011 Somfy SAS. All rights reserved. 06/2011
EN
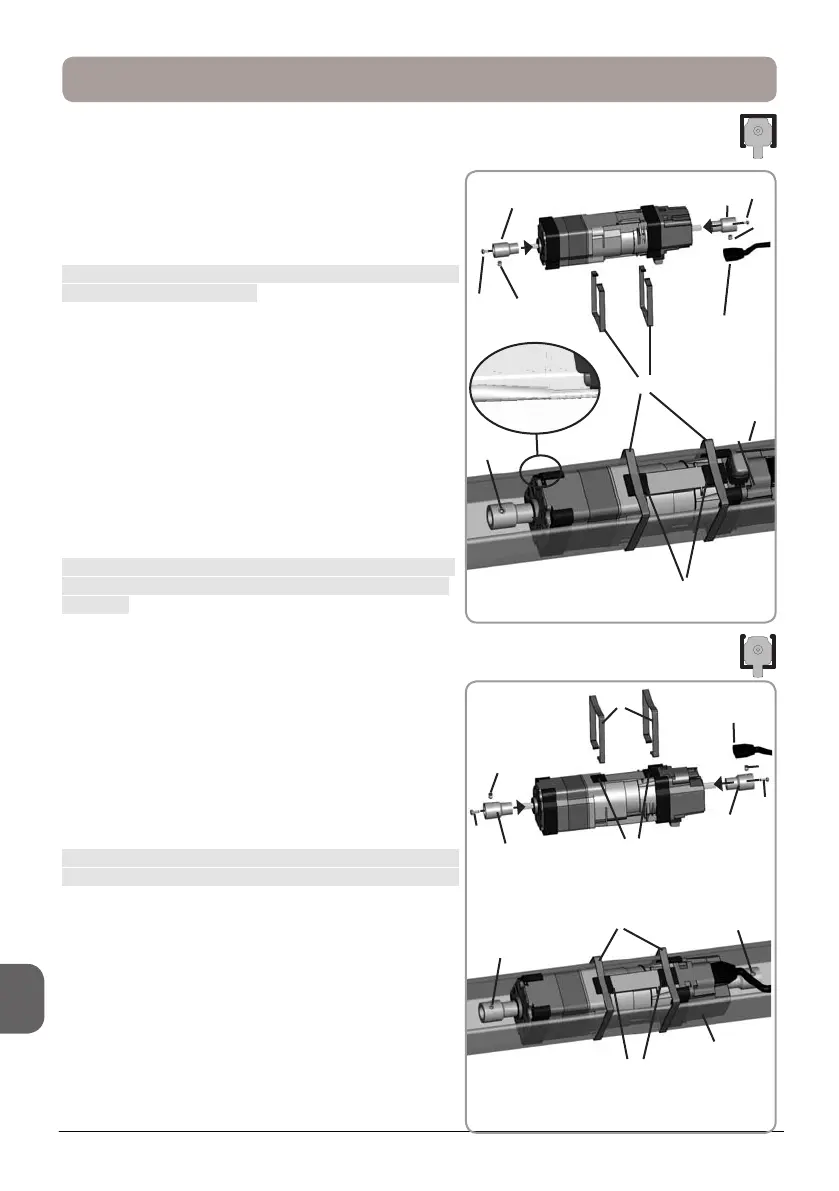
3. INSTALLATION
• Screw the 2 adaptors (1) using 2 M3x8 bolts (2) on
the motor shaft.
F Tightening torque = 1.1 Nm
• Connect the connection cable (3) to the motor.
Ensure that the cable does not pass over a rotating part
of the motor or mechanism.
• Compress the edge of the head rail (4) into the motor
zone.
• Insert the motor into the head rail (4).
• Using the clips (5), attach the motor in the head rail
(4) above the small acoustic tapes (6a).
• The shaft can be fitted into the adapter using a
headless screw (7).
If the tension of the clips (5) is insufcient, it is possible
to stick up to 3 small acoustic tapes (6a) one on top of
the other.
Installation with external clips
• Screw the 2 adaptors (1) using 2 M3x8 bolts (2) on
the motor shaft.
F Tightening torque = 1.1 Nm
• Connect the connection cable (3) to the motor.
Ensure that the cable does not pass over
a rotating part of the motor or mechanism.
• Insert the motor into the head rail (4).
• Using the clips (5), attach the motor in the head rail
(4) above the small acoustic tapes (6a).
• The shaft can be fitted into the adapter using a
headless screw (7).
5
4
7
7
3.1 57 X 51 mm or 58 x 56 mm head rail, open below
3.2 58 x 56 mm head rail, open above
2
7
1
1
3
7
2
6a
2
7
1
1
3
7
2
7
5
4
7
6a
5
6a
 Loading...