EN
Copyright © 2016 Somfy SAS. All rights reserved.
3
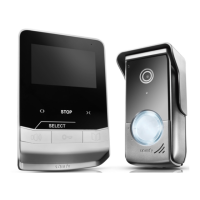
2 PRESENTATION OF THE MONITOR
2.1 General description
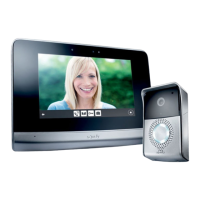
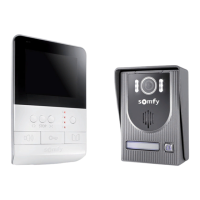
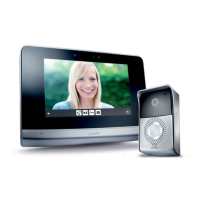
The video monitor must be combined with at least one external module to visualise and talk to a visitor.
Depending on your installation, it also allows communication between two monitors.
This monitor is equipped with buttons which can be used to:
- answer or reject a visitor’s call
- talk between several monitors in the same dwelling
- activate a motorised gate, an electric lock or other peripherals
- activate io-homecontrol® Somfy products
- take a photo of visitors manually or automatically for every call made from the external module.
2.2 Presentation of the monitor
3
35
12
13
14
15
67
4
5
18
1
32
36
8
910
37 38 39 40
Front panel
Bottom view
Back of the front panel
Mark Designation
1 LCD screen - 800 x 480 pixels
2 Communication buttons
3 Speaker
4 Microphone
5 io control
6 Removable terminal block 1
7 Removable terminal block 2
8 BUS line selector
9 Address switch (8 selectors)
10 Intercommunication switch (4 selectors)
12 Buzzer level selector
13 Conversation volume setting thumb-wheel
14 io control battery
Mark Designation
15 io programming button (PROG)
18 “Battery low” indicator light
35 Support for SD micro card
36
Status indicator light:
- automatic photo (light on)
- new photo in the memory (flashing light)
37
“Navigation between images” button
38
Adjusting the screen
Setting the date + time
39
Triggering photos manually
40
Automatic photo button (ON/OFF)
2.3 Operation of the buttons
Operation of the io-homecontrol® control (no. 5)
Open button: press briefly to open the relative product (roller shutter, awning, garage door, etc.) or to switch
the light on.
Stop button: press briefly to stop the relative product.
Close button: press briefly to close the relative product or switch the light off.
Selecting the channel: press the number of times required to activate the desired channel.
Note: channel 5 corresponds to 4 LEDs lit.
 Loading...