EN
Copyright © 2016 Somfy SAS. All rights reserved.
11
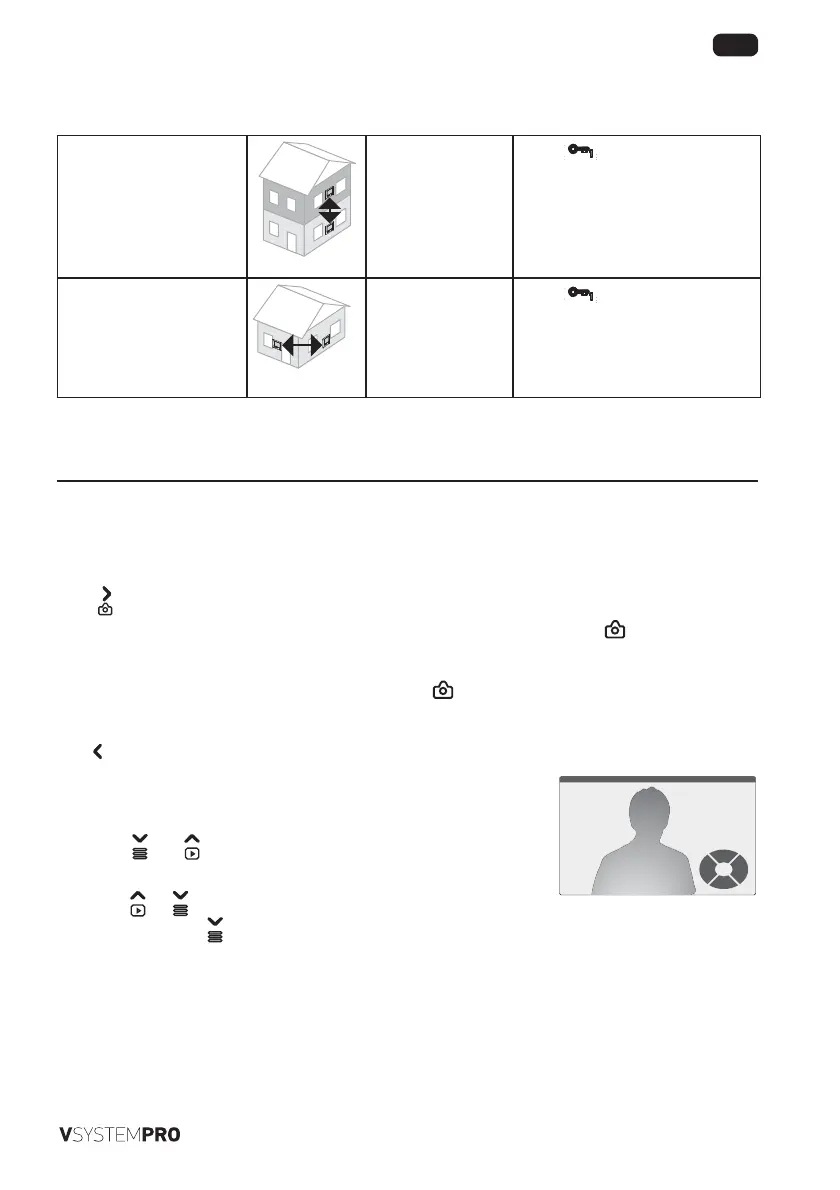
Operating principle of the addresses and extensions of the monitors
The configuration of each monitor determines how it can communicate with the other monitors of the installation, which is
why it is important that your installer completes the guide at the beginning of these instructions and that your keep it handy.
Switch 10 - SW1 = ON The monitor can call the
monitor(s) of another
house.
Note: communication
can be established
between two monitors
at the same time.
Press
the number of times
corresponding to the main address (Adr.)
of the house to be called:
House with Adr. = 1, press once
House with Adr. = 2, press twice
Note: all the monitors configured to SW1 =
ON ring when the house is called.
Switch 10 - SW1 = OFF
The monitor can call the
monitor of the house.
Note: communication
can be established
between two monitors
at the same time.
Press
the number of times
corresponding to the extension (Ext.) of
the monitor to be called:
Monitor with Ext. = 1, press once
Monitor with Ext. = 2, press twice
Etc.
Note: a monitor configured with SW1 = ON cannot call another monitor in the same house but can be called by a monitor in
the same house configured with SW1 = OFF.
9 IMAGE MEMORY
It is possible to add an SD micro-card in the Premium io monitor in order to recover the images recorded (see “7 - Installing
the memory card”, page 9).
9.1 Automatic or manual photographing
Irrespective of whether the monitor is on standby or in communication, you can modify the photo mode:
Press
to modify the mode:
In automatic mode, “Auto” is displayed in red on the OSD screen and the LED behind the
pictogram is lit. In this
mode, the monitor takes a photo every time a call is placed from an external module and each time you call an external
module from the monitor.
Note: when the monitor records a new photo, the LED behind the
pictogram flashes until you view the new recordings
saved.
In manual mode, you can take a photo when the monitor is in communication with an external module by pressing
.
9.2 Operations possible on saved recordings
When the monitor is on standby, you can access the recordings to view or delete them.
[1]. Press then to display the last recording saved. The top of the screen
displays the number, date and time of the recording.
[2]. Press
or to display the previous or next recording (if you are on the last
recording, pressing
displays the first recording saved).
Previous
2016-07-280001-0100 16:21:59
Stop
Quit
Next
Delete
 Loading...