5
Copyright
©
2018 SOMFY ACTIVITES SA, Société Anonyme. All rights reserved.
The default setting for this function is deactivated.
The procedure to be followed to activate or deactivate automatic cut-off of each LED light is identical:
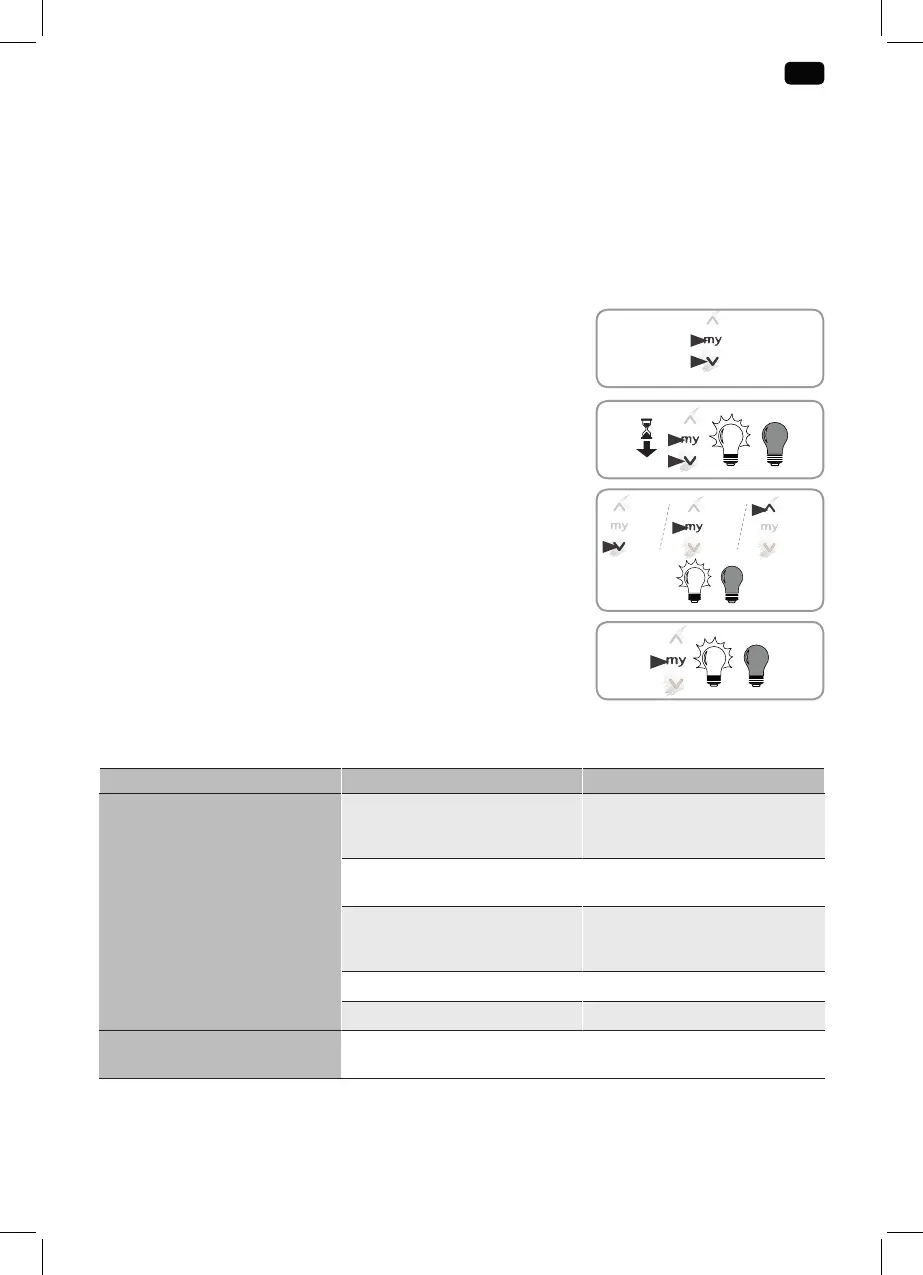
• Press the my and Down buttons simultaneously on the control point until the LED light comes
on then goes out.
- If the LED light comes on then goes out once: the function is activated.
- If the LED light comes on then goes out twice: the function is deactivated.
2.2.3. Setting the time of functioning
The operating period of each LED light before automatic cut-off can be configured.
The default setting is 6 hours.
To alter these settings, for each LED light:
1) Briefly press the my and Down buttons simultaneously on the
1W io control point.
2) Immediately aerwards, press and keep depressed the my and
Down buttons simultaneously until the LED light comes on
then goes out.
• Briefly press the Down button to set the period to 3hours.
• Or briefly press the my button to set the period to 6hours.
• Or briefly press the Up button to set the period to 12hours.
The LED light comes on then goes out.
3) Press the my button until the LED light comes on then goes out.
The new setting has been programmed.
2.3. TIPS AND ADVICE ON INSTALLATION
2.3.1. Questions about the white LEDreceiver io?
Observations Possible causes Solutions
The LED light does not react at
all when a button is pressed on
the control point
The control point has not been
programmed into the white
LED Receiver io.
Follow the commissioning
procedure (see 2.2.)
The batteries in the control
point are low.
Replace the batteries, using the
same battery model.
The control point used is not
compatible with the white
LEDreceiver io.
Ensure the two products are
compatible.
The power supply is faulty. Check the power supply.
The wiring is incorrect. Check the wiring (see 2.1.)
The LED light comes on as soon
as the power is switched on.
The wiring is incorrect. Check the wiring (see 2.1.)
< 2 s
 Loading...