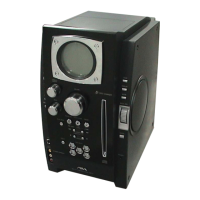
21
CX-JTD8
SECTION 4
TEST MODE
[MC TEST MODE]
• This mode is used to check operations of the respective sections
of Amplifier, Tuner, and Tape.
Procedure:
* To enter MC Test Mode
1. Press x button, [ENTER] button and [DISC 3] button
simultaneously, the message “TEST MODE” will be displayed
on the fluorescent indicator tube.
* Check of Amplifier
1. When [BASS] knob is turned clockwise, GEQ increases to its
maximum and a message “GEQ MAX” appears on the
fluorescent indicator tube.
2. When [BASS] knob is turned counter clockwise, GEQ
decreases to its minimum and a message “GEQ MIN” appears
on the fluorescent indicator tube.
3. When [SOUND FIELD] button is pressed, GEQ is set to flat
and a message “GEQ FLAT” appears on the fluorescent
indicator tube.
4. When the [VOLUME] knob is turned clockwise even slightly,
the sound volume increases to its maximum and a message
“VOL MAX” appears for two seconds, then the display returns
to the original display.
5. When the [VOLUME] knob is turned counter-clockwise even
slightly, the sound volume decreases to its minimum and a
message “VOL 0” appears for two seconds, then the display
returns to the original display.
* VACS ON/OFF Change Over
1. Press [i-Bass] button. The message “VACS OFF” or “VACS
ON” appears.
* Tape function
1. When a tape is inserted in Deck B and recording is started, the
function is changed to VIDEO automatically.
2. After recording is stopped by pressing
x button, press
–
m
button will change the function to TAPE B and rewind Tape B
until the recording start position and playback of Tape B is
started. If the [REC PAUSE/ START] button is pressed for a
pause and pressed again to resume recording during recording
time, when tape deck B is rewind, tape deck B will be rewind
until the position where the pause is applied.
* AMS Test Mode
1. Select the function “TAPE A” or “TAPE B”.
2. Insert a test tape AMS-110A or AMS-120 to selected tape deck.
3. Press the [CD SYNC] button to enter the AMS test mode.
4. After the test tape is rewind to the beginning of the tape, the
AMS+ is checked, and the mechanism is shut off after detecting
the AMS signal twice.
5. Then the AMS- is checked and the mechanism is shut off after
detecting the AMS signal twice.
6. When the check is complete, a message of either OK or NG
appears.
* To release MC Test mode.
1. To release this mode, press [POWER] button.
2. The cold reset is enforced at the same time.
[AMP TEST MODE ]
• This mode is used in order to set up each section of amplifier.
Procedure:
1. Press x button, [ENTER] button and [DISC2] button
simultaneously, the message “AMP TEST” will be displayed
on the fluorescent indicator tube.
2. Press [ENTER] button and [DISC1] button simultaneously,
VACS display/amplifier regulation display is switched.
3. Press [SOUND FIELD] button, SURROUND ON/OFF is
switched.
4. Press [MANUAL] button, EQ band is selected. EQ band
adjustment is performed by the [TECHNO] button (EQ band
up) and the [HIP HOP] button (EQ band down).
5. Press [i-Bass] button, i-Bass ON/OFF is switched.
6. Turn the
[BASS] knob, BASS (i-Bass) volume adjustment is
performed.
7. Press [HEAVY] button, i-Bass f
0
adjustment is performed.
8. To release this mode, pull out the AC cord. Then insert the AC
code, and press [POWER] button to turn the set ON. The cold
reset is enforced at the same time.
[PANEL TEST MODE ]
• This mode is used check operation of the front panel.
Procedure:
1. Press X button, [ENTER] button and [DISC2] button
simultaneously, all LED and segments in fluorescent indicator
tube are lighted up.
2. Press [ENTER] button and [DISC2] button simultaneously,
the key check mode is activated. In the key check mode, the
fluorescent indicator tube displays “KEY 0 0 0”. While pressing
the key, the number corresponding to each key is displayed.
Example: When [ENTER] button is pressed “KEY 0 2 0”
3. Press [ENTER] button and [DISC2] button simultaneously
again, the key control mode is activated. In the key control
mode, the fluorescent indicator tube displays “KEYCONT 0”.
4. Press [ENTER] button and [DISC2] button simultaneously
again, “VOLUME FLR” will be displayed.
When the [VOLUME] knob is turned clockwise, the message
“VOLUME UP” appears for two seconds, then the message
“VOLUME FLR” is displayed again.
When the [VOLUME] knob is turned counter-clockwise, the
message “VOLUME DOW” appears for two seconds, then the
message “VOLUME FLR” is displayed again.
5. Press [ENTER] button and [DISC2] button simultaneously
again, release from this mode.
[VERSION DISPLAY]
• This mode is used check the model, destination, software version.
Procedure:
1. Press X button, [ENTER] button and [DISC3] button
simultaneously, the model and destination are displayed.
2. Each time [ENTER] button and [DISC2] button is pressed
simultaneously, the display changes from MC version, GC
version and DVD version in this order, and release from this
mode.
3. When [ENTER] button and [DISC2] button is pressed
simultaneously while the version numbers are being displayed
except model and destination, the date of the software creation
appear. When [ENTER] button and [DISC2] button is pressed
simultaneously again, the display returns to the software
version display.
[COLD RESET]
• The cold reset clears all data stored in the RAM to initial condi-
tions. Execute this mode when returning the set to the customer.
Procedure:
1. Press x button, [ENTER] button, and [DISC1] button
simultaneously.
2. The fluorescent indicator tube becomes blank for a while, and
the set is reset.
[HOT RESET]
• The hot reset clears data except BUCKUP stored in the RAM.
Procedure:
1. Press X button, [ENTER] button, and [DISC1] button
simultaneously.
2. The fluorescent indicator tube becomes blank for a while, and
the set is reset.
[TUNER STEP CHANGE]
• The step interval of AM channels can be toggled between 9 kHz
and 10 kHz.
 Loading...