9
CX-JTD8
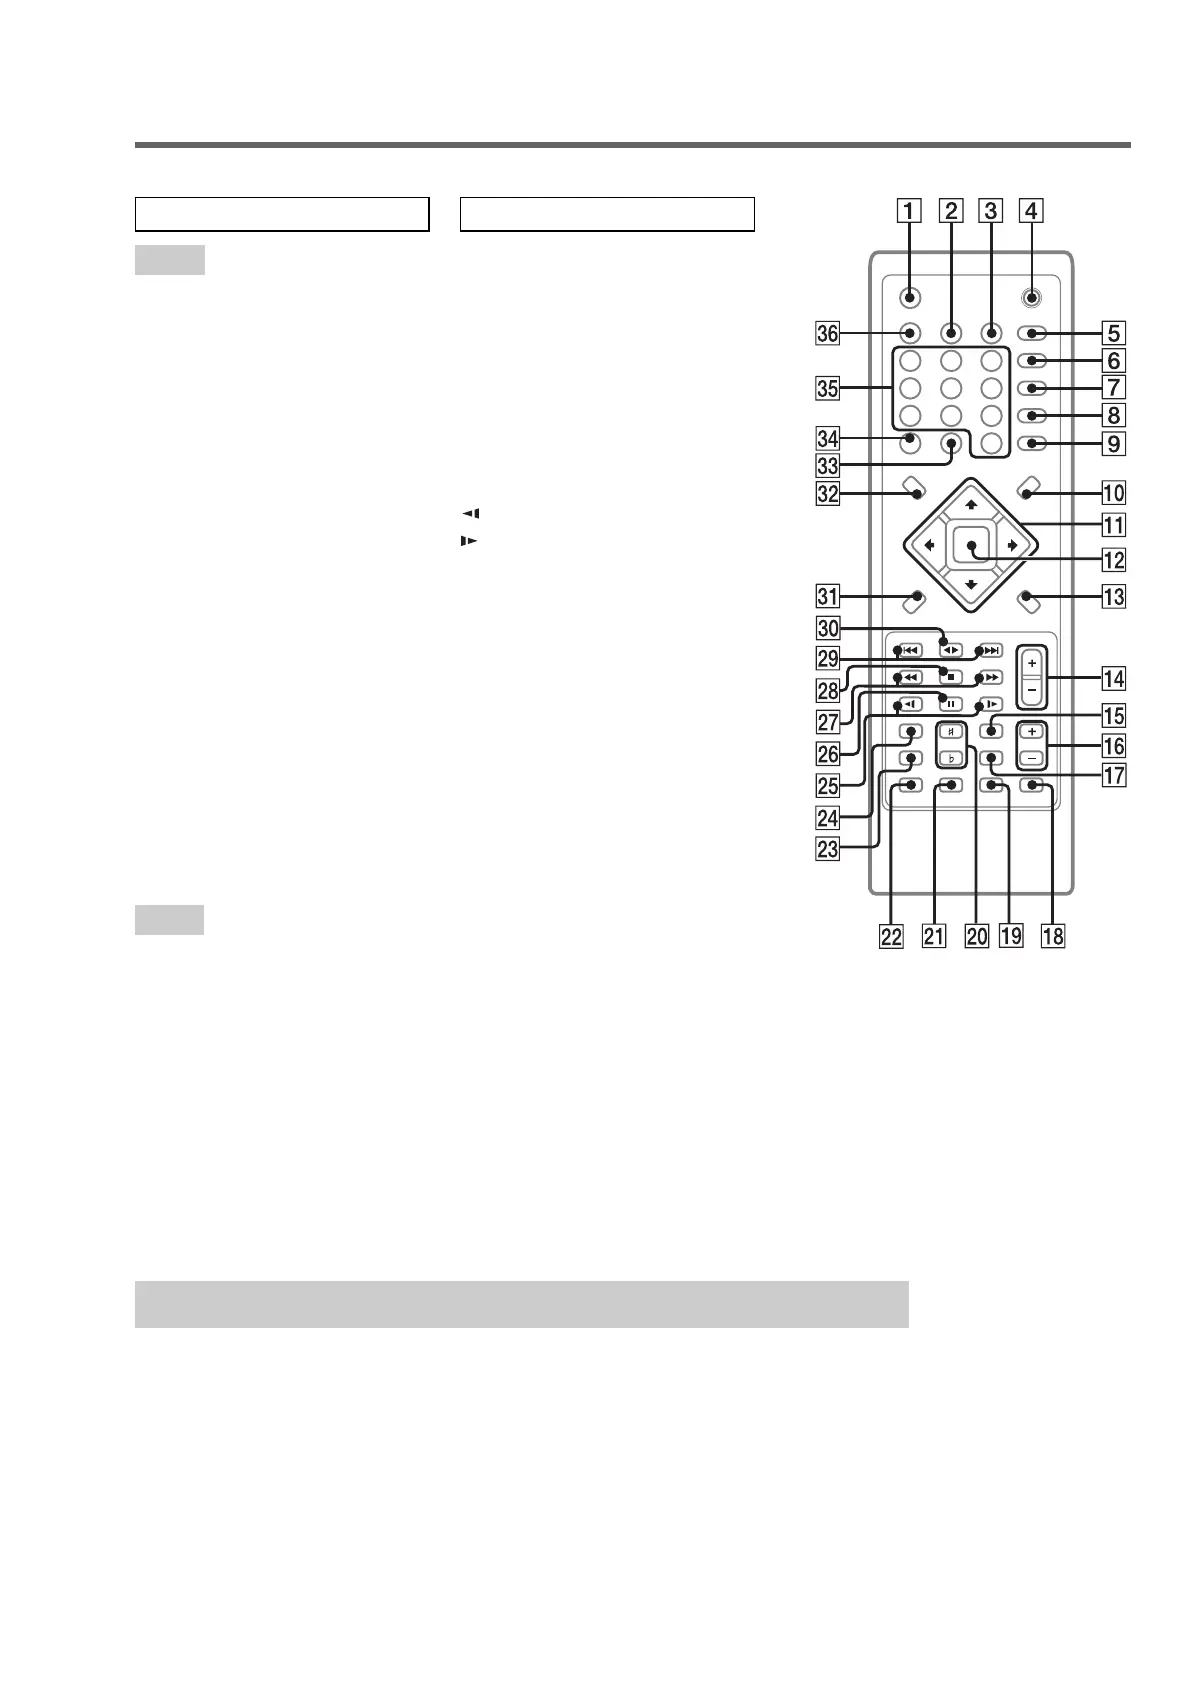
Remote control
ALBUM +/− qh
AMP MENU qg
CLEAR 9
CLOCK/TIMER SELECT 3
CLOCK/TIMER SET 2
DISPLAY 1
D.SKIP qk
DVD DISPLAY qd
DVD MENU q;
DVD SETUP qj
DVD TOP MENU es
ECHO wd
ENTER qs
FM MODE ql
FUNCTION*
1
ef
i-Bass 6
KARAOKE wf
KEY CONTROL
#
/
2
w;
Number buttons eg
PLAY MODE 7
PRESET −/PREV . wl
PRESET +/NEXT > wl
REPEAT 8
O RETURN ea
SELECT nN e;
SHIFT*
2
ws
SLEEP eh
SLOW −/+ wg
SOUND FIELD 5
TUNER/BAND ed
TUNER MEMORY wa
TUNING −/+ wj
VOL +/− qf
?/1 4
x (stop) wk
nN (SELECT) e;
X (pause) wh
M/m/</, qa
m (TUNING −) wj
M (TUNING +) wj
. (PRESET −/PREV) wl
> (PRESET +/NEXT) wl
(SLOW −) wg
(SLOW +) wg
#
(KEY CONTROL) w;
2
(KEY CONTROL) w;
*1
Switches the active function among
CD, TAPE, TUNER, MD (VIDEO)
and DVD.
*2
Press and hold SHIFT and press m,
, or < to do the following;
• SHIFT + m = SUBTITLE
• SHIFT + , = ANGLE
• SHIFT + < = AUDIO
e.g.) Press and hold SHIFT, and press
m to activate the subtitle menu.
ALPHABETICAL ORDER
A – Q
R – Z
BUTTON DESCRIPTIONS
Use buttons on the remote for the operation.
1
Press ?/1 to turn on the system.
2 Press CLOCK/TIMER SET.
3 Press M or m repeatedly to set the hour.
4 Press ,.
5 Press M or m repeatedly to set the
minute.
6 Press ENTER.
The clock starts working.
To adjust the clock
1
Press CLOCK/TIMER SET.
2
Press M or m to select CLOCK, then press
ENTER.
3
Do the same procedures as step 3 to 6
above.
Note
The clock settings are canceled when you disconnect
the power cord or if a power failure occurs.
Setting the clock