Do you have a question about the Sony EV-C3 and is the answer not in the manual?
Essential safety warnings, cautions, and general safety advice for operating the unit.
Includes owner's record, regulatory compliance for US/Canada, and CATV installer notes.
Guidelines for installation, operation, cleaning, and repacking the video recorder.
Lists and identifies all accessories provided with the video cassette recorder.
Instructions on proper insertion, ejection, and handling of video cassettes, including notes on storage.
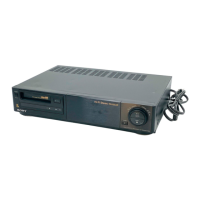
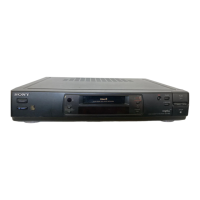
Details the functions of buttons and indicators on the front panel of the EV-C3.
Identifies the various input/output jacks and switches on the rear panel.
Explains the meaning of indicators shown in the unit's display window.
Procedure for correctly inserting batteries into the remote commander.
Explanation of functions for each button on the remote commander.
Information on the effective operating range and angle of the remote commander.
Instructions for connecting the EV-C3 to a TV that has video and audio input jacks.
Step-by-step guide on how to play back a video cassette tape.
Details on auto rewind and auto play functions for enhanced playback convenience.
Instructions for connecting the EV-C3 to a TV that lacks video and audio input jacks.
Explanation of how to use the TV/VTR switch for different viewing scenarios.
How to achieve a still image during playback.
Methods for searching for specific scenes using high-speed playback.
How to view playback at reduced speeds (x2, x1/10, x1/5).
Procedure for advancing the picture frame-by-frame.
How to set the tape counter to a specific point for scene marking.
Procedure for using the TAPE RETURN button to locate the counter zero point.
Information regarding potential differences between the tape counter display and actual time.
Diagram and instructions for connecting the EV-C3 to a TV for recording programs.
Step-by-step guide on how to record TV programs or other video sources.
Important notes regarding recording, including tuner requirements and cable connections.
Instructions for copying tapes by playing from another VCR and recording with the EV-C3.
Techniques for creating edited programs by joining scenes from different tapes.
Method for re-recording new scenes onto an existing tape.
How to control the EV-C3 using an external video editing controller.
Detailed steps for copying a tape using another VCR and the EV-C3 for recording.
Illustrates assemble editing using the SYNCHRO EDIT button for synchronized recording.
Important considerations and cautions regarding the quality and copyright of edited tapes.
Steps for copying a tape using the EV-C3 to record from another VCR via CONTROL L.
Detailed procedure for assemble editing using the Control L connector.
Procedure for assemble editing using the Control S IN jack for synchronized recording.
Guidance on searching for and setting start and end points for editing.
Detailed steps for assemble editing using the Control S IN jack.
How to stop the assemble editing process during operation.
Procedure for assemble editing using the Control L connector with a VCR.
Steps for assemble editing with a VCR not equipped with a control terminal.
Detailed steps for assemble editing using the Control L connector.
Procedure for assemble editing with a VCR lacking a control terminal.
Instructions for re-recording new scenes onto an original tape using insert editing.
Detailed steps for performing insert editing with a VCR.
Example connection for controlling the EV-C3 with a video editing controller.
Step-by-step guide for editing using the Sony RM-E100V video editing controller.
Instructions for connecting the EV-C3 to a TV with video and audio input jacks.
Instructions for connecting the EV-C3 to a TV without video and audio inputs.
Guidance on checking TV inputs and choosing appropriate antenna connection examples.
Important notes and cautions regarding antenna connections and RF output.
Steps for connecting a combination VHF/UHF antenna using a separator.
Instructions for connecting only a VHF antenna.
Instructions for connecting only a UHF antenna.
Steps for connecting both VHF and UHF antennas.
Detailed steps for connecting VHF/UHF antennas using various methods.
Instructions for connecting a UHF antenna to the recorder.
Procedure for connecting a VHF antenna to the recorder.
Detailed steps for connecting combination VHF/UHF antennas using a separator.
Procedure for connecting only a VHF antenna to the recorder.
Instructions for connecting only a UHF antenna to the recorder.
Steps for connecting a combination VHF/UHF antenna, including separator use.
Procedure for connecting only a VHF antenna to the recorder.
Instructions for connecting only a UHF antenna to the recorder.
Instructions for connecting to a cable TV compatible television.
Instructions for connecting to a television not compatible with cable TV.
Guide on how to attach an external antenna connector to a cable.
Detailed steps for attaching an F-type connector to a coaxial cable.
Procedure for attaching an external antenna connector to a 300-ohm twin lead cable.
Detailed steps for attaching an F-type connector to a coaxial cable.
Instructions for setting the RF UNIT selector switch for proper signal reception.
Guidance on adjusting the TV channel to match the RF UNIT setting.
Technical specifications for the video recording system, including tape speed and time.
General specifications covering power, dimensions, operating temperature, and weight.
Specifications for the remote commander, including power, dimensions, and weight.
Details of the various input and output connectors and their specifications.
List of accessories that are supplied with the unit.
Troubleshooting steps for when the power cannot be turned on.
Solutions for problems preventing playback or resulting in poor picture quality.
Troubleshooting steps for when recording cannot be performed.
Solutions for problems with the remote commander not functioning.
| SP Playback | Yes |
|---|---|
| LP Playback | Yes |
| Remote Control | Yes |
| Tuner | No |
| Recording System | Rotary 2-head helical scan |
| Playback System | NTSC |
| Heads | 2 |
| Inputs | Composite video, Audio |