Do you have a question about the Sony FDR-AX700 and is the answer not in the manual?
Essential safety guidelines to prevent hazards and ensure proper operation of the device.
Details regarding compliance with FCC rules and regulations for the device.
Guide to choosing and setting the video recording format and resolution for optimal image quality.
List of accessories and components included with the camcorder for immediate use.
Step-by-step instructions on how to connect the camcorder and charge its battery using the AC adapter.
Procedures for powering up the camcorder and initial setup for first-time use.
Instructions on how to adjust the viewfinder for clear and comfortable viewing.
Guide on how to properly insert SD cards or Memory Stick media into the camcorder's slots.
Information on compatible memory card formats and classes for recording movies and photos.
How to choose between memory card slots A and B for recording and playback operations.
Recommended procedure to format memory cards for stable operation and data integrity.
Instructions on how to start and stop recording video footage using the camcorder.
Guide on automatically switching to a second memory card when the first is full for uninterrupted recording.
Instructions for recording the same footage onto two memory cards concurrently for backup.
Steps to switch to photo mode and capture still images using the camcorder.
Manual control of the camcorder's focus using the lens ring for precise sharpness.
How to manually control the aperture (iris) to adjust the amount of light entering the lens.
Manual adjustment of the signal amplification (gain) to control image brightness in low light.
Manual control of the shutter speed to manage motion blur and exposure in varying lighting conditions.
Using the built-in ND filter to reduce light intensity in bright shooting environments.
Accessing and viewing recorded movies and photos stored on the memory card.
Connecting the camcorder to a television via HDMI to watch recorded content on a larger screen.
Configuring HDMI output settings to ensure optimal playback quality on different TV types.
Transferring movies and photos from the camcorder to a computer using PlayMemories Home software.
Methods for storing recorded video and still images onto external devices like computers or DVD recorders.
Connecting the camcorder to analog devices using an AV cable for image transfer.
Instructions for connecting the camcorder to smartphones and tablets wirelessly for file transfer or remote control.
Connecting a smartphone to the camcorder via NFC or Wi-Fi for remote operation and live view.
Navigating the camcorder's menu system to access and adjust various settings and functions.
An overview of all available menu items and their corresponding functions for customization.
Important warnings and advice regarding handling, operation, and environmental factors to prevent damage.
Information on LCD screen characteristics and potential OLED panel behaviors during normal use.
Notes on normal operating temperatures and automatic power-off mechanisms to protect the device.
Guidance on resolving common issues and problems encountered while using the camcorder.
Technical details and performance characteristics of the camcorder, including sensor, lens, and formats.
List of registered trademarks and logos associated with the product and its components.
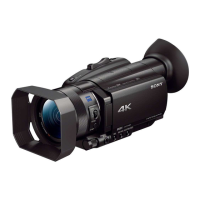
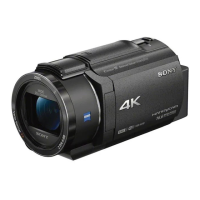
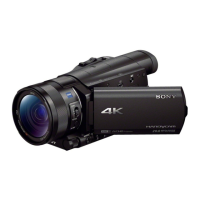
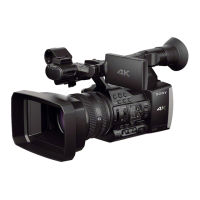
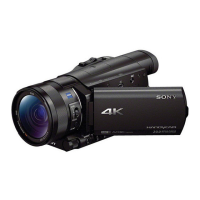
Identification and description of external buttons, ports, and components of the camcorder.
Instructions for using the remote control, including battery replacement and proper operation.
| Sensor type | CMOS |
|---|---|
| Total megapixels | 14.2 MP |
| Optical sensor size | 1 \ |
| 3D | No |
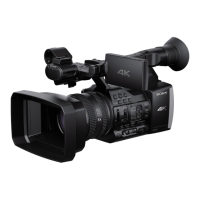
| Camcorder type | Handheld camcorder |
| Image processor | BIONZ X |
| Minimum illumination | 1.7 lx |
| Supported aspect ratios | 16:9 |
| Back Light Compensation (BLC) | Yes |
| Filter size | 62 mm |
| Digital zoom | 192 x |
| Optical zoom | 12 x |
| Interchangeable lens | - |
| Image stabilizer type | Optical Image Stabilization (OIS) |
| Minimum aperture number | 2.8 |
| Focal length (35mm film equivalent) | 29 - 348 mm |
| Playback modes | Fast, Slow |
| Number of diaphragm blades | 7 |
| Viewfinder type | Electronic |
| Viewfinder resolution | 2359296 pixels |
| Viewfinder screen size | 0.39 \ |
| Focus adjustment | Auto/Manual |
| Closest focusing distance | 0.01 m |
| Display diagonal | 3.46 \ |
| Camera shutter speed | 1/10000 s |
| Camera file system | DCF 2.0, Exif 2.3 |
| Camcorder media type | Memory card |
| Compatible memory cards | MS PRO Duo Mark 2, MS XC-HG Duo, SD, SDHC, SDXC |
| Internal storage capacity | - GB |
| Video resolutions | 640 x 360, 1280 x 720, 1440 x 1080, 1920 x 1080, 3840 x 2160 pixels |
| Maximum frame rate | 120 fps |
| Video formats supported | AVCHD, H.264, MPEG4 |
| Maximum video resolution | 3840 x 2160 pixels |
| Bitrate at maximum video resolution | 100 Mbit/s |
| Image formats supported | JPG |
| Maximum image resolution | 5024 x 2824 pixels |
| Microphone connectivity | 3.5 mm |
| Scene modes | Beach, Fireworks, Landscape (scenery), Night, Portrait, Spotlight, Sunrise, Sunset |
| Wi-Fi standards | 802.11b, 802.11g, Wi-Fi 4 (802.11n) |
| Composite video out | 1 |
| USB 2.0 ports quantity | USB 2.0 ports have a data transmission speed of 480 Mbps, and are backwards compatible with USB 1.1 ports. You can connect all kinds of peripheral devices to them. |
| Battery type | NP-FV70A |
| Battery voltage | 7.4 V |
| Battery technology | Lithium |
| Battery recharge time | 2.5 h |
| Number of batteries included | 1 pc(s) |
| Product color | Black |
| Depth | 196.5 mm |
|---|---|
| Width | 116 mm |
| Height | 89.5 mm |
| Weight | 1030 g |