25
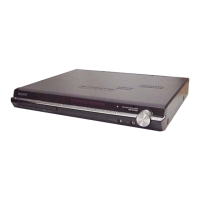
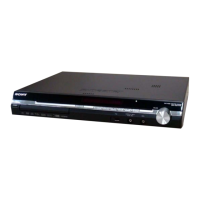
HCD-DX155/DX255
DVD SECTION
[TEST DISC LIST]
Be sur e to use the D VD disc tha t ma tches the signal standar ds of
your r egion.
• CD
YEDS-18 (Part No.: 3-702-101-01)
PATD-012 (Part No.: 4-225-203-01)
• DVD SL (Single La yer)
NTSC : HLX-503 (Part No.: J-6090-069-A)
HLX-504 (Part No.: J-6090-088-A)
PAL : HLX-506 (Part No.: J-6090-077-A)
• DVD DL (Dual La yer)
NTSC : HLX-501 (Part No.: J-6090-071-A)
HLX-505 (Part No.: J-6090-089-A)
PAL : HLX-507 (Part No.: J-6090-078-A)
8-1. GENERAL DESCRIPTION
The Mir ror Time and IOP measur ement allo ws you to mak e
diagnosis and adjustment simply by using the remote commander
and monitor TV. The instr uctions, dia gnosis r esults, etc . ar e given
on the on-screen display (OSD).
Be sur e to e xecute the Mir ror Time and IOP measur ement w hen a
BU (Base Unit) is r eplaced .
8-2. HOW TO ENTER TEST MODE
While pr essing the
x and A buttons sim ultaneousl y, tur n
VOLUME + with the D VD player in po wer on.
The Test Mode star ts, then the men u sho wn belo w will be
displayed on the TV scr een.
* During the TEST mode is r unning , the model name “DSX1” is
displayed for DX155 in the “Remocon Dia gnosis Men u”. The
model name “DSX1D” is displayed for DX255.
The men u a bove is the Remocon Dia gnosis Men u scr een w hic h
consists of six main function. At the bottom of the men u scr een,
the model name and IF-con v er sion. To enter Mir ror Time
Adjustment men u, press button 2 “R” on the r emote commander
to enter Dr ive Man ual Oper ation men u. To e xit from the Test Mode ,
press the po wer b utton on the r emote commander .
8-3. DRIVE MANUAL OPERATION
The Dr ive Man ual Oper ation men u consists of f ive main
function. By pr essing 2 “R” button on the r emote commander in
the Remocon Dia gnosis Men u, the scr een will a ppear as belo w.
Remocon Diagnosis Menu
0. External Chip Check
1. Servo Parameter Check
2. Drive Manual Operation
3. Emergency History
4. Version Information
Model Name : DCX1D_UC
IF-con : V
Syscon : Ver.
er. xx.xx (xxxx)
x.xxx
Drive Manual Operation
1. Servo Control
2. Track/Layer Jump
3. Manual Adjustment
4. Tray Aging Mode
5. MIRR time Adjust
0. Return to Top Menu
8-4. MIRROR TIME ADJUSTMENT
To enter Mir ror Time Adjustment, pr ess 5 “R” button on the r emote
commander . The scr een will a ppear as belo w.
Ther e ar e five main commands in the Mir r time Adjust men u as
shown in the f igur e a bove. The functions of eac h command ar e
descr ibed in the f ollowing pa ge.
1. CD MIRR time Check
This command c hec ks the Mir ror time v alue f or CD disc .
2. DVD MIRR time Check
This command c hec ks the Mir ror time v alue f or DVD disc.
3. Threshold
This command displa ys the thr eshold v alue betw een CD and D VD
mirror time.
4. Save to EEPROM
This command sa ves an adjusted mir ror time v alue to the EEPR OM.
5. Default set MIRR time
This command will set CD and D VD mir ror time to f irmwar e def ault
value .
[Open] / [Close]
Pr essing the A button contr ols the tr ay for disc c hang e
during mirror time adjustment.
[0] Retur n to pr evious men u
Pr ess the 0 “R” button to r etur n to pr evious men u.
8-4-1. EXECUTING MIRROR TIME ADJUSTMENT
In or der to e xecute mir ror time adjustment, the f ollowing standar d
procedur es m ust be f ollowed.
(1) In po wer on, while pr essing the x and A buttons
simultaneousl y, tur n VOLUME + .
(2) Select “2. Dr ive Man ual Oper ation”.
MIRR time Adjust Menu
1. CD MIRR time Check:
2. DVD MIRR time Check:
3. Threshold:
4. Save to EEPROM
5. Default set MIRR time
[Open] Tray open [Close] Tray close
[0] Return to previous menu
Remocon Diagnosis Menu
0. External Chip Check
1. Servo Parameter Check
2. Drive Manual Operation
3. Emergency History Check
4. Version information
Model : DCX1D_UC
IF-con : Ver. xx.xx (xxxx)
Syscon : Ver. x.xxx
Ver. 1.2