10
Microphone power switches
When a microphone is connected to the corresponding AUDIO
IN connector, set whether or not to supply a power to the
microphone.
+48V: To supply +48 V power supply.
OFF: Not to supply power.
(No function has been assigned to the lowermost position. No
power is supplied to the microphone.)
To supply +12 V power, contact a Sony sales representative
or Sony service representative.
Preparations
Attaching a Lens
For information on handling lenses, refer to the lens’ operation
manual.
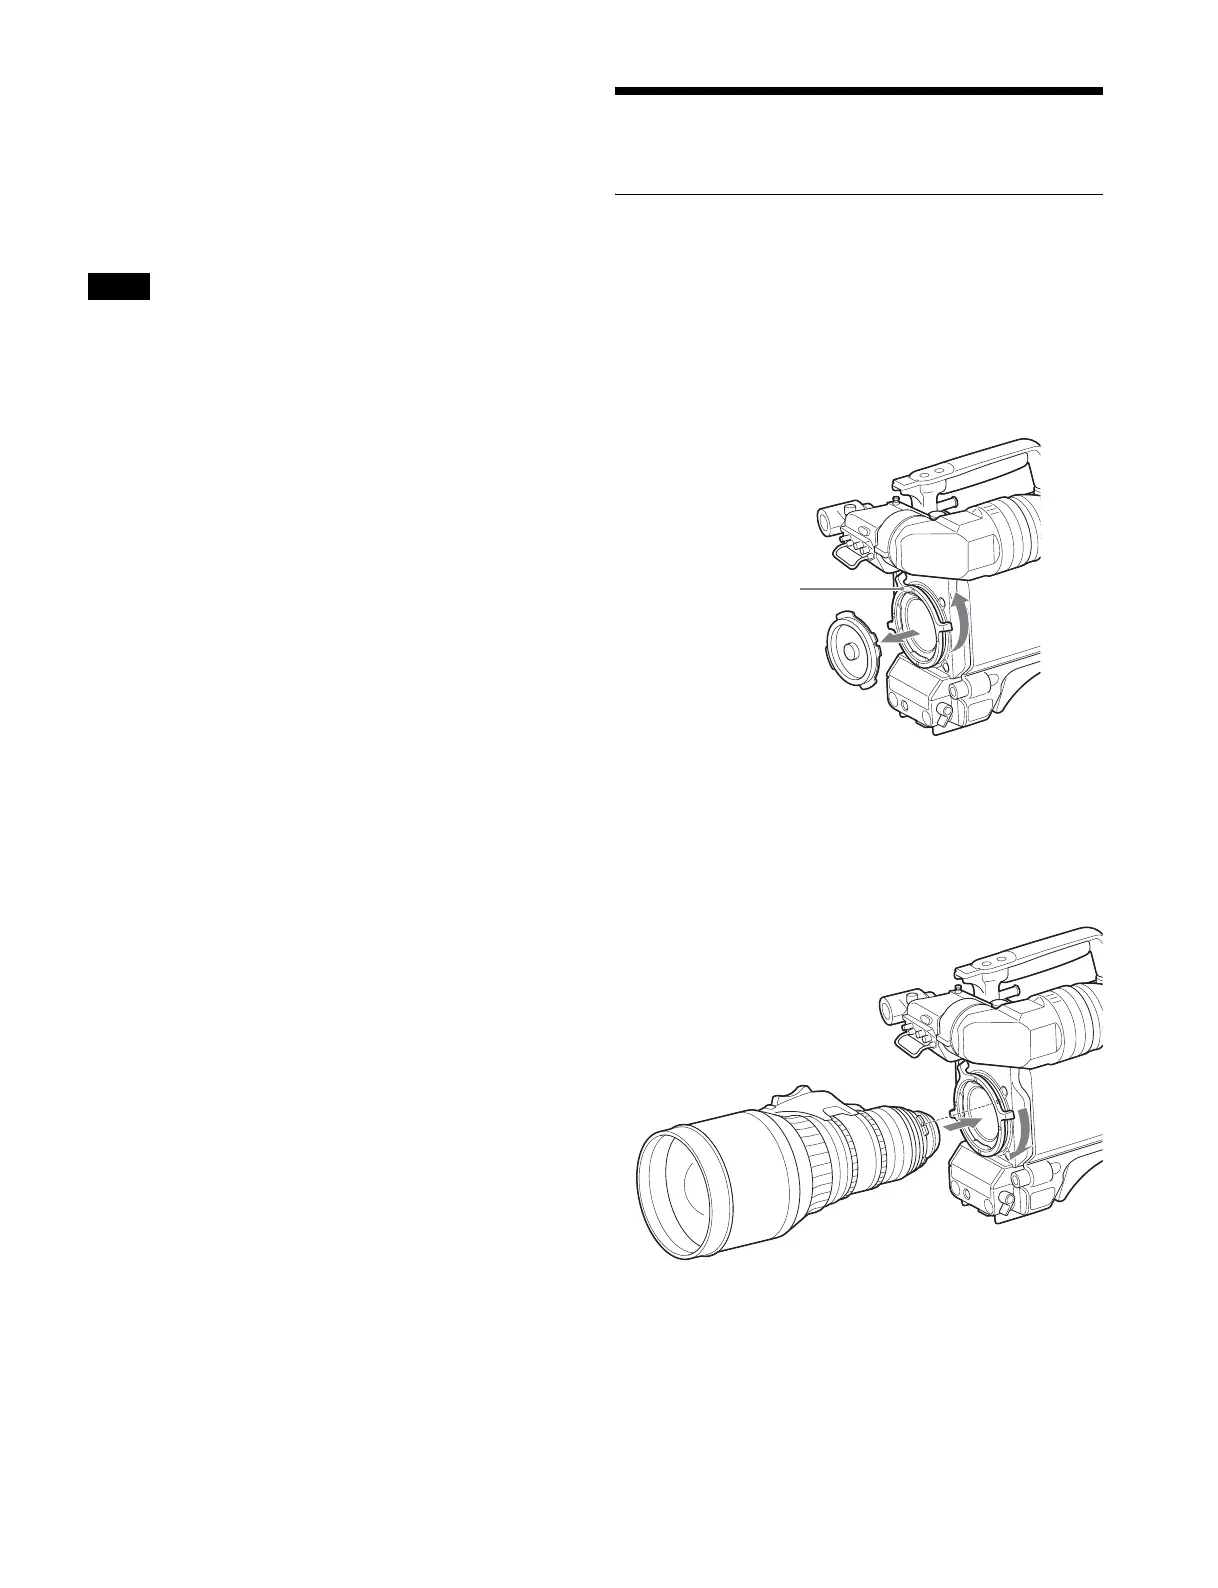
Attaching a PL lens
1 Turn the lens fixing lever (PL) counterclockwise, and
remove the lens mount cap from the lens mount.
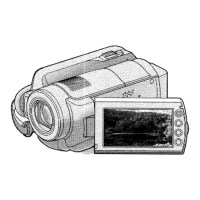
2 Align the notch on the lens with the positioning pin on
the upper part of the lens mount, and insert the PL
lens into the mount.
3 While supporting the PL lens, turn the lens fixing
lever (PL) clockwise to secure the lens.
Note
Lens fixing lever
(PL)