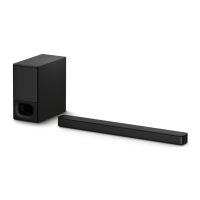
HT-NT3
20
SECTION 3
TEST MODE
COLD RESET
The cold reset clears certain data in this system without initialize
Personal Information and some operation data.
Execute this mode when returning the unit to the customers.
Procedure:
1. Press the [
?/1
] button on the main unit to turn the power on.
2. Press the [
?/1
] button and [VOL -] button on the main unit
simultaneously for fi ve seconds.
3. The message “WAIT” appears and then “RESET” appears on
the fl uorescent indicator tube, then becomes standby states.
PANEL TEST
Procedure:
1. Press the [
?/1
] button on the main unit to turn the power on.
2. Press button in order of the [
x
] → [DISPLAY] → [
m
] → [
M
]
on the remote commander.
(Make the interval when each button is pressed within two sec-
onds).
3. All segments in fl uorescent indicator tube are lighted up and
then is dimmed after a second.
4. In the state of step 3, press the [INPUT +] button on the remote
commander and “K 0” is displayed on the fl uorescent indicator
tube.
5. In the state of step 4, press the [VOL +] button on the remote
commander and “SZ_A” is displayed on the fl uorescent indi-
cator tube.
6. In the state of step 5, press the [VOL -] button on the remote
commander and all segments in fl uorescent indicator tube are
lighted up and then is dimmed after a second.
7. In the state of step 6, press the [
x
] button on the remote com-
mander and “1 24” is displayed on the fl uorescent indicator
tube.
Releasing method:
To release from this mode, press the [
?/1
] button on the main unit
or press the [
?/1
] button on the remote commander.
AMP TEST
Procedure:
1. Touch the [
?/1
] touch key on the main unit to turn the power
on.
2. Press button in order of the [
x
] → [DISPLAY] → [VOL -] →
[
M
] on the remote commander.
The messsage “MSURE” is displayed on the fl uorescent indi-
cator tube.
3. In the state of step 2, press [DIMMER] button on the remote
commander.
The message will appear in order of the “FULL” → “THRU”
→ “F2S” → “F2SB” → “F2CW” on the fl uorescent indicator
tube.
4. In the state of step 3, press [
m
] button on the remote com-
mander.
The message will appear in order of the “A.OFF” → “A.ON”
on the fl uorescent indicator tube.
5. In the state of step 4, press [
%
] button on the remote com-
mander.
The message will appear in order of the “V.N” → “V.MSM” on
the fl uorescent indicator tube.
6. In the state of step 5, press [CLEARAUDIO+] button on the
remote commander.
The message will appear in order of the “VAON” → “VAOFF”
on the fl uorescent indicator tube.
7. In the state of step 6, press [VOICE] button on the remote com-
mander to adjust the volume gain.
It can be adjusted between -3.0 to +3.0 (increase everytime 0.1
step).
Eg: When gain +1.0 dB by pressing the [VOICE] button, the
message “G +1.0” will appear on the fluorescent indicator
tube.
8. In the state of step 7, press [NIGHT] button on the remote
commander to adjust the volume gain.
It can be adjusted between +3.0 to -3.0 (decrease everytime 0.1
step).
Eg: When gain -1.0 dB by pressing the [NIGHT] button, the
message “G -1.0” will appear on the fluorescent indicator tube.
WIRELESS SOUND TEST MODE
It can display the μ-com version of Subwoofer (SA-WNT3).
Note : More than one item may be displayed on the fl uorescent indicator
tube, but it is not used for the servicing other than “VER”.
Preparation:
• Prepare the remote commander attached to this unit.
Remote commander:
RM-AH110U (US and Canadian models)
RM-AH110E (Except US and Canadian models)
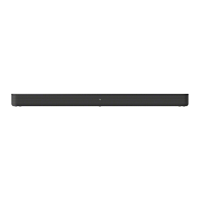
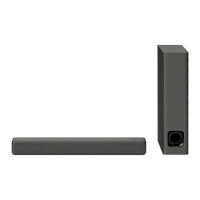
• Connect the Bar Speaker (SA-NT3) and the Subwoofer (SA-WNT3)
by wireless.
Procedure:
1. Press button in order of the [
x
] → [DISPLAY] → [CLEAR
AUDIO+] → [
M
] on the remote commander.
2. The message “FACTR” is displayed on the fl uorescent indica-
tor tube and enter the wireless sound test mode.
3. Press the [
M
]/[
m
] buttons on the remote commander, select the
“VER”, and press the [ ] button on the remote commander.
4. The μ-com version of Subwoofer (SA-WNT3) is displayed on
the fl uorescent indicator tube. For example, 0.12A.
5. When [
M
]/[
m
] buttons on the remote commander is pressed
while the μ-com version of Subwoofer (SA-WNT3) is dis-
played on the fl uorescent indicator tube, year, month and day
of the creation is displayed on the fl uorescent indicator tube.
For example, 41027.
When [
M
]/[
m
] buttons on the remote commander is pressed
again, the display returns to the μ-com version of Subwoofer
(SA-WNT3) display.
Releasing method:
Press the [
?/1
] button to release the test mode menu.

 Loading...