17
KLV-26M400A/32M400A/37M400A/40M400A
KLV-26M400A/32M400A/37M400A/40M400A
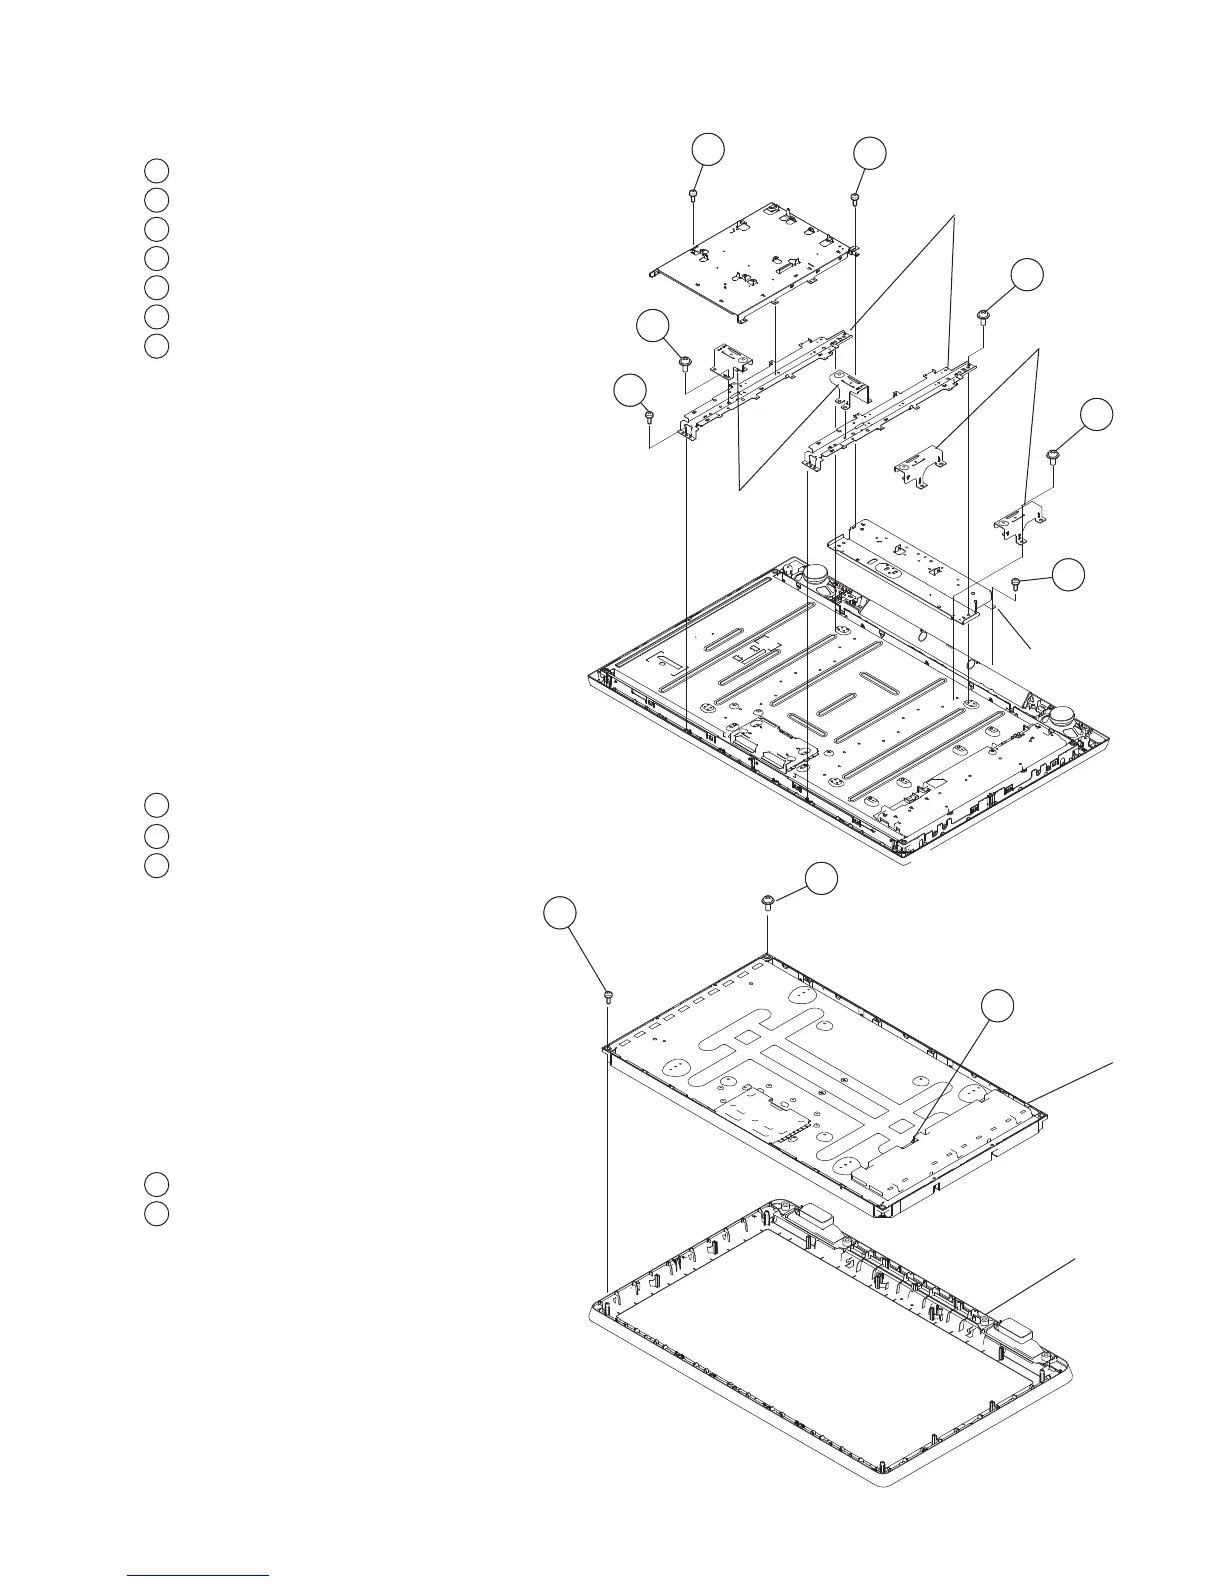
1-7. STRUCTURAL FRAMES AND BRACKETS REMOVAL (KLV-40M400A ONLY)
1
Remove 4 screws from Top Vesa Brackets
2
Remove 2 screws from Main Bracket
3
Remove 4 screws from Main Bracket
4
Remove 6 screws from Spine Frames
5
Remove 2 screws from Spine Frames
6
Remove 4 screws from Bottom Vesa
7
Remove 4 screws from Bottom Brackets
7
6
Bottom Frame
Vesa (Top)
Spine Frame
Vesa (Bottom)
1
5
4
3
2
1-8. LCD PANEL REMOVAL
1
Remove 2 screws
2
Remove 1 screw (KLV-26M400A ONLY)
3
Disconnect 1 connector (KLV-26M400A/32M400A/37M400A ONLY)
Disconnect 2 connectors (KLV-40M400A ONLY)
1
LCD Panel
Bezel
2
3
1-8-1. CLEANING THE LCD PANEL
CAUTION: When cleaning the TV, be sure to unplug the
power cord to avoid any chance of electric shock.
1
Clean the cabinet of the TV with a dry soft cloth.
2
Wipe the LCD screen gently with a soft cloth.
Stubborn stains may be removed with a cloth
slightly moistened with a solution of mild soap and
warm water.
If using a chemically pretreated cloth, please follow
the instruction provided on the package.
Never use strong solvents such as a thinner,
alcohol or benzine for cleaning.
Periodic vacuuming of the ventilation openings is
recommended to ensure to proper ventilation.
☛