Adding Memory
85
3
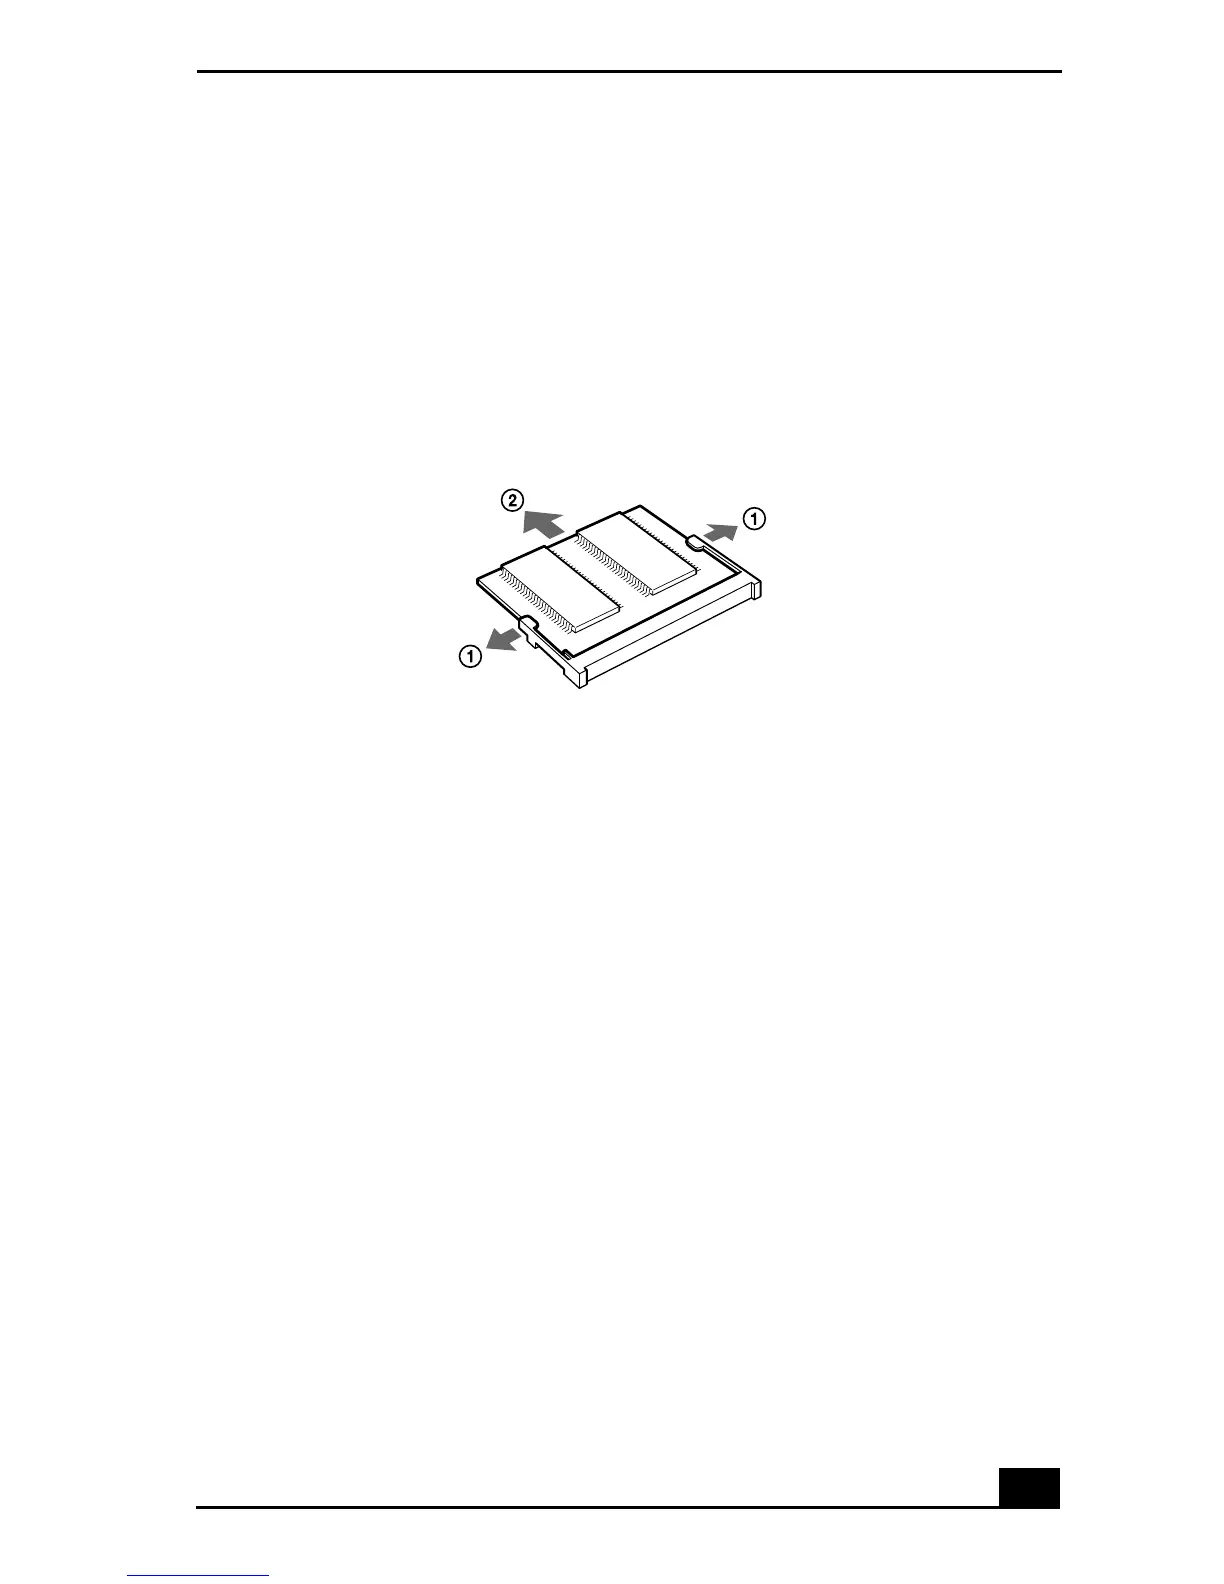
Remove the memory module.
Before you handle the memory module, touch a metal part of the notebook to
discharge any static electricity accumulated on your body.
Carefully press down on the release tabs on either end of the memory
module at the same time.
Pull out the memory module in the direction of the arrow.
Perform Steps 6 and 7 for “Installing a Memory Module.”
Confirming Added Memory Capacity
1
Turn on the notebook.
2
Click the Start button, point to VAIO, and then click Sony Notebook Setup.
3
Click the About This Notebook tab. Check the System Memory displayed in
the left panel to confirm that the correct memory amount is displayed.
If the memory amount on the display is not correct, shut down the system,
turn off the notebook, and repeat the installation procedures.
Removing a Memory Module