Turning
the
photo
frame
on
Turning
on
the power
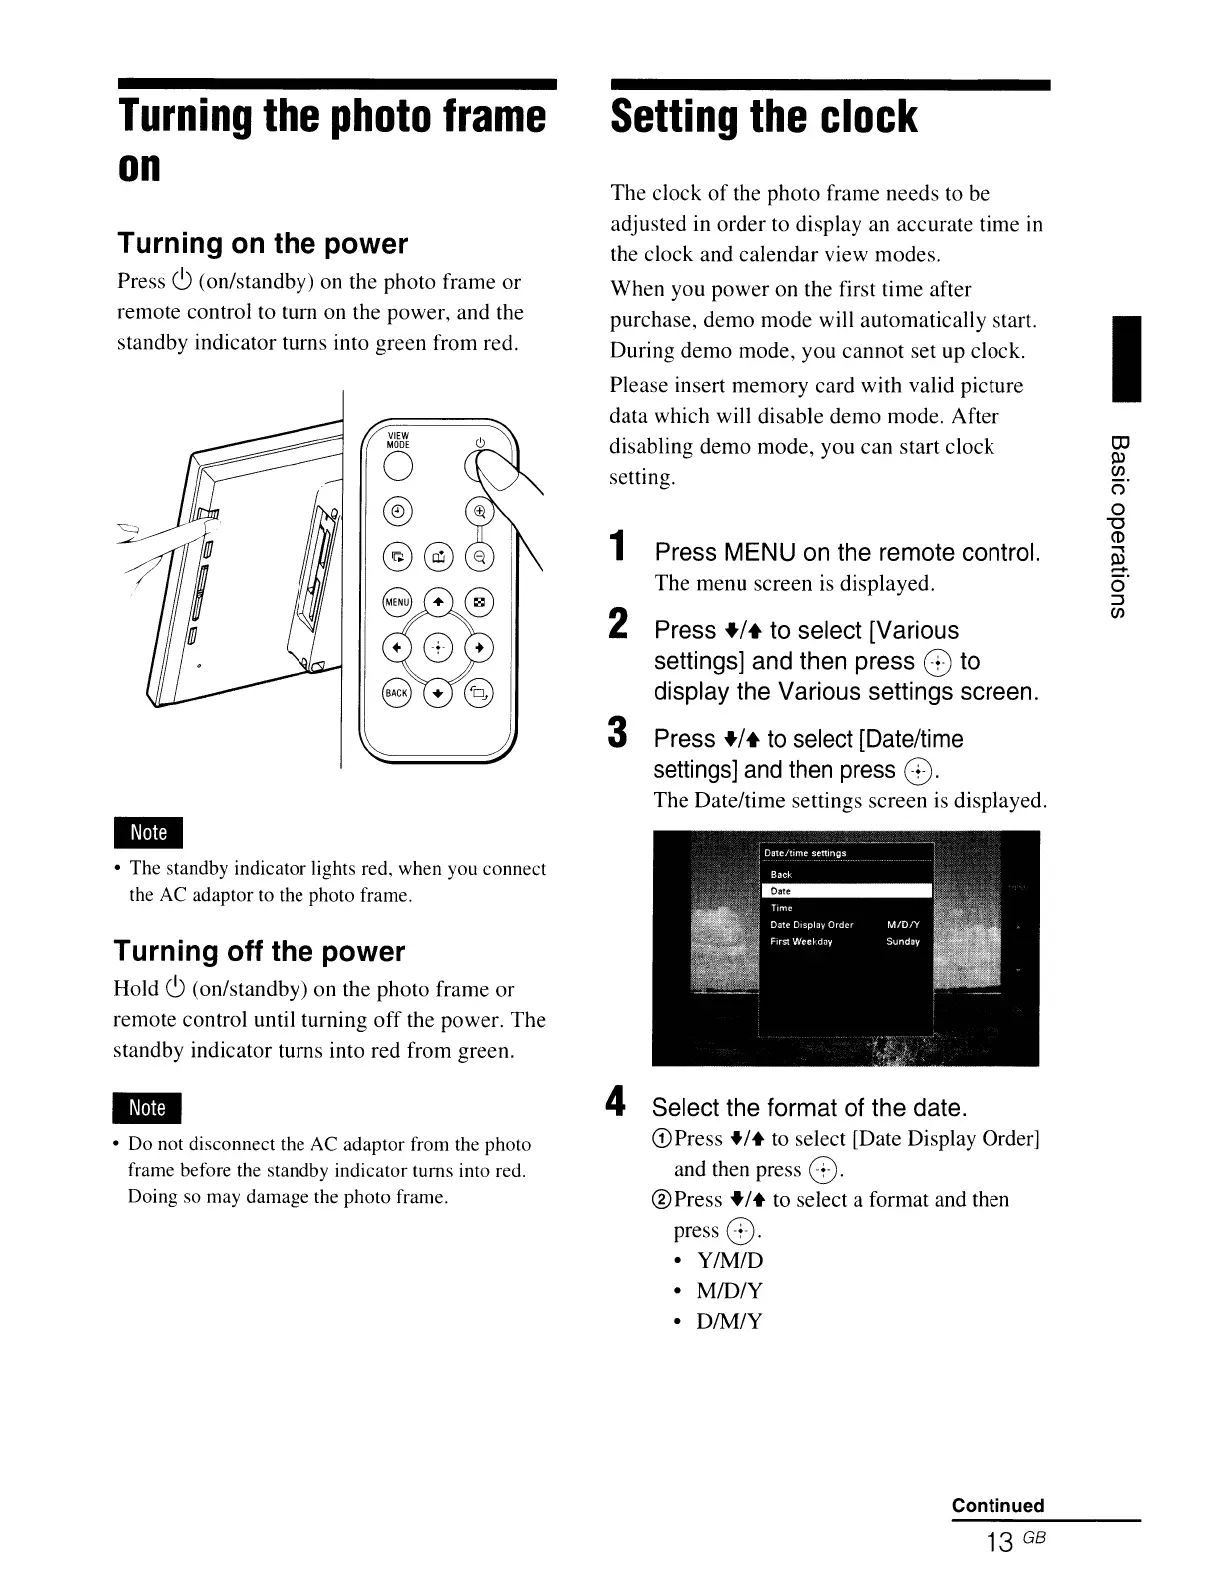
Press
CJ
(on/standby) on the photo frame or
remote control to tum on the power, and the
standby indicator turns into green from red.
VIEW
MODE
o
@
@@
• The standby indicator lights red, when you connect
the AC adaptor to the photo frame.
Turning off the power
Hold
CJ
(on/standby) on the photo frame
or
remote control until turning
off
the power. The
standby indicator turns into red from green.
• Do not disconnect the AC adaptor from the photo
frame before the standby indicator turns into red.
Doing so may damage the photo frame.
Setting
the
clock
The clock
of
the photo frame needs to be
adjusted in order to display an accurate time
in
the clock and calendar view modes.
When you
power
on the first
time
after
purchase, demo
mode
will automatically start.
During demo mode, you cannot set up clock.
Please insert memory card with valid picture
data which will disable demo mode. After
disabling demo mode, you
can
start clock
setting.
1 Press MENU on the remote control.
The menu screen is displayed.
2 Press
+/+
to select [Various
settings] and then press
8 to
display the Various settings screen.
3 Press
+/+
to
select [Date/time
settings]
and
then press
8.
The
Dateltime settings screen
is
displayed.
4 Select the format of the date.
Q)Press
+/+
to select [Date Display Order]
and then press
8.
@Press
+/+ to select a format and then
press
8.
•
YIM/D
•
MID/Y
•
DIM/Y
Continued
13 GB
I
OJ
P>
C/l
o'
o
"0
CD
.....
P>
.-+
o'
:::s
C/l