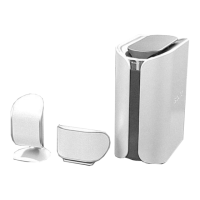
HCD-F200/F500
25
2-8. VACS Display
Not used for the servicing.
Press the [
?/1
] button if having entered this mode.
2-9. VACS On/off
Not used for the servicing.
Press the [
?/1
] button if having entered this mode.
2-10. DSP Halt Mode
Not used for the servicing.
Press the [
?/1
] button if having entered this mode.
2-11. DSP Status Display
Not used for the servicing.
Press the [
?/1
] button if having entered this mode.
2-12. A.CAL Test Disp
Not used for the servicing.
Press the [
?/1
] button if having entered this mode.
2-13. Demo Disc Play
Mode to prevent theft of the demonstration disc.
Setting Procedure:
It automatically enters the mode when the demonstration disc is
inserted.
Releasing Procedure:
1. Enter the test menu.
2. Press the [
M
] [
m
] button on the remote commander to select the
“DEMO PLAY”, and press the [ENTER] button on the remote
commander.
3. “DEMO OFF” displayed on the
fl
uorescent indicator tube.
2-14. DVD Debug
Not used for the servicing.
Press the [
?/1
] button if having entered this mode.
2-15. Sircs Disable
Not used for the servicing.
Press the [
?/1
] button if having entered this mode.
2-16. DMPORT Device Test
Not used for the servicing.
Press the [
?/1
] button if having entered this mode.
2-17. S-AIR ID Select (F500 only)
When shifting to the ID selection mode of S-AIR, this mode is
used.
Procedure:
1. Connect EZW-RT10 (P/N: A-1368-101-A) (Canadian model),
(P/N: A-1512-377-A) (Australian model) and (P/N: A-1512-
377-A) (240V AC area E, Iranian, Singapore and Russian
models) with the EZW-RT10 connector (CN701) on the AMP-
DSP board from SA-WSF500.
2. Enter the test menu.
3. Press the [
M
] [
m
] button on the remote commander to select
the “S-AIR ID”, and press the [ENTER] button on the remote
commander.
2-18. S-AIR pearing
Not used for the servicing.
Press the [
?/1
] button if having entered this mode.
3. DVD SERVICE MODE
3-1. DVD Service Mode General Description
This mode let you make diagnosis and adjustment easily by using
the remote commander and the TV screen. The instructions, diag-
nostic results, etc. are given on the on-screen display.
Be sure to execute the IOP measurement when a base unit is re-
placed.
3-2. Enterring DVD Service Mode
Procedure:
1. Press the [
?/1
] button to turn the power on.
2. Press the [FUNCTION] button on the remote commander to
select the “DVD”.
3. Press the button in order of the [CLEAR]
[ENTER]
[0]
[1]
[0]
[ANGLE]
[0]
[6] on the remote com-
mander. (Make the interval when each button is pressed within
two seconds.)
4. The message “SERVICE IN” appears on the
fl
uorescent in-
dicator tube and top menu of the Remocon Diagnosis Menu
appears on the on-screen display on the TV screen as follows.
The model name, IF-con version and Syscon version are dis-
played at the bottom of the on-screen display.
Remocon Diagnosis Menu
0. External Chip Check
1. Servo Parameter Check
2. Drive Manual Operation
3. Emergency History
4. Version Information
Model Name :xxxx_xx
IF-con:Ver.xx.xx(xxxx)
Syscon:Ver.x.xxx
5. To execute each function, press its number by using numeric
button on the remote commander.
6. To release from this mode, press the [
?/1
] button.
3-3. Executing IOP Measurement
In order to execute IOP measurement, the following standard pro-
cedures must be followed.
Procedure:
1. From the top menu of Remocon Diagnosis Menu, select “2
Drive Manual Operation” by pressing the [2] button on the
remote commander. The following screen appears on the on-
screen display
Drive Manual Operation
1. Servo Control
2. Track/Layer Jump
3. Manual Adjustment
4. Tray Aging mode
5. MIRR time Adjust
0. Return to Top Menu