Final
check
After
the
adjustments have been completed, face
the
set
in
all direction, (North,
South,
East and West) and check
whether
there
is
no uneven color in any direction. This
test have
to
be done
with
full flat field
of
RGB each color.
Check
that
the
picture
is
not
tilted.
2-6.
Convergence
Adjustment
If
you
use
the
CRT
of
FRU
provided
by
SONY, you
adjust
described
in
the item 5), 6).
I)
Receive a white
hatch
signal.
2) Check
the
BNC.
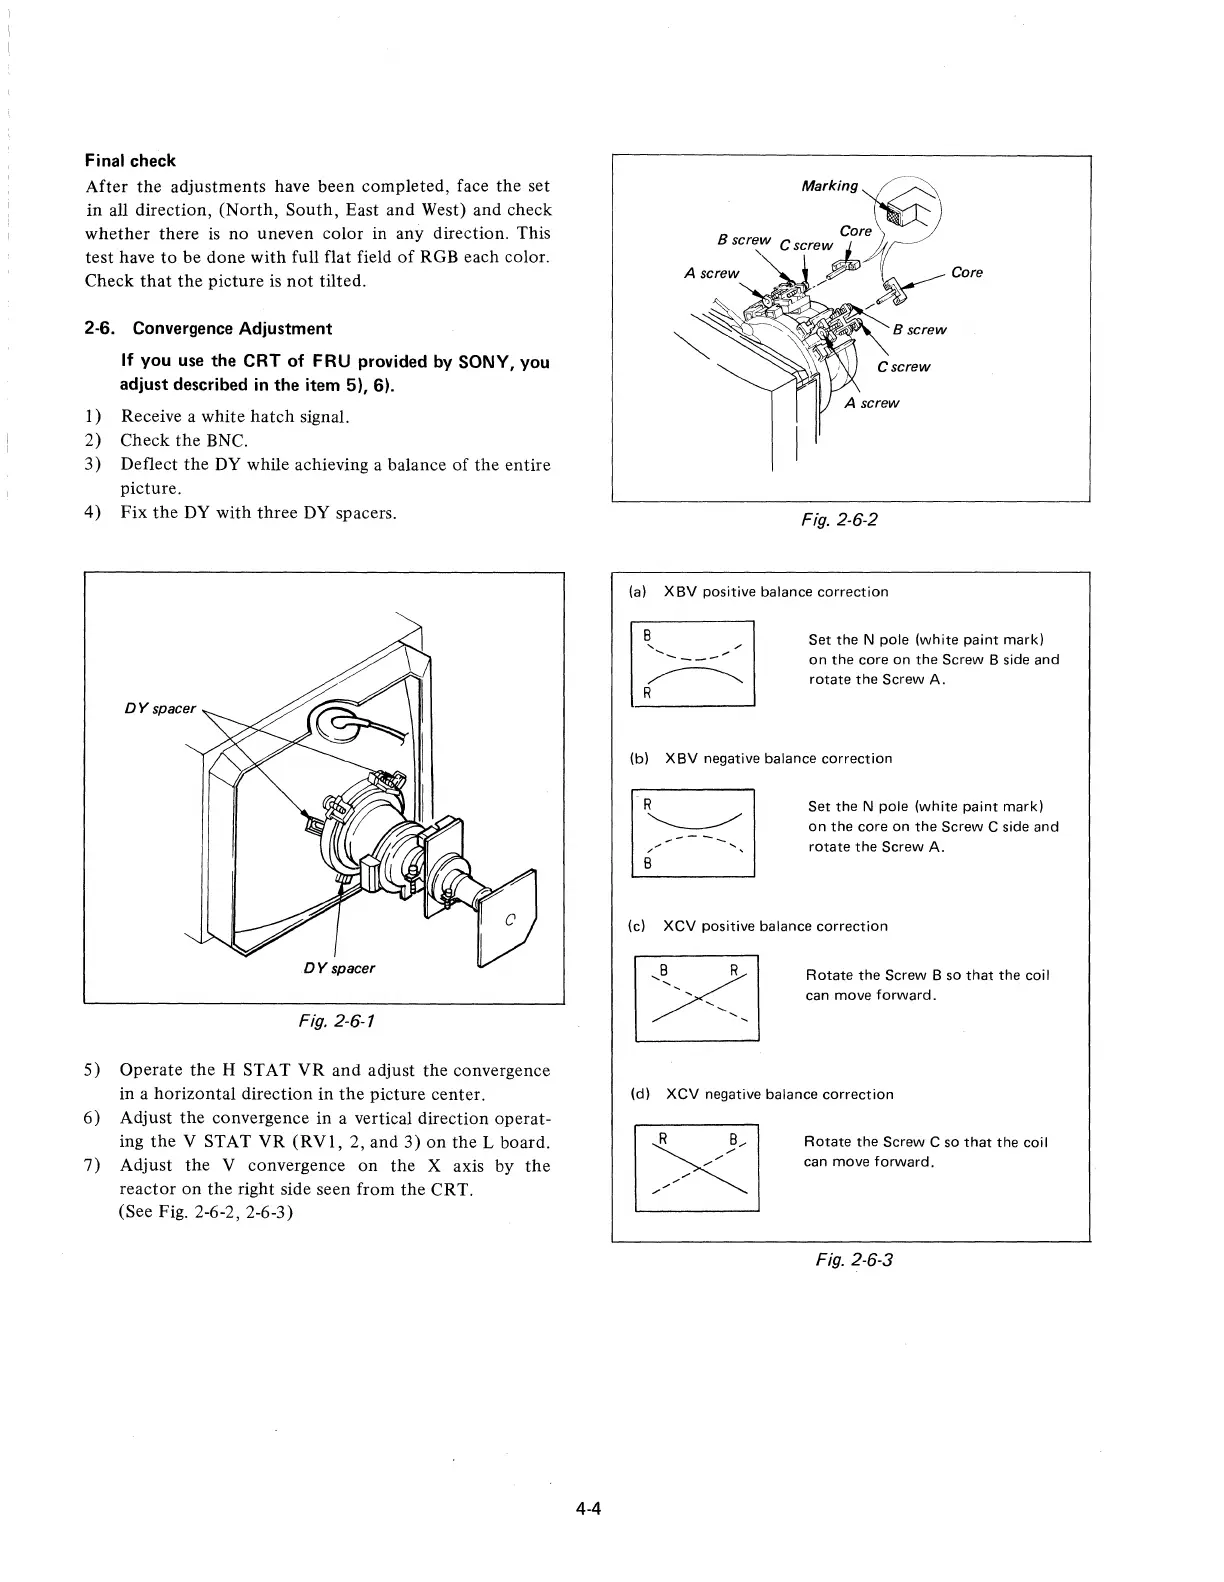
3) Deflect
the
DY while achieving a balance
of
the
entire
picture.
4)
Fix
the
DY
with
three
DY spacers.
DYspacer
Fig. 2-6-1
5)
Operate
the
H STAT
VR
and adjust
the
convergence
in a horizontal direction
in
the
picture center.
6)
Adjust
the
convergence
in
a vertical direction operat-
ing
the
V STAT
VR
(RVI,
2, and 3)
on
the L board.
7)
Adjust
the
V convergence on
the
X axis by
the
reactor
on
the
right side seen from
the
CRT.
(See Fig. 2-6-2, 2-6-3)
4-4
Marking~
Core
Bwrew Crerow
~
~)
A
~row'
~
Core
,-
B screw
Fig. 2-6-2
(a) XBV positive balance
correction
Set
the
N pole (white paint mark)
on
the
core
on
the
Screw B side
and
rotate
the
Screw A.
(b)
XBV
negative balance correction
Set
the
N pole (white
paint
mark)
on
the
core
on
the
Screw C side
and
rotate
the
Screw A.
(c)
XCV
positive balance
correction
Rotate
the
Screw B so
that
the
coil
can move
forward.
(d)
XCV negative balance
correction
Rotate
the
Screw C so
that
the
coil
can move
forward.
Fig. 2-6-3
 Loading...