10
R
EFERENCE
& I
NSTALLATION
M
ANUAL
2.8 PROGRAMMABLE OUTPUT CONNECTIONS
The Spectra Series control panels include one or more programmable outputs (PGMs).
When a specific event occurs in the system, a PGM can reset smoke detectors, activate
strobe lights, open/close garage doors and much more. PGM1 provides a maximum
150mA output and PGM2 provides up to 2.5A and can be used as a strobe output (see
page 40). PGM2 is limited by the power source being used. If powered by the
BELL
+
terminal, the combined current consumption of the bell output and PGM2 must not
exceed 2.5A. If it is powered by the aux.+, the devices connected to the auxiliary power
supply and PGM2 must not exceed 1.1A. If it is powered by an external device, PGM2
can supply 2.5A. If the current draw on the PGM is to exceed the current output, we
recommend the use of a relay as shown in Figure 2-2. For details on how to program the
PGM, refer to PGM Programming on page 39.
2.9 ALARM RELAY
The Spectra 1758 and 1758EX control panels have an optional 5A relay. This relay can be connected as shown in
Figure 2-1B on page 8. Please note that the Alarm Relay can be programmed to follow the bell output or the
activation and de-activation of the Global PGM (see Alarm Relay Options on page 40).
2.10 KEYSWITCH CONNECTIONS
Keyswitches allow users to arm or disarm a partition by pushing button or by activating a
switch with a key. You must enable zone 2 as a Keyswitch Zone (see page 22), connect
the keyswitch to zone input terminal 2 as shown in Figure 2-3 and program the Keyswitch
Options as described on page 24.
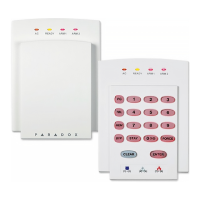
2.11 KEYPAD INSTALLATION
To connect the keypads to the control panel, remove the back cover and wire the GRN, YEL, RED, and BLK terminals of
each keypad to the corresponding terminals on the control panel as shown in Figure 2-1A on page 7. There is no limit to
the number of keypads that can be connected to the control panel so long as the current consumption does not surpass
the maximum current consumption of the control panel's Auxiliary Power Terminals (see page 9). For information on
Keypad Tamper Supervision refer to page 42 and for information on Keypad Zone Connections refer to page 10.
2.12 KEYPAD ZONE CONNECTIONS
Each keypad has one zone input terminal, allowing you to connect one motion detector or door contact directly to a
keypad. The keypad can then communicate the status of the zone to the control panel. A maximum of two keypad
zones can be used with each control panel. After connecting the device as shown in Figure 2-1A on page 7, the
zone's parameters must be defined. For details on zone recognition and Zone Programming refer to page 20.
Example: A door contact located at the entry point of an establishment can be wired directly to the input terminal of
the entry point keypad instead of wiring the door contact all the way to the control panel.
If there are more than 2 keypads connected to the control panel and at least one keypad zone is being used,
connect as shown in Figure 2-4 and program as follows:
•
Do not
exceed the control panel’s maximum current consumption.
•
Do not
place a jumper across the zone and “blk” terminals of all keypads that are not using their keypad zone.
• Make sure that “Keypad Zone Sending” is enabled on all 1641 LCD Keypads. To do so:
Step 1: Press and hold the [0] key for two seconds to enter the keypad’s programming mode.
Step 2: Enter the [
KEYPAD
CODE
]. Default: 000000
Step 3: Press the [2] key (“Options”) or use the arrow keys to scroll to option [2] (“Options”) and then press the
[
ENTER
] key.
Step 4: Make sure option [1] (“Keypad Zone Sending”) is enabled. If it is not enabled, press the [1] key to enable
the option and then press [
ENTER
].
Figure 2-2: PGM
gure
-
:
eysw
c