15
The Model Name function allows you to name a model using up to 10 characters.
This makes identifying and selecting models much easier. Naming a model is
normally done during initial setup. You can modify or change names at any time
without affecting other programming. Typical model names include Vibe 50 3D,
Extra 300, Blade 400, Sport 40 #1, etc. Note that upper case, lower case, numbers
and symbols are available.
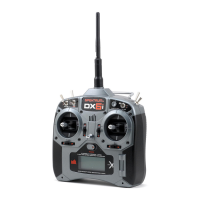
Press and hold the roller while turning on the transmitter. When System Setup
appears on the screen, release the roller. The DX8 is now in System Setup Mode.
Rotate the roller to highlight Model Name then press to access the function.
The following screen appears:
Rotate the roller to highlight the desired character then press to accept.
Repeat the process until complete. The name will display on the main screen.
Pressing will erase the current character.
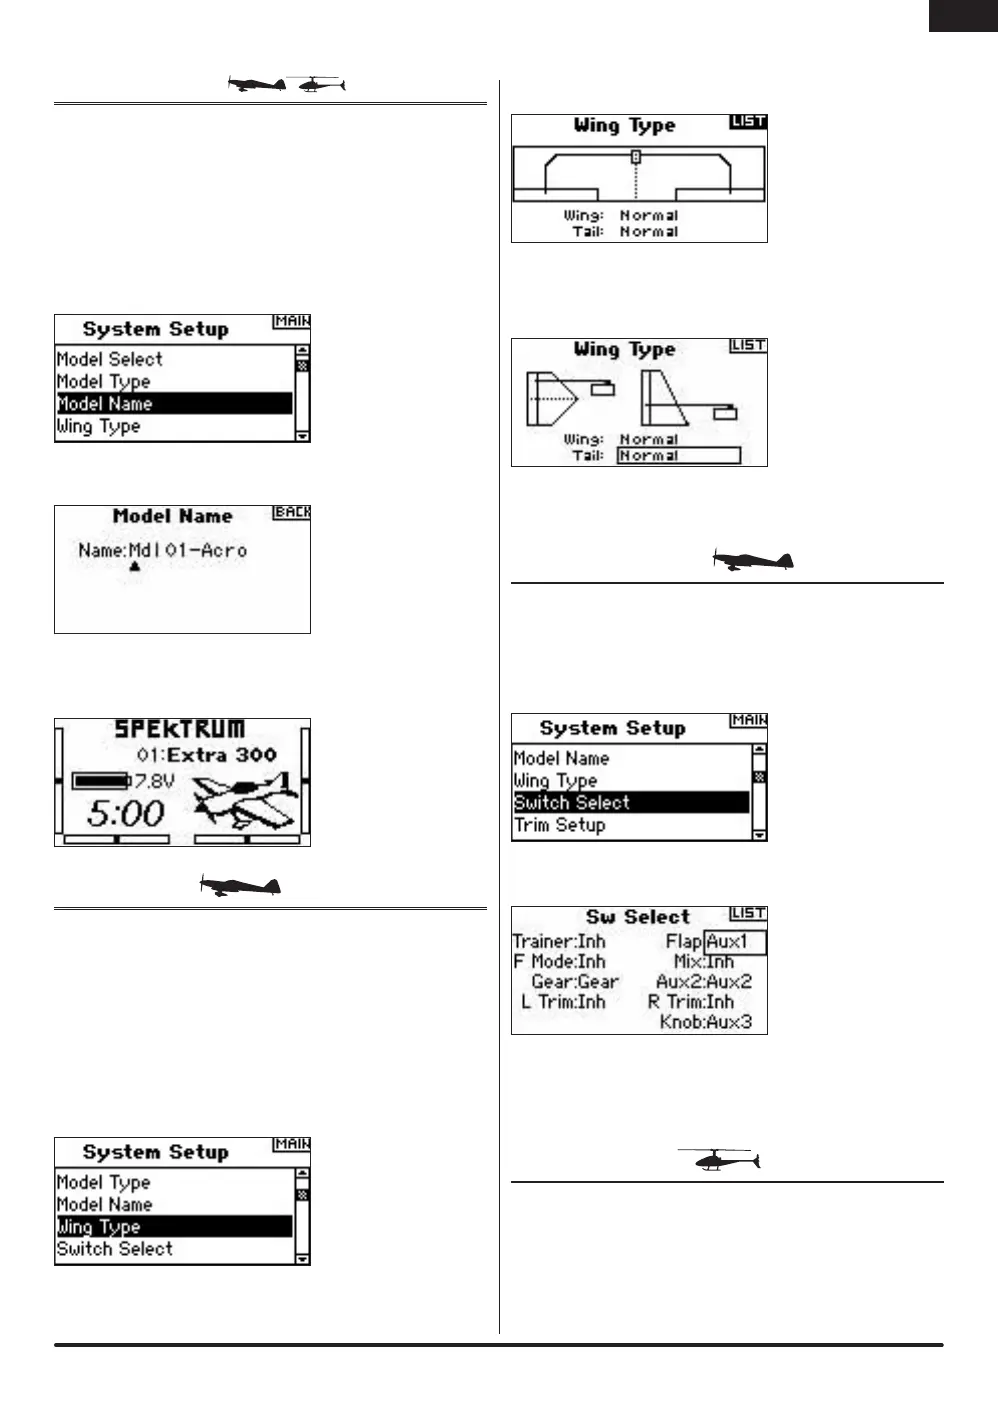
Use the Wing Type function to program the wing and tail mix to match your
airplane. Eight wing types (Normal, elevon, dual aileron, 1 aileron and 1 flap,
flaperon, 1 aileron and 2 flaps, 2 ailerons and 1 flap, 2 ailerons and 2 flaps) and
five tail types (normal, V-Tail, dual elevator, dual rudder, dual rudder/ elevator) are
available. You must select the correct wing and tail type to match your airplane
before doing any other wing or tail related programming (e.g., Flaps, Travel
Adjust, Sub-Trim, etc.).
Press and hold the roller while turning on the transmitter. When System Setup
appears on the screen, release the roller. The DX8 is now in System Setup Mode.
Rotate the roller to highlight Wing Type then press to access the function.
The following screen appears:
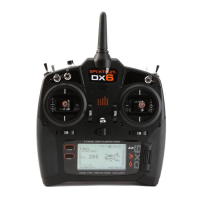
Rotate the roller to highlight Wing and press to access the function. Rotate the
roller to the desired wing mix. Press the roller to select.
Rotate the roller to highlight Tail then press.
Rotate the roller to access the desired tail type. Press the roller to select.
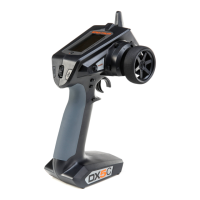
The Switch Select function allows the switches, knob and right and left trimmers
to be assigned to the gear, Aux1, Aux2 or Aux3 channels or inhibit.
Press and hold the roller while turning on the transmitter. When System Setup
appears on the screen, release the roller. The DX8 is now in System Setup Mode.
Rotate the roller to highlight the desired switch, knob or trimmer then press the
roller to access.
Rotate the roller to select the desired channel or function you wish the switch,
knob or trimmer to operate. Press the roller to accept. Note that the channel or
function can only be assigned once.
Repeat to select all desired switch positions.
Use the Swash Type screen to program the swashplate mix to match your
helicopter swashplate type. Six swashplate types are available: Normal, 3-servo
120 CCPM, 3-servo 140 CCPM, 3-servo 90 CCPM, 3-servo 135 CCPM, and
2-servo 180 CCPM. Select the correct swashplate type to match the specific
helicopter before doing any other cyclic programming e.g., Pitch Curve, Travel
Adjust, Sub-Trim, etc.). If in doubt consult your helicopter’s manual for correct
swashplate mixing.
EN