28
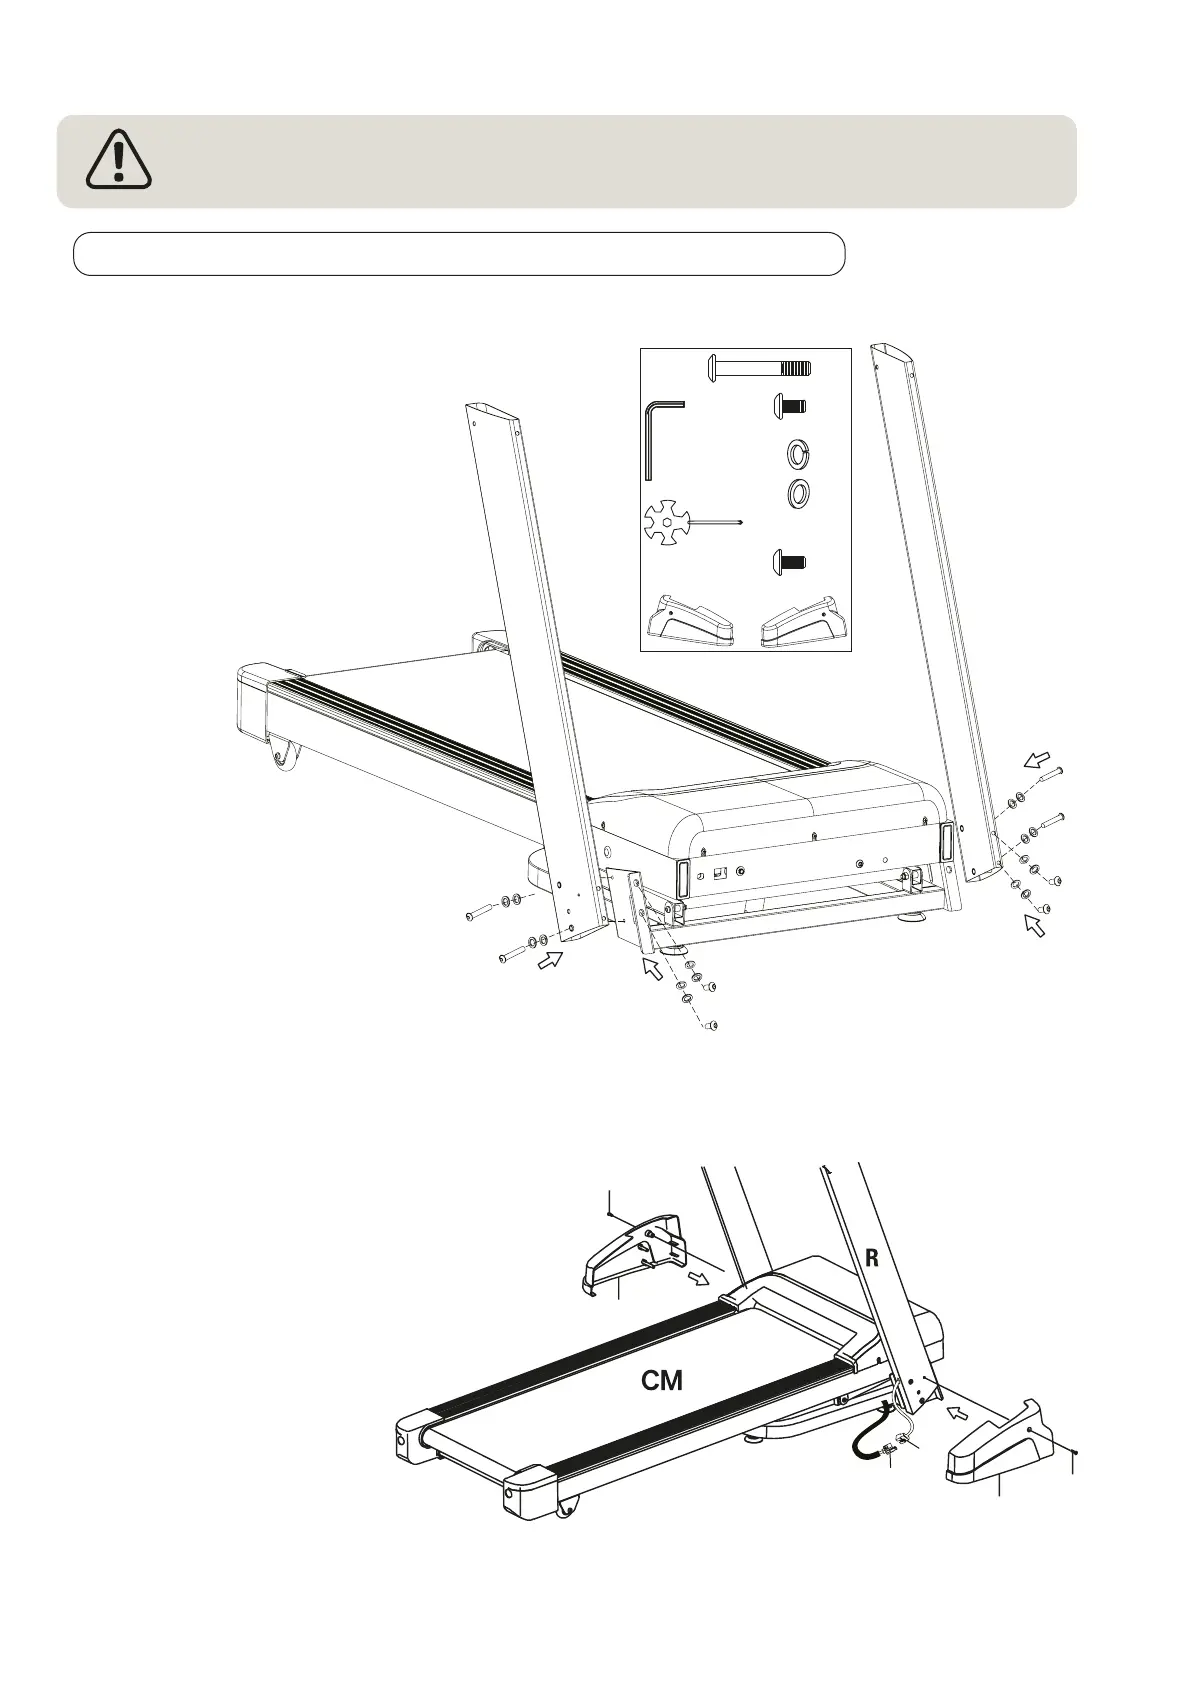
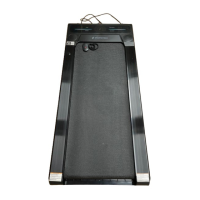
4.1 BASE FRAME WITH SUPPORT BARS & COVERS
• Tighten all individual parts and pre-assembled parts!
• Check the firmness again before each training session!
4. Assembling
B
B
B
B
A
A
A
A
J
D
J
D
J
D
J
D
J
J
J
D
D
D
R
L
J
D
A
B
D
J
4 x
4 x
8 x
8 x
Hex
Mul
H I
C
2 x
If possible, have a second person help you with this step.
• Hold the right-hand retaining bar ('R') with the
flat side against the retaining plate at
the bottom of the base frame -
so that all the drill holes in the
retaining bar and retaining plate
match up.
• Prepare the screw connections:
First slide a washer ('J') and a spring
washer ('D') onto each of four long
screws ('A') and four short screws
('B').
• Fasten the
retaining
bar with
two long
and two
short screw
connections:
Screw in the screw
connections with a 6 mm
Allen key (Hex) .
• Repeat these three substeps
for the left hand retaining bar
('L').
• Check the tightness of the screw
connections.
• Open the knot in the cable which comes out of the right
retaining bar's lower end. Make sure the cable does not slip
into the retaining bar.
• Join the female connector ('X2') of the retaining
bar's ('R') cable with the male connector ('X1')
from the main frame ('CM'). Make sure they are
locked together.
• Push the connection and a part of the
protective hose carefully into the retaining
bar's drill hole.
• Put the covers ('H' and 'I') on the lower
end of the retaining bars.
• Fasten the covers with
one cross-head screw
each ('C'). Use the
multifunction key ('Mul').
H
I
C
C
X1
X2