GEOFENCING
The Geofencing button opens a drop-down menu that
includes the following options: Create Geofencing Area
and View/Delete Geofences. The Geofences define
parameters to which the assigned Driver/Vehicle is
permitted to drive. If the Driver/Vehicle exits the
parameters, an alert will be sent as specified in the
CHANGE SETTINGS options. When using the drop down
menus, click the option to access a pop up screen that
allows for preference changes.
Create Geofencing Area
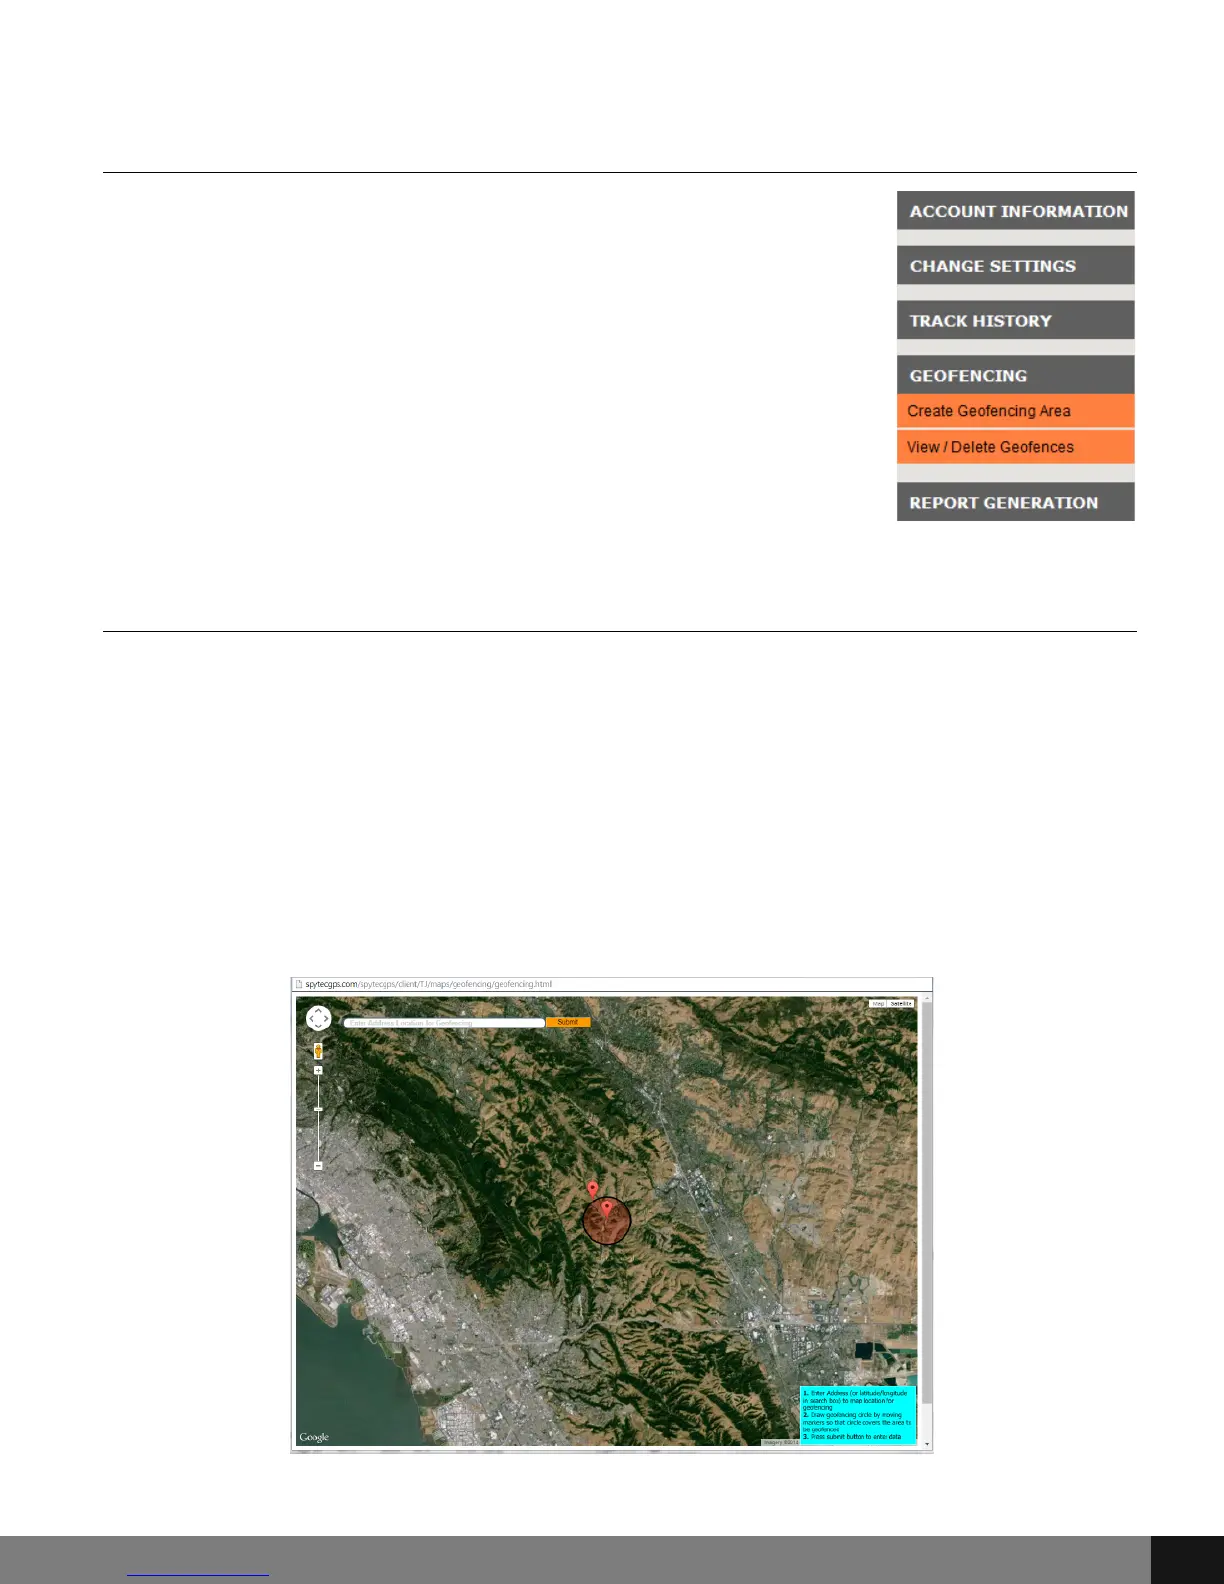
To create a Geofencing area, click on the Geofencing menu option and then
click Create Geofencing Area from the drop-down menu. A pop-up with Real
Time map will appear with instructions to the bottom right of the screen:
1. Enter Address (or latitude/longitude in search box) to map location
for geofencing.
2. Draw geofencing circle by moving markers so that circle covers the
area to be geofenced.
3. Press submit button to enter data.
Spy Tec www.spytecinc.comSpy Tec www.spytecinc.com 18