Do you have a question about the SRAM RockShox SEKTOR and is the answer not in the manual?
SRAM's warranty statement for its products, covering defects in materials and workmanship.
Explains how local laws may affect warranty rights for consumers.
Specific warranty information for customers in Australia.
Limits SRAM's liability for indirect, special, or consequential damages.
Details conditions under which the warranty is voided.
Steps for preparing components before servicing, including cleaning.
General guidelines for performing service procedures on RockShox products.
Lists necessary RockShox Sektor 200 Hour Service Kit and other components.
Lists essential safety gear like gloves, glasses, and cleaning supplies.
Details the specific lubricants and suspension oils required for service.
Lists specialized RockShox tools needed for maintenance.
Lists general bicycle tools that may be used during service.
Lists common tools such as hex wrenches and sockets.
Emphasizes wearing safety gear and protecting the work area.
Outlines maintenance tasks based on service hours (every ride, 50, 200 hours).
Provides a table to log suspension settings and service dates for tracking.
Lists specific torque specifications for various fork components.
Details oil types, weights, and volumes for the damper assembly.
Details oil and grease types, weights, and volumes for the spring assembly.
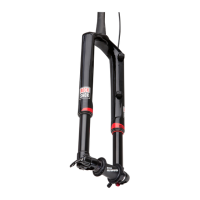
Identifies key components of the 80-120mm Sektor fork assembly.
Identifies key components of the 130-150mm Sektor fork assembly.
Step-by-step instructions for removing the lower leg assembly.
Directs the user to the next step for 50-hour service.
Directs the user to the next step for 200-hour service.
Instruction on removing foam rings from the lower leg.
Guidance on cleaning or replacing foam rings.
Steps for cleaning the internal and external surfaces of the lower leg.
Instruction on installing new foam rings correctly under wiper seals.
Directs the user to the final step of lower leg assembly.
Steps to remove and discard existing foam rings and wire springs.
Guidance on stabilizing the lower leg for seal removal.
Instructions for cleaning the lower leg before installing new seals.
How to prepare new foam rings by soaking them in suspension oil.
Steps for removing the wire spring from new dust wiper seals.
Instructions for installing new wiper seals using a specific tool.
Ensures wiper seals are seated flush without compressing the foam ring.
Instruction for installing the outer wire springs back into the seals.
Steps for disassembling the air spring assembly.
Critical safety warning regarding air pressure and eye protection.
Reminder to inspect components for scratches that can cause leaks.
Instruction to remove the top cap and clean threads.
Procedure for replacing the O-ring on the air spring top cap.
Step for inserting the air shaft into the upper tube.
Warning against scratching the air shaft to prevent air leaks.
Guidance on removing the retaining ring securing the air spring assembly.
Method for pulling the air spring shaft out using a bolt.
Final steps to remove the air spring assembly.
Specific disassembly steps for 80-120mm travel shafts.
Specific disassembly steps for 130-150mm travel shafts.
Warning about scratches on the air spring shaft causing leaks.
Steps for replacing O-rings on the air piston.
Warning against scratching the air piston to prevent leaks.
Steps for replacing O-rings on the seal head.
Warning against scratching the seal head to prevent leaks.
Detailed instructions for greasing and installing new O-rings.
Instructions for cleaning the upper tube after air spring removal.
Warning about scratches on the upper tube causing air leaks.
Explains how to change fork travel and use Bottomless Tokens.
Chart detailing travel options, spacers, and token limits for DebonAir.
Visual guide showing configurations for different fork travel settings.
Step-by-step guide for installing Bottomless Tokens into the air spring.
Introduction to optional travel changes and part ordering.
Instructions for applying grease to the inside of the upper tube.
Step for installing the top out bumper on the shaft.
Instructions for applying grease to the air spring shaft.
Specific installation steps for spacers on 80-120mm shafts.
Specific installation steps for spacers on 130-150mm shafts.
Steps for installing washers and springs on 130-150mm shafts.
Guide for inserting the assembled air spring into the upper tube.
Step to connect the air shaft to the base plate.
Instructions for correctly installing the retaining ring using pliers.
Procedure for adding the specified amount of oil to the air spring.
Final steps to install and torque the air spring top cap.
Steps for removing the damper assembly from the fork.
Instruction to remove the adjuster knob or remote spool.
Specific instruction for 2019 RL R models.
Step for removing the lower remote spool.
Specific instruction for 2020 RL R models.
Instruction to remove the remote spool.
Steps for unthreading and removing the top cap.
Procedure for carefully removing the compression damper.
Warning against forcing the damper to prevent piston separation.
Step to drain the suspension oil from the fork into an oil pan.
Securing the fork to the work stand for rebound shaft removal.
Instructions for removing the retaining ring from the rebound shaft.
Warning about scratching the rebound shaft causing leaks.
Step to pull the rebound shaft to its full extension.
Final steps for removing the rebound damper and seal head.
Instructions for cleaning the upper tube after damper service.
Warning about scratches on the upper tube causing oil leaks.
Steps for servicing the compression damper components.
Instructions for replacing O-rings on the compression damper.
Step to remove the bottom bolt from the damper shaft.
Instruction to remove the seal head from the damper shaft.
Steps for cleaning and inspecting the damper shaft for damage.
Warning about scratches on the damper shaft causing oil leaks.
Instructions for replacing O-rings on the seal head.
Steps for removing and installing a new glide ring.
Procedure for installing the seal head onto the rebound damper shaft.
Steps for installing the rebound damper assembly.
Instruction to insert the rebound damper piston and seal head.
Steps for securing the rebound damper shaft with a bottom bolt.
Instructions for installing the retaining ring for the rebound damper.
Warning about scratching the rebound shaft causing leaks.
Final steps to extend the shaft and remove the bolt.
Steps for installing the compression damper assembly.
Procedure for adding the specified oil volume for the compression damper.
Emphasizes the importance of correct oil volume for performance and fork safety.
Instruction to open the compression valve using the adjuster knob.
Steps for inserting the compression damper into the upper tube.
Steps to thread and torque the compression damper top cap.
Specific lubrication steps for RL model top cap.
Specific installation of the adjuster knob for RL models.
Final step to secure the adjuster knob with a retaining screw.
Specific installation of the cable stop collar for 2019 RL R.
Instruction to tighten the set screw for the cable stop collar.
Steps for installing the lower remote spool on 2019 RL R.
Instructions for installing the spool retaining screw.
Specific installation of the cable stop collar for 2020 RL R/TK R.
Warning against overtightening the set screw to prevent thread damage.
Specific installation steps for the remote spool on 2020 RL R/TK R.
Final step to secure the remote spool with a retaining screw.
Steps for installing the lower leg assembly onto the fork.
Instruction to clean the upper tubes before assembly.
Procedure for saturating foam rings with suspension oil.
Instructions for applying grease to the inner surfaces of wiper seals.
Guide for sliding the lower leg assembly onto the upper tubes.
Warning to ensure wiper seals do not fold during installation.
Correct fork orientation for injecting lower leg oil.
Procedure for injecting the specified oil volume into each lower leg.
Warning against overfilling the lower legs with oil.
Final step to slide the lower leg assembly fully into place.
Steps for removing old and installing new crush washers and retainers.
Warning about damaging bolt threads during crush washer replacement.
Warning against reusing old or damaged crush washers.
Instruction to install the correct bolt on the spring side.
Instruction to install the correct bolt on the damper side.
Lubrication steps for the rebound adjuster knob and bolt.
Steps for installing the rebound adjuster knob.
Instructions for setting the air spring pressure using recorded settings or charts.
Process of compressing the fork to equalize air chambers.
Final step to install the air valve cap.
Instruction to clean the entire fork after service.
| Type | Fork |
|---|---|
| Damper Type | Motion Control |
| Brake Compatibility | Disc |
| Travel | 140mm |
| Wheel Size | 27.5", 29" |
| Steerer | Tapered |
| Axle | 15mm Thru-Axle |