Do you have a question about the ST STM32 Nucleo-64-P and is the answer not in the manual?
Step-by-step guide to quickly evaluate and start development with the board.
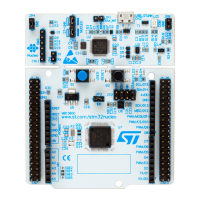
Detailed top view layout of the STM32 Nucleo-64-P board components.
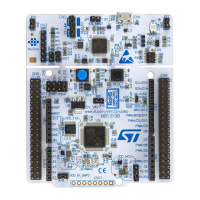
Physical dimensions and layout of the STM32 Nucleo-64-P development board.
Specifies the default jumper settings and VDD@1.8V configuration for the board.
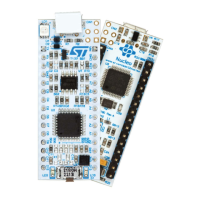
Information on dividing the board into ST-LINK and target STM32 sections.
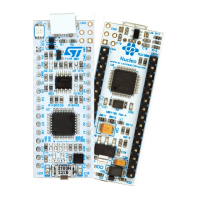
Details on the integrated ST-LINK/V2-1 debugger/programmer.
Instructions for installing the necessary USB drivers for the ST-LINK/V2-1.
Guidance on keeping the ST-LINK/V2-1 firmware up to date.
How to use the embedded ST-LINK/V2-1 for on-board STM32 programming.
How to use the embedded ST-LINK/V2-1 for external STM32 programming.
Configuration options and capabilities for powering the Nucleo-64-P board.
Details on various external power sources that can be connected to the board.
Information on using board pins as output power supplies for shields.
Explanation of the Switched-Mode Power Supply (SMPS) features.
Procedure for programming/debugging when not using the ST-LINK 5V source.
Overview of the low-speed and high-speed clock sources available on the board.
Configuration options for the low-speed external crystal oscillator.
Configuration options for the high-speed external crystal oscillator.
Identifies the different signals that can trigger a reset on the board.
Details on using the UART interfaces for virtual COM port communication.
Description of the four LEDs on the board and their functions.
Information about the user and reset push buttons on the board.
How to use the jumper JP6 for measuring current consumption.
Detailed settings for various jumpers on the board.
Explains the configurations and settings for the board's solder bridges.
Details of the USB Micro-B connector for PC programming and debugging.
Information on the Arduino Uno V3 compatible connectors for shields.
Details of the ST morpho connectors for accessing all signals and power pins.
Information on the external power connector for Vcore logic and VDD_MCU.
| Ethernet | No |
|---|---|
| Microcontroller | STM32 |
| Core | ARM Cortex-M |
| Operating Voltage | 3.3V |
| Input Voltage | 7-12V |
| Communication Interfaces | SPI, I2C |
| SRAM | Varies by STM32 variant |
| Clock Speed | Varies by STM32 variant |
| USB | Yes |
| Arduino Compatibility | Yes |
| ST Morpho Headers | Yes |
| On-board Debugger | ST-LINK/V2-1 |
| USB Connector | Micro-USB |
| Extension Headers | Arduino Uno Revision 3 connectivity, ST morpho extension pin headers for full access to all STM32 I/Os |