10
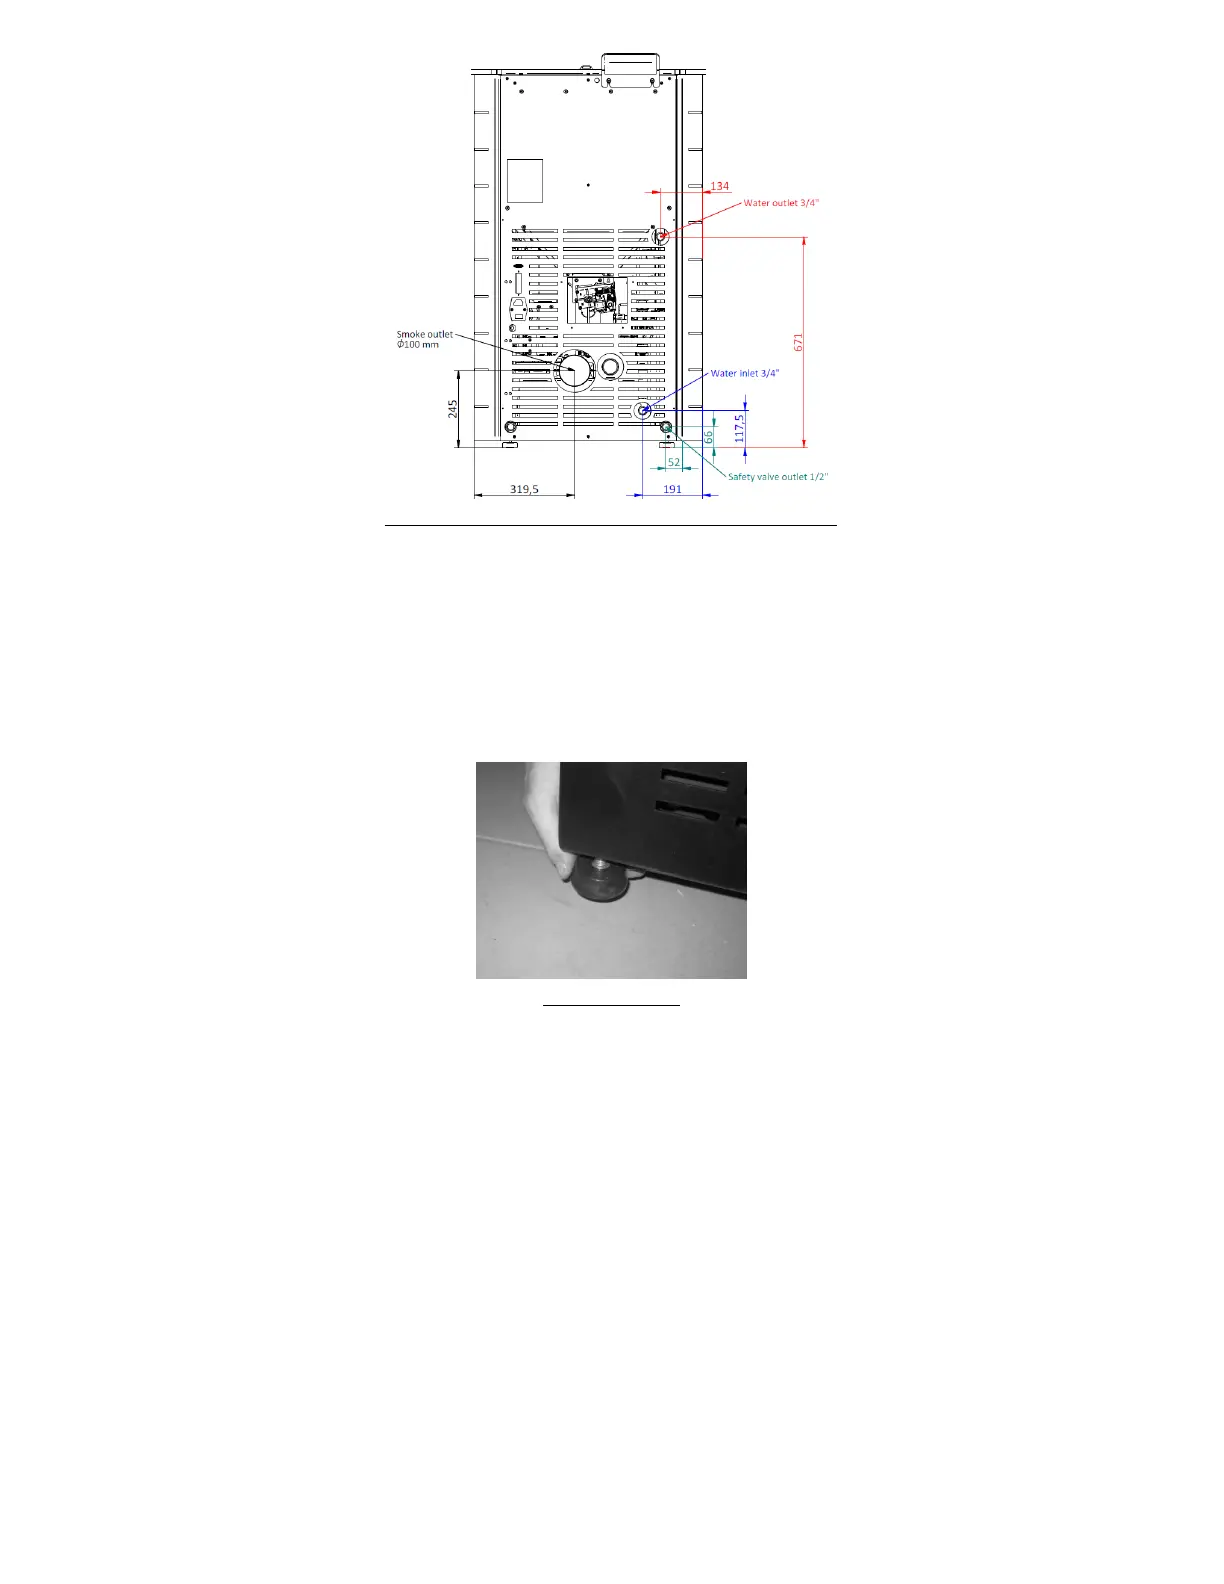
Figure 7 - Hydraulic connections of the free-standing pellet fire unit K2300 (curved)
6. Installing the free-standing pellet fire
Before installing, please perform the following steps:
• Upon receipt, check the product is complete and determine there is no sign of any damage. Any damages or defects should be
checked before the unit is installed;
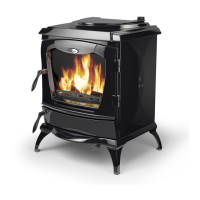
• The unit is equipped with four adjustable height feet at the base which allow for a simple regulation when installed on a non-
flat surface;
Figure 8 - Adjustable feet
• Remove the instruction manual from the package and hand it over to the client;
• Connect an 80mm wide (K1200) or 100mm wide (K1700 or K2300) duct between the combustion gas output and the outgoing
fume extraction duct of the building (e.g., chimney) – check diagrams point 5;
• If a tube is used for combustion air inlet from the outside, it shall be no longer than 60cm horizontally or present offsets (such
as bends);
• Perform the hydraulic installation;
• Connect the 230VAC power cable to a grounded socket;
• The surface of the unit where the hot air outlet is located must be facing the area to be heated;
• As an option, a conventional external programmer may be used (not included) to automatically setup the unit's operating
periods. This should be connected through cable to the optional 230VAC programmer plug (not provided).
6.1. Installation requirements
The minimum distance between the free-standing pellet fire unit and particularly flammable surfaces is specified in Figure 9. The
top of the unit must be at least 100cm separated from the ceiling, especially in rooms with ceilings consisting of flammable