34
THE MAINTENANCE
FAULT (“SERVICE”
MESSAGE ON THE DISPLAY) MEANS THAT THE STOVE HAS MORE THAN 2100 HOURS IN SERVICE. THE CUSTOMER
MUST HAVE THE EQUIPMENT SERVICED AND ONLY THEN RESET THE HOUR METER TO ELIMINATE THE FAULT
MESSAGE. THIS DOES NOT INFLUENCE THE NORMAL OPERATION OF THE EQUIPMENT; IT IS ONLY A WARNING.
WARNING!
TO SWITCH OFF THE APPLIANCE IN AN EMERGENCY, YOU SHOULD NORMALLY SHUT DOWN THE EQUIPMENT.
WARNING!
THE APPLIANCE WILL BE HOT DURING OPERATION, SO THAT CARE SHOULD BE TAKEN ESPECIALLY WITH THE DOOR
GLASS AND THE DOOR HANDLE.
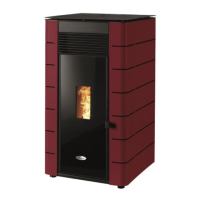
12. Operating the unit
To start operating the Free-Standing Pellet Fire unit, press the start/stop button for 3s. The display should indicate “Lighting”
until this completion of this phase.
The pellets are fed through the supply channel to the burning basket (combustion chamber), where they will be ignited using a
heat resistor. This process may take between 5 and 10 minutes, depending on whether the worm screw used to push through the
pellets has been previously filled with fuel or is empty. Upon completion of the ignition phase, the word “On” should appear on the
display. The heating power can be adjusted at any time by pressing the power selection button for approximately 1 second. You
can choose between five pre-set power levels. The selected power is indicated on the display. The initial power status at each
start-up will correspond to the power level set during the last cycle operation.
Important Note: Before starting up the unit, check to determine if the deflector plate is CORRECTLY positioned.
12.1. Stop
The stop sequence of the unit is started by pressing the start/stop key for 3s. The display will show “Desactivação” (Disabling)
until full completion of this phase. The extractor will remain active until the fume temperature of 40ºC is reached, to guarantee
that all the material has been burnt.
12.2. Turning off the unit
The unit should only be disconnected after its full stop. Make sure that the display shows “Off” before disconnecting the unit. If
necessary, disconnect the power cable from the mains.
13. Instruction for installing the casings
Before installing the casings, you should check immediately whether the packing is complete and in perfect condition, possible
damages or lack of element must be reported and marked before proceeding with its installation.
This manual will demonstrate how to install the casings in the K1200, 17 and 23 equipment’s.
IMPORTANT NOTICE: Before installing the casings, the machine must be switched off (remove the mains plug).
planned for
maintenance
achieved
of the equipment