ENGLISH • 31
9. NEVER run the workpiece between the fence and a
moulding cutterhead.
10. CUTTING THE WORKPIECE WITHOUT THE
USE OF A FENCE OR MITER GAUGE IS KNOWN
AS “FREEHAND” CUTTING. NEVER perform “free-
hand” operations. Use either the fence or miter gauge
to position and guide the workpiece.
11. HOLD THE WORKPIECE FIRMLY against the miter
gauge or fence.
12. CUTTING COMPLETELY THROUGH THE WORK-
PIECE IS KNOWN AS “THROUGH-SAWING”.
Ripping and cross-cutting are through-sawing
operations. Cutting with the grain (or down the length
of the workpiece) is ripping. Cutting across the grain
(or across the workpiece) is cross-cutting. Use a fence
or fence system for ripping. DO NOT use a fence or
fence system for cross-cutting. Instead, use a
miter gauge. USE PUSH STICK(S) for ripping a
narrow workpiece.
13. AVOID AWKWARD OPERATIONS AND HAND
POSITIONS where a sudden slip could cause a hand
to move into the blade.
14. KEEP ARMS, HANDS, AND FINGERS away from the
blade.
15. NEVER have any part of your body in line with the
path of the saw blade.
16. NEVER REACH AROUND or over the saw blade.
17. NEVER attempt to free a stalled saw blade without
first turning the machine “OFF”.
18. PROPERLY SUPPORT LONG OR WIDE workpieces.
19. NEVER PERFORM LAYOUT, assembly or set-up
work on the table/work area when the machine is
running.
20. TURN THE MACHINE “OFF” AND DISCONNECT
THE MACHINE from the power source before
installing or removing accessories, before adjusting or
changing set-ups, or when making repairs.
21. TURN THE MACHINE “OFF”, disconnect the
machine from the power source, and clean the
table/work area before leaving the machine. TURN
THE SWITCH IN THE “OFF” POSITION.
POWER CONNECTIONS
Before connecting the machine to the power line, make
sure the switch (s) is in the “OFF” position and be sure
that the electric current is of the same characteristics as
indicated on the machine. All line connections should
make good contact. Running on low voltage will damage
the machine.
Danger! Do not expose the machine to rain or operate
the machine in damp locations.
Before connecting the machine to the power source, make
sure the switch is in the “OFF” position.
ASSEMBLY
Assembly of the leg stand
When assembling the stand, it is recommended that the
screws are only lightly tightened until the stand is fully
assembled.
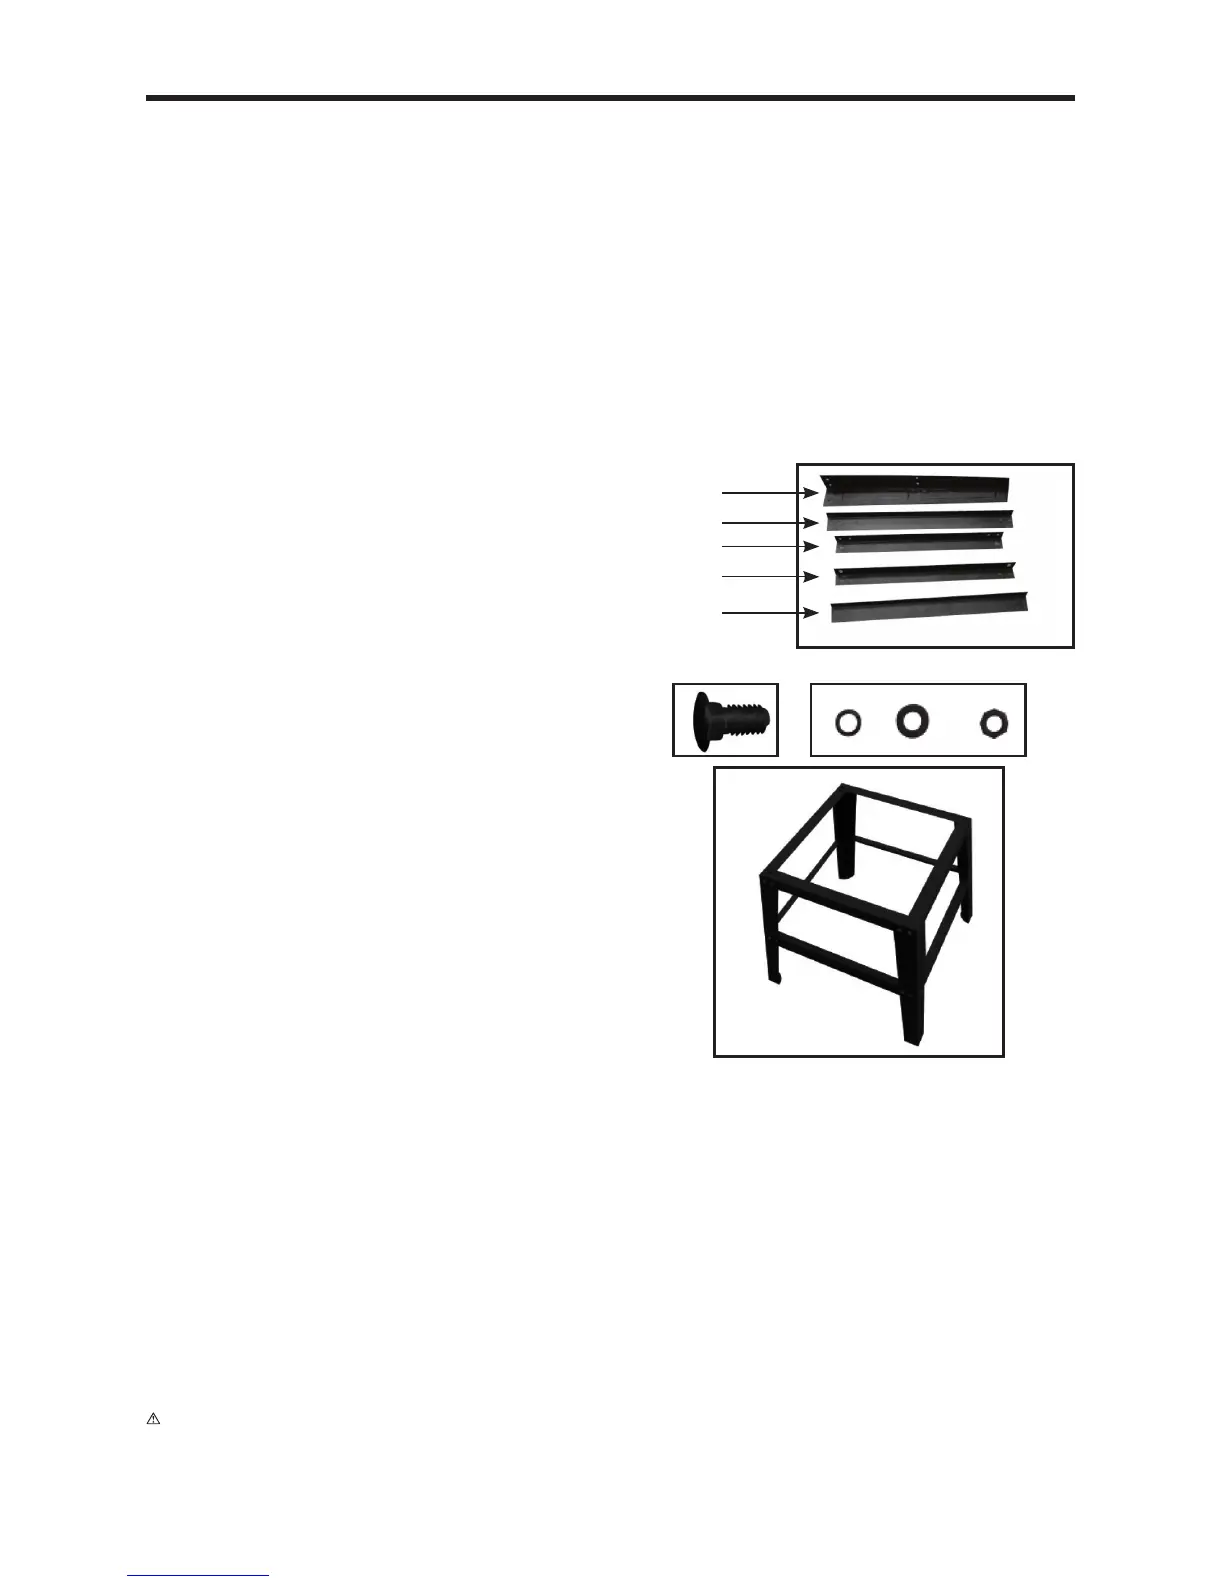
1. Identify the parts and fittings
Before you start the assembly of the stand’s legs, fully
unpack the saw and lay out the individual parts.
Clearly identify the parts shown in Fig. A1 and A2,
including the fittings. Group these parts together and
ensure that you have the correct quantity of all the
pieces shown.
2. Assemble the stand’s legs
Step 1
Select the following parts:
2 x Part 1
1 x Part 3
1 x Part 5
Lay the parts together as shown in Fig. B1, B2, and
B3. This is best done by simply laying the parts
loosely together on the floor. Once you are satisfied
that you have the parts correctly laid together, start
the fitting process.
Align the holes and secure with the bolts (a) as shown
in Fig. B1.
DO NOT fully tighten the bolts, nuts and washers at
this point. Finger tight is sufficient.
Bolt Washer Nut
A1
1 x 4 pieces
2 x 2 pieces
3 x 2 pieces
4 x 2 pieces
5 x 2 pieces
A2
5
5
3
3
1
1
1
1
2
2
4
4