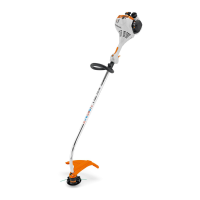
► Insert the pin (8) into the opening in the quick
release clamp (5).
Align the pin (8) so that the notch of the pin is
at the bottom.
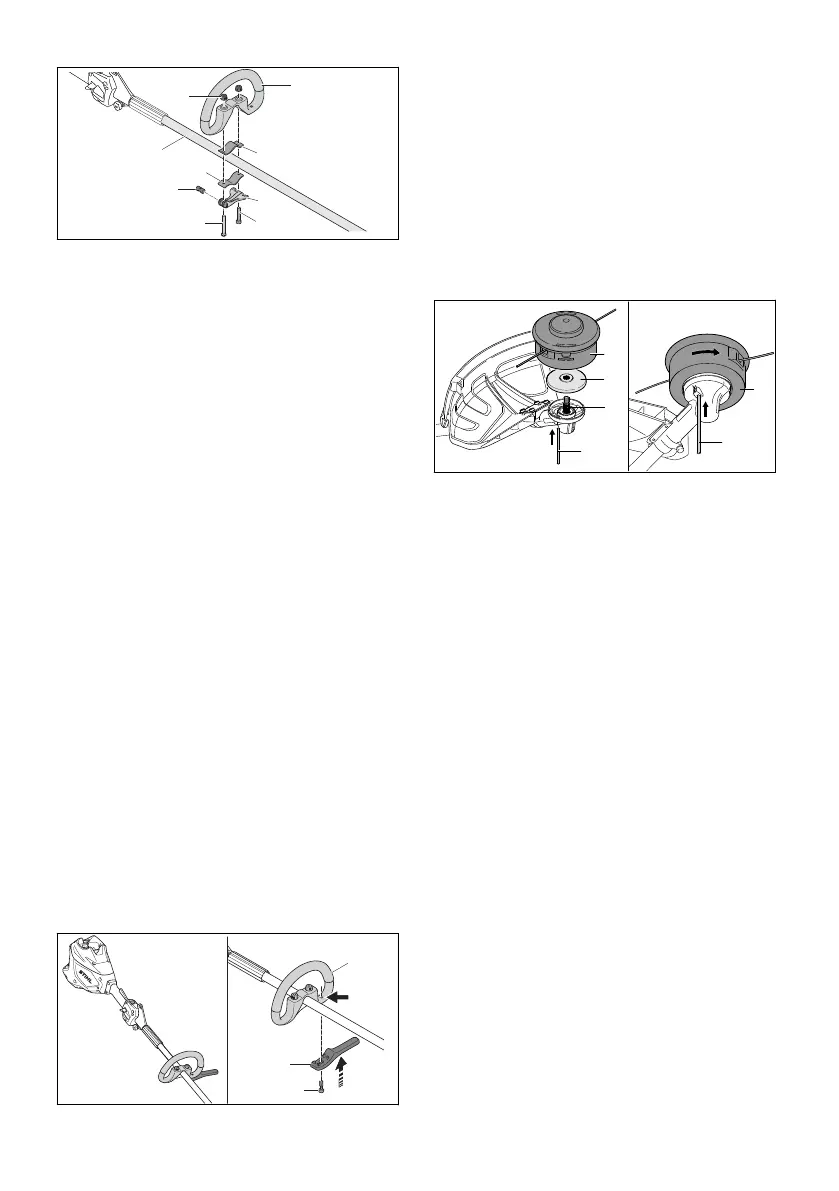
► Place the clamp (3) in the loop handle so that
the holes are aligned.
► Place the loop handle (2) with clamp (3) on the
shaft (9).
► Insert the long screw (7) through the holes in
the pin and quick release clamp (5).
► Press the clamp (4) against the shaft so that
the holes are aligned.
► Insert the short screw (6) through the holes.
► Insert the long screw (7) through the holes.
► Screw on the knurled nuts (1).
► Close the quick release clamp (5).
The loop handle (2) is properly adjusted if it can
no longer be moved.
► If the loop handle (2) can be moved:
► Open the quick release clamp (5).
► Tighten the knurled nuts (1).
► Close the quick release clamp (5).
The loop handle (2) can no longer be
moved.
► If the quick release clamp (5) cannot be
closed:
► Open the quick release clamp (5).
► Loosen the knurled nuts (1).
► Close the quick release clamp (5).
The loop handle (2) can no longer be
moved.
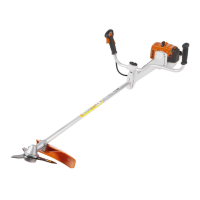
7.4 Attaching the barrier bar
► Switch off the brushcutter and remove the bat‐
tery.
► Place the barrier bar (2) on the loop han‐
dle (3).
The barrier bar should close flush with the
loop handle.
► Screw in and securely tighten the screw (1).
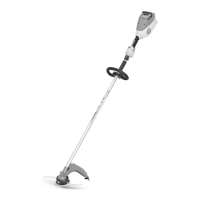
7.5 Mounting and Removing the
Mowing Head
7.5.1 Mounting the Mowing Head
► Switch off the brushcutter and remove the bat‐
tery.
► Place the thrust plate (2) on the shaft (3) so
that its smaller diameter faces up.
► Fit the mowing head (1) on the shaft (3) and
turn it counterclockwise by hand.
► Insert the stop pin (4) in the bore up to the limit
stop and hold it depressed.
► Turn the mowing head (1) counterclockwise
until the stop pin (4) engages in position.
The shaft (3) is now blocked.
► Tighten down the mowing head (1) firmly by
hand.
► Remove the stop pin (4).
7.5.2 Removing the Mowing Head
► Switch off the brushcutter and remove the bat‐
tery.
► Insert the stop pin in the bore up to the limit
stop and hold it depressed.
► Rotate the mowing head until the stop pin
engages in position.
The shaft is now blocked.
► Unscrew the mowing head clockwise.
► Remove the thrust plate.
► Remove the stop pin.
7.5.3 Mounting the Metal Cutting Attach‐
ment
► Switch off the brushcutter and remove the bat‐
tery.
7 Assembling the Trimmer English
0458-027-0101-A 15
 Loading...