9
Aufstellen und
Bedienungshinweise
Installation and
operating instructions
Montaje e
instrucciones operativas
KARL STORZ AIDA
®
control und OR1™ con-
trol verbinden
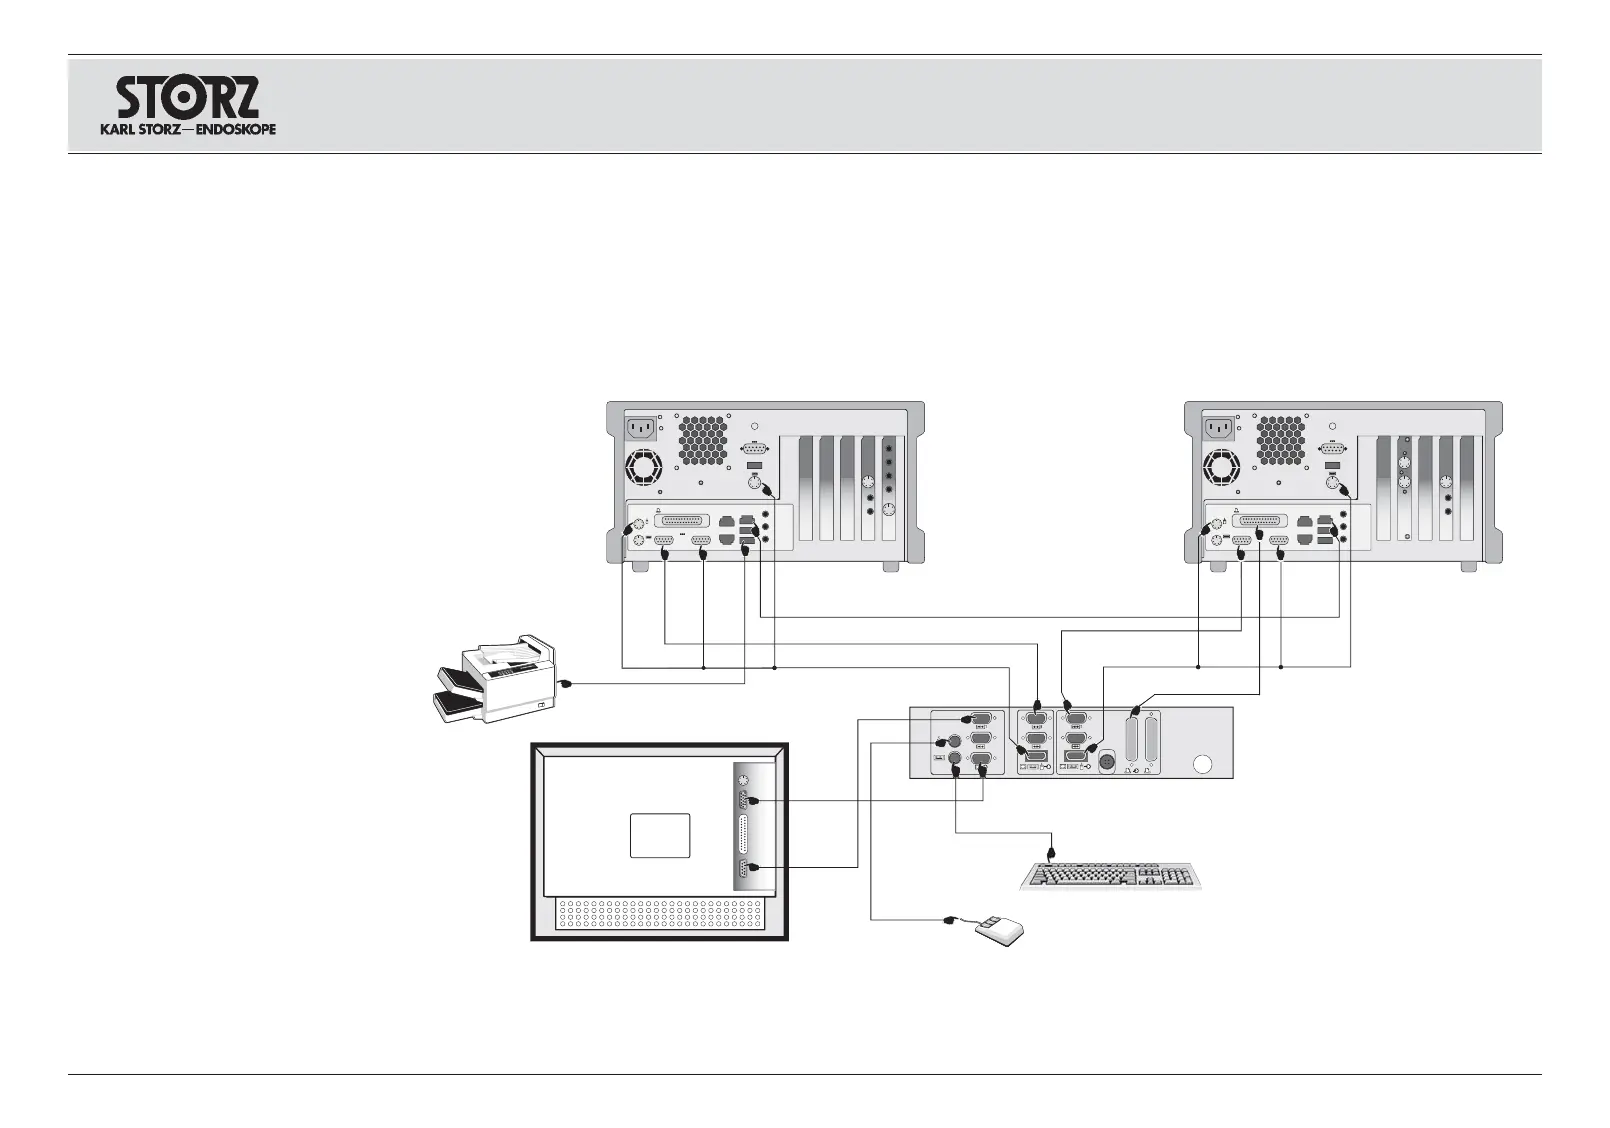
Das Schnittstellengerät, die beiden
Steuerrechner und die Ein-/ Ausgabegeräte
anhand nachstehender Zeichnung mit den beilie-
genden Kabeln verbinden.
Connecting the KARL STORZ AIDA
®
control
and OR1™ control
Connect the interface box, the two control com-
puters and the input/output devices with the
enclosed cables, as shown in the diagram below.
Conectar KARL STORZ AIDA
®
control y OR1™
control
Conecte con los cables adjuntos el aparato de
interfaz, ambos ordenadores y los aparatos de
entrada y salida, conforme se detalla en el
esquema siguiente a modo.
Hinweis: Der Drucker muss gemäß
IEC 60601-1 durch einen Trenn-Transformator
von der Versorgungsspannung getrennt sein.
Note: In accordance with IEC 60601-1, the
printer must be disconnected from the power
supply via an isolation transformer.
Nota: Según la norma CEI 60601-1, la impre-
sora debe estar separada de la tensión de ali-
mentación de la red por un transformador
aislante.