13
English
12
6.1 Getting Started
(
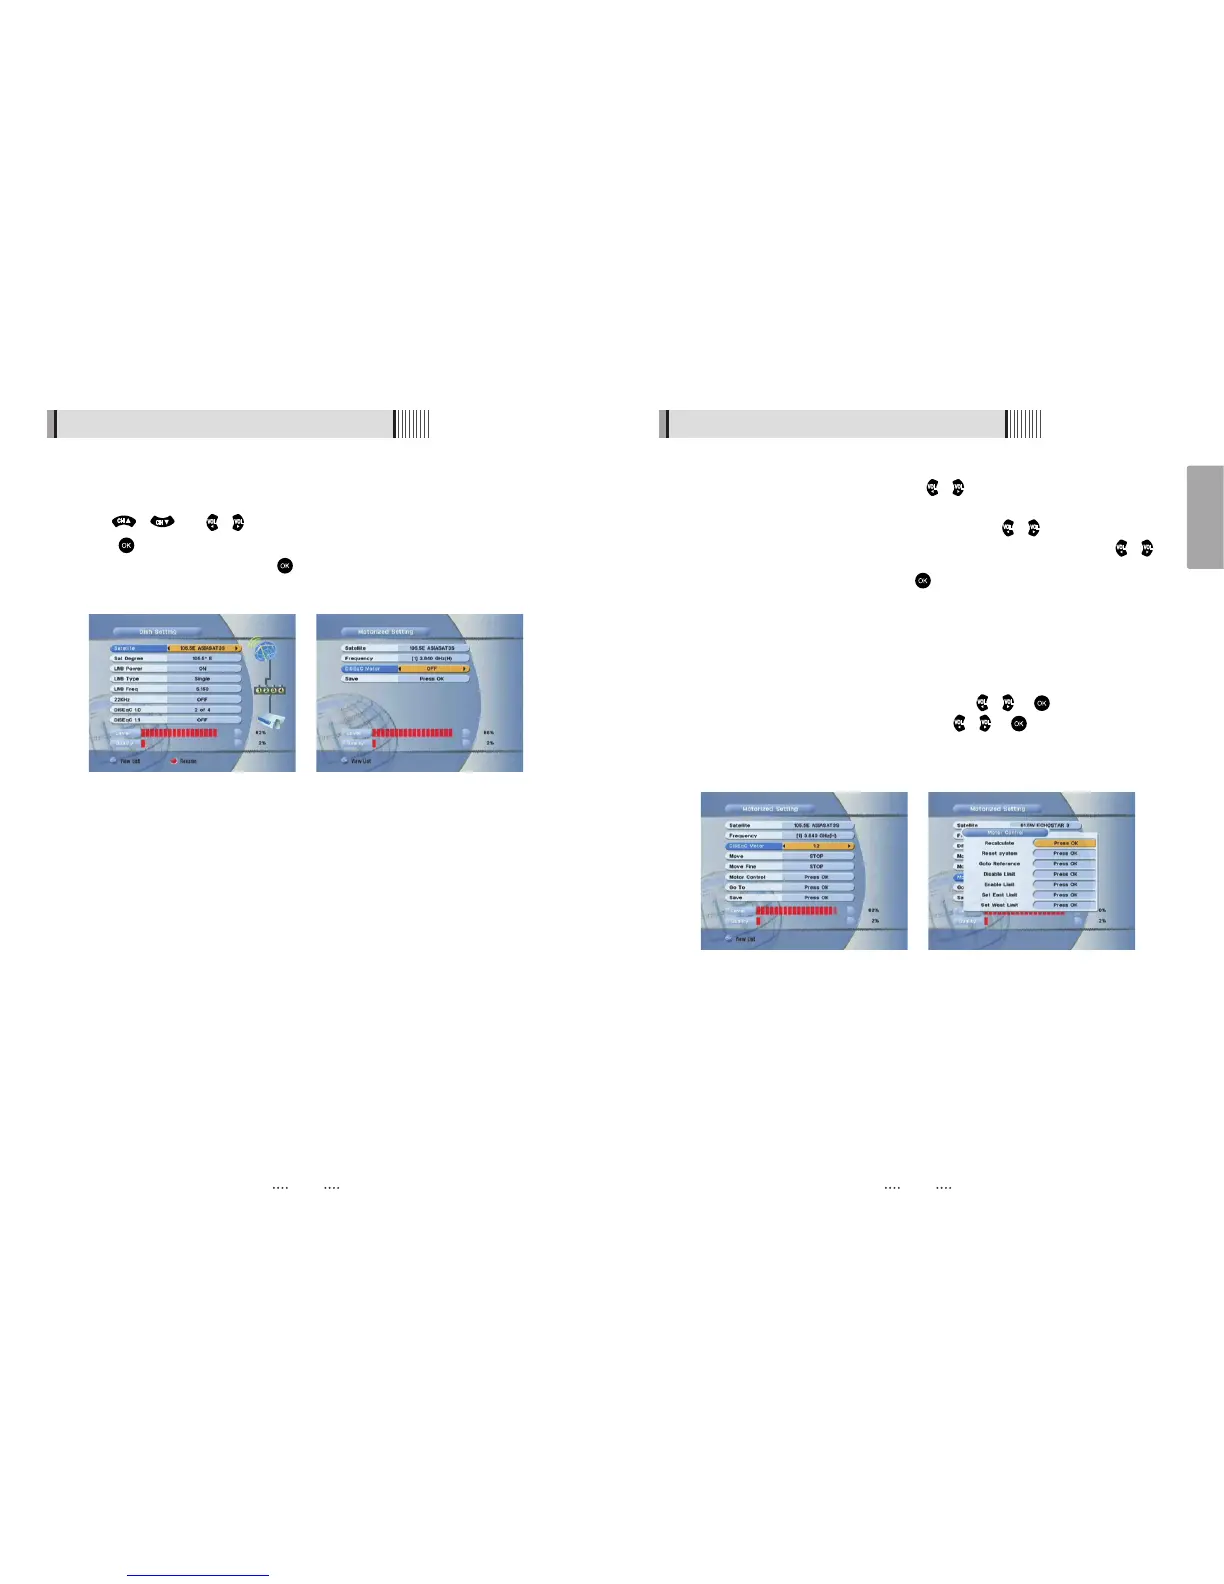
When the DiSEqC Motor parameter is set as 1.2 <Figure 6.1.4>
)
- Satellite : Select any satellite by pressing / buttons.
- Frequency : Displays the current TP value of the selected satellite.
- Move : Move the dish position to west/east by pressing / buttons.
- Move Fine : Move the dish position 1 step at a time to west/east by pressing /
buttons.
- Motor Control : Control motor by press button on the remote. <Figure 6.1.5>
⍜Recalcuate : Recalculate the position of all other saved satellites relative to the
known position.
⍜Reset System : Reset the position of all saved satellites.
⍜Goto Reference : Move the dish to the 0 position.
⍜Disable Limit : Disable east and west limit.
⍜Enable Limit : Enable the saved east and west limit.
⍜Set East Limit : Edit & Save east limit by pressing / or buttons.
⍜Set West Limit : Edit & Save limit by pressing / or buttons.
- Go To : Go to the position of the saved satellite.
- Save : Save the current setting of DiSEqC 1.2 system.
<Figure 6.1.4> <Figure 6.1.5>
6.1 Getting Started
⊼
Select the item that you want to edit, and set its parameters as desired. <Dish Setting>
- LNB Power : Select among ON/OFF/13V/18V.
- LNB Type : Select among Single/Universal/OCS.
- LNB Freq : Set the frequency of the LNB oscillator.
- 22KHz : When not AUTO, set the signal path from LNB or switch by selecting a control
signal among 0/22KHz.
- DiSEqC 1.0 : Select DiSEqC 1.0 Port
- DiSEqC 1.1 : Select DiSEqC 1.1 Port
⊽
Select the item that you want to edit and set its parameters as desired. <Motorized
Setting>
- Frequency : If the default TP frequency is not appropriate, you can select another TP
frequency at which to check for signal.
- DiSEqC Motor : Select DiSEqC protocol among OFF/1.2/USALS as appropriate for
your Motor.
<Figure 6.1.2> <Figure 6.1.3>
2) Antenna Setup
⊹
Press the MENU button to display the main menu.
⊺
Use / and / to move in the menu.
⊻
Press on ‘Dish Setting’. The following window will appear. <Figure 6.1.2>
If you have a motorized dish, press on ‘Motorized Setting’. < Figure 6.1.3>
ҫ
Note : Enter a 4-Digit password if need arise. The default password is ‘0000’.