24
CLEANING SCHEDULE [TO BE PERFORMED BY TRAINED SERVICE PROVIDERS ONLY]
Maintenance Freq. Instructions
Case
Exterior
Qtly
Condensing Coil: Using air pressure or an industrial strength vacuum, clean the
dust and dirt that may collect on the condenser coil. It may be necessary to use a
soft-bristled brush to loosen up caked dust and debris that may form on coil.
See previous page for step-by-step illustrations on accessing condensing coil.
Qtly
Under Case Cleaning: Once refrigeration package is clear of unit, vacuum under
case to remove all dust and dirt that may collect.
Case Interior Qtly
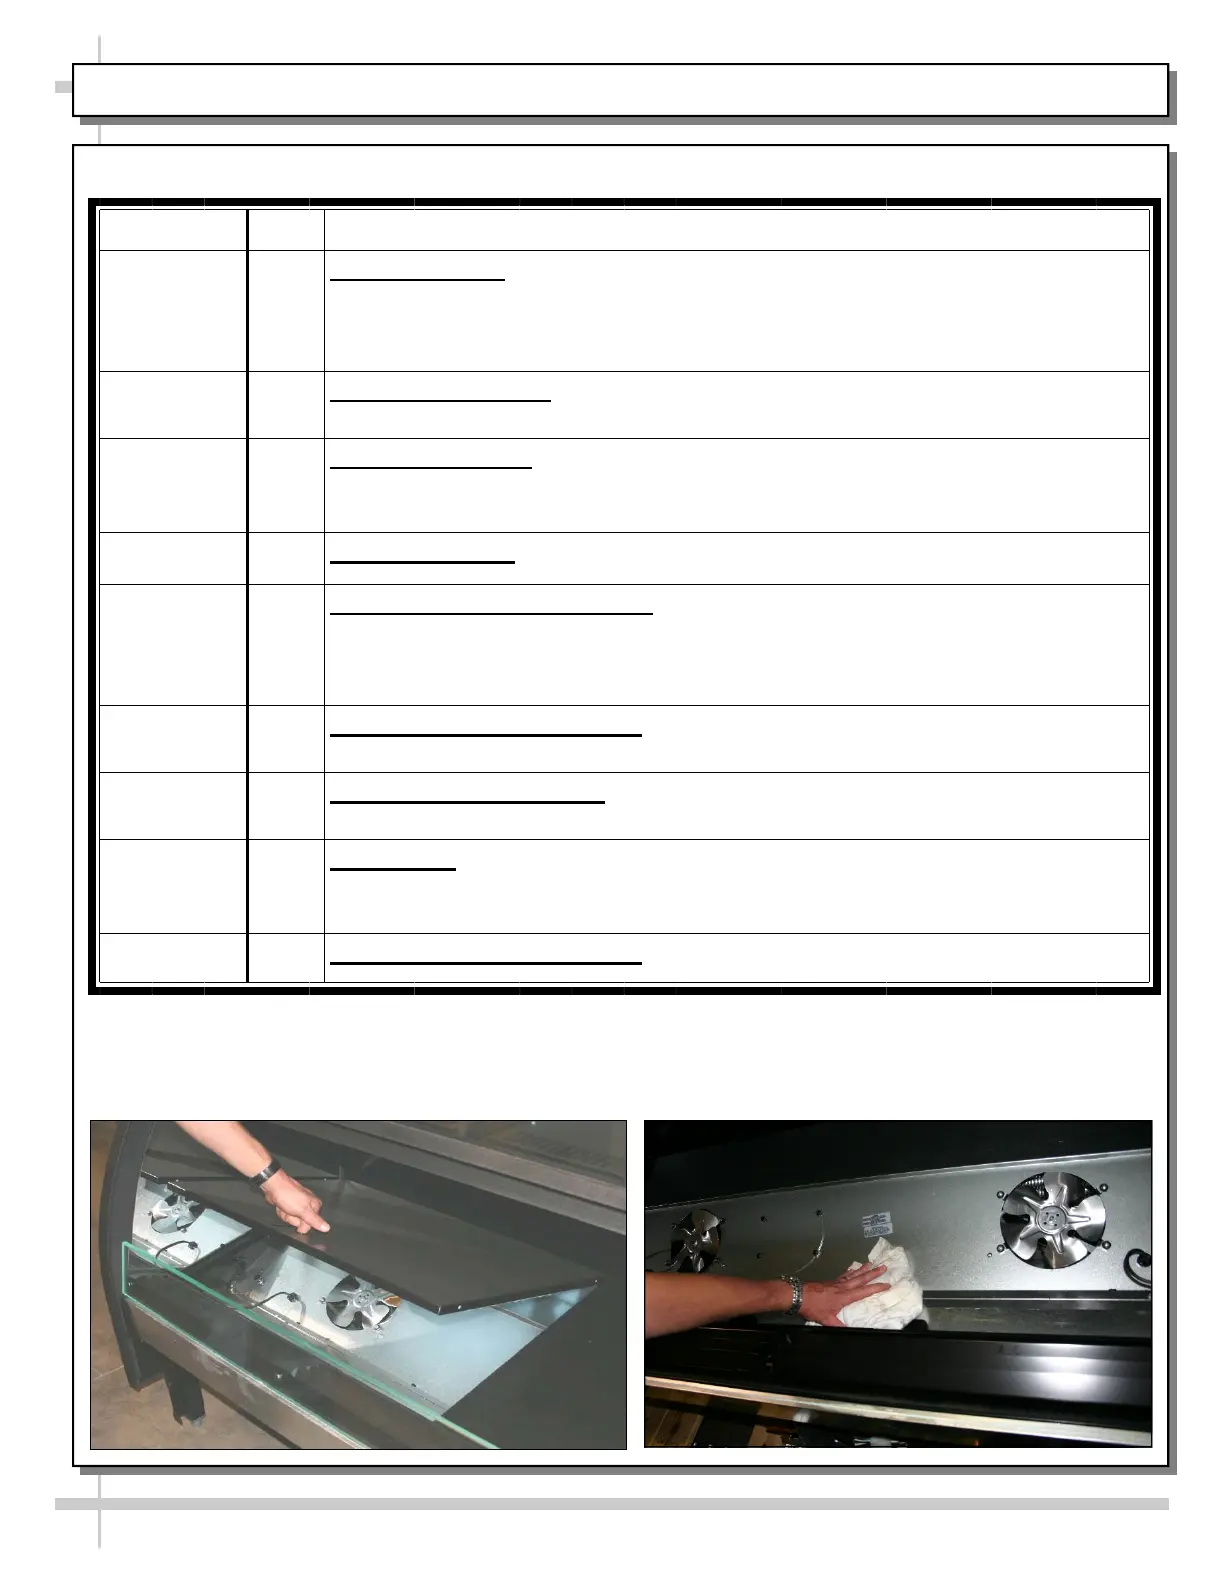
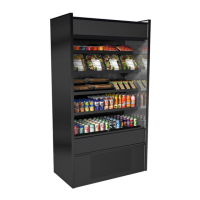
Tub, Coil and Drain: Remove evaporator fan panel [as shown in images #6 and 7
below] and clean tub, coil and drain with warm water and mild soap solution.
Remove any debris that may clog drain.
Compressor Area: Slide out from case. Wipe off dust & debris w/moist cloth.
Hot Gas Loop Condensate Pan: Disconnect power. Slide out refrigeration
assembly (casters provided for easy slide). Use a de-scaling solution (such as
CLR® that will prevent corrosion, lime and rust) to thoroughly clean pan. Use wet /
dry vacuum to remove all residue. If necessary, wipe down with damp cloth.
Qtly
Evaporative Wicking Material: Lift up and off from support. Replace with new
evaporative wicking material.
Qtly
Fan Blades, Shroud, Drain: Wipe down each blade and shroud with moist cloth.
Clean out drain. See images #6 and 7 below.
Qtly
Honeycomb: See PREVENTIVE MAINTENANCE - HONEYCOMB AIR
DIFFUSERS [SERVICE TECHNICIANS ONLY] section in this manual for specs.
Qtly
Upper and Lower Step Inserts: Remove from Case. Clean w/soap and water.
Image #6
Use finger holes to lift up
Deck. Remove from case.
Image #7
Clean under Air Return Grille and Fan
Shroud Area with moist cloth. Remove drain
cleaning access door and clean drain.
WARNING! TURN OFF POWER TO CASE BEFORE PERFORMING PREVENTIVE MAINTENANCE!