5
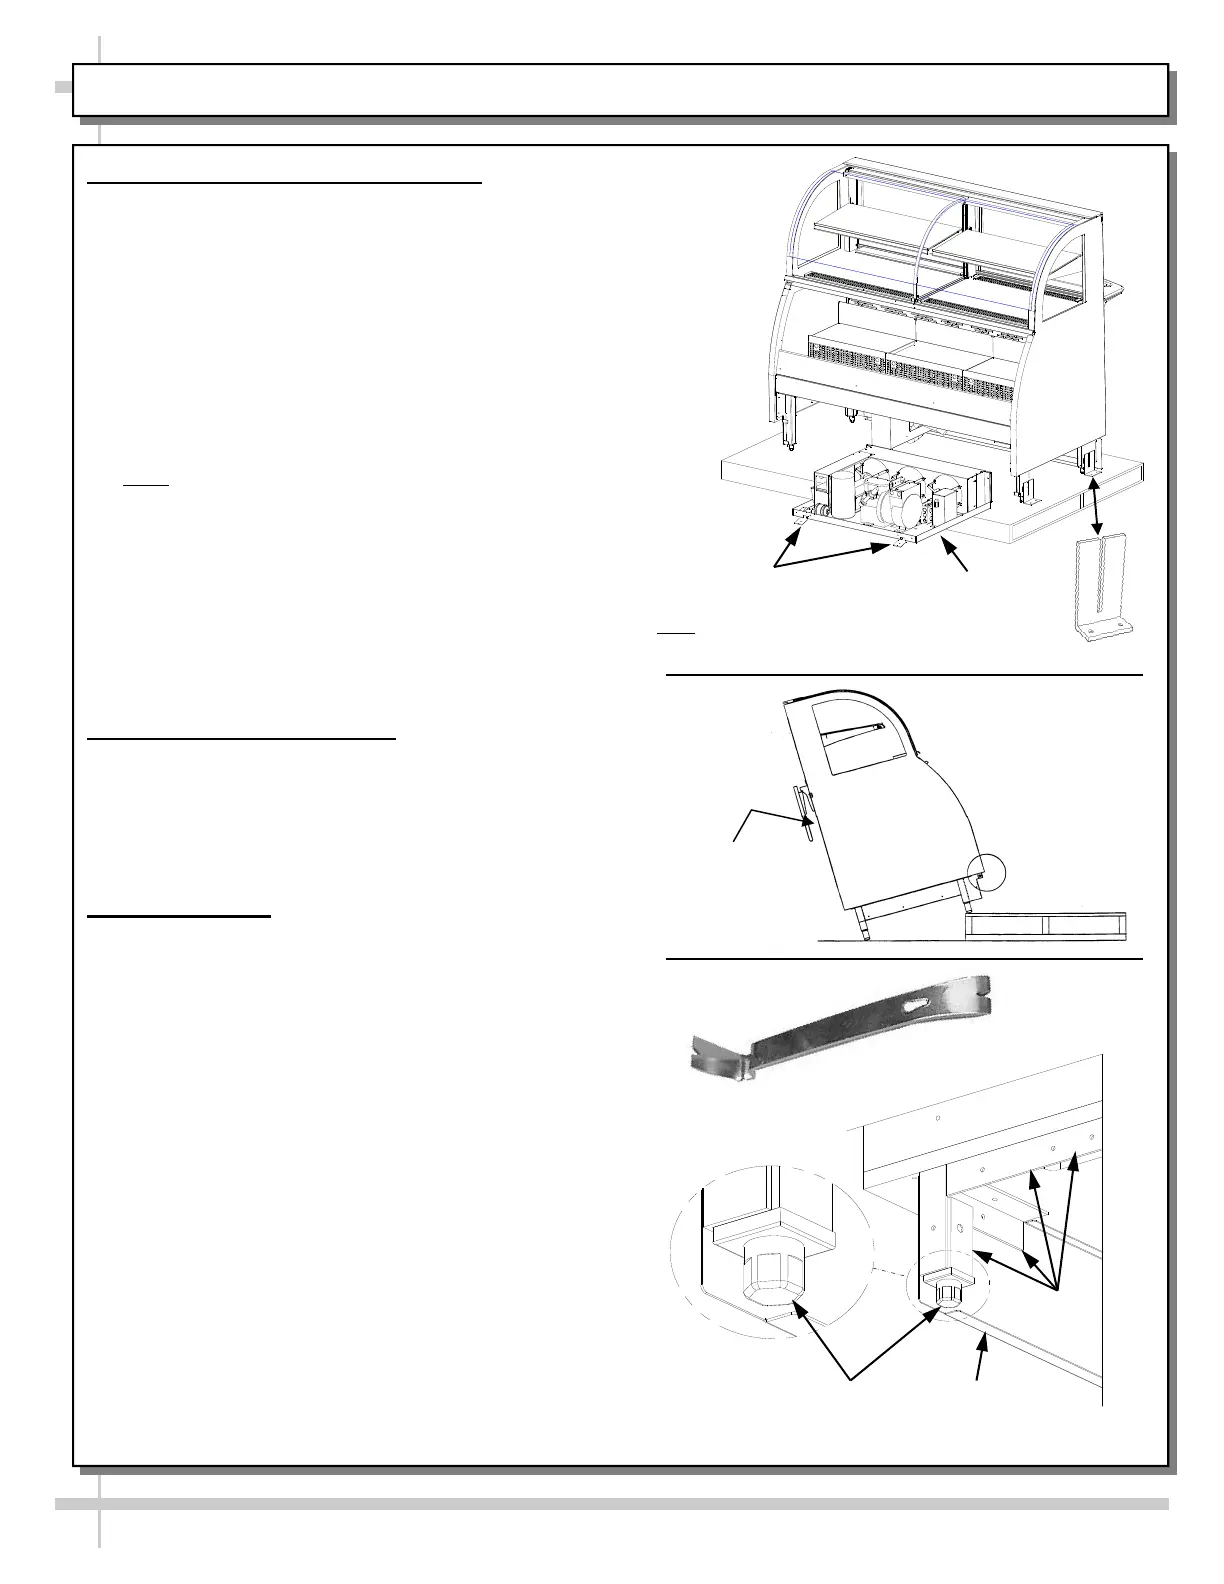
REFRIGERATION ASSEMBLY REMOVAL, CASE REMOVAL AND LEVELER ADJUSTMENT
1. Removing Refrigeration Assembly
Note: Retain screws that are removed from the
CASE shipping brackets (Screws will be used as
Toe-Kick fasteners).
Remove front panel.
Lift front panel upward from the lower edge,
approximately one half inch to detach from the
retainer hooks.
Remove all shipping brackets from units base and
compressor.
Reuse shipping bracket screws for Toe-Kick
mounting.
Note: Make sure all hoses and power cords are
disconnected before completely removing
compressor from unit.
The compressor base is on casters. Roll the
assembly out half way straight out from the front
of the case.
Carefully lower assembly to floor.
After compressor unit is removed, roll out of the
way while locating and setting case.
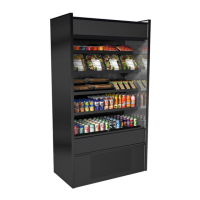
2. Removing Case from Skid
Slide case halfway off back of skid.
Lower case onto back rear levelers.
Tilt case back enough to free skid.
Slide skid out from front of case, lower case to
floor.
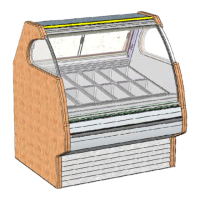
3. Leveling Case
Levelers may need to be adjusted for proper height
clearance to fully insert unit.
Tools needed: level, pry bar, and adjustable
wrench.
Using a level, find the highest point on the case.
Level the case to that highest point by turning the
levelers up or down to the desired level position.
Refrigeration
Assembly
Refrigeration Assembly
Shipping Brackets.
Note: Illustration shown may
differ slightly from your case.
Pry Bar
Toe-Kick
Base
Frame
Leveler
Do NOT grab
rear ledge
to move case!