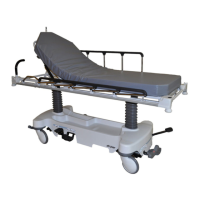
5. Using a 1/2” socket with a 3/8” drive extension and a 3/8” drive ratchet, remove the two Nylock flange hex nuts (A) (one
on each side) that secure the brake link assembly (B) to the casters (Figure 3).
6. Using needle nose pliers, remove the rue ring cotter (C) and clevis pin (D) from the brake rod activator.
7. Apply the brake. Push on the product to make sure that the brake is locked.
8. Remove the brake link assembly (B). Pull outward with equal force on the assembly. Save the brake link assembly.
9. Using a small bottle jack, raise the product until the caster falls out of the frame socket. Discard the caster.
10.Using a 5/16” socket with a 3/8” drive extension and a 3/8” drive ratchet, remove the two hex washer head screws (F)
that secure the brake swivel lock ring to the base frame. Remove and discard the brake swivel lock ring.
11.Using a 5/16” socket with a 3/8” drive extension and a 3/8” drive ratchet, install the supplied brake swivel lock ring.
NNoottee -- There are two dowels that mate to the base frame when you install the brake swivel lock ring.
12.Position the supplied caster assembly on the base frame. Lower the jack until the caster is secured in the base frame.
Remove the jack.
NNoottee -- Make sure that the arrow located at the top of the caster assembly fork stem points toward the foot end of the
product. If the arrow does not point toward the foot end, damage may occur to the caster assembly.
13.Reverse steps to reinstall. Using a 3/8” drive torque wrench, torque the two Nylock flange hex nuts (A) that secure the
brake link assembly (B) to the casters to 80 ± 20 in-lb. Using the 3/8” drive torque wrench, torque the two hex washer
head screws (F) that secure the brake swivel lock ring to the base frame to 50 ± 4 in-lb.
NNoottee -- When you install the supplied brake link assembly, be sure to reinstall the bearing (E) which may have fallen off
when you removed the brake link assembly.
14.Verify proper operation before you return the product to service.
BBrraakkee lliinnkk aasssseemmbbllyy rreeppllaacceemmeenntt,, hheeaadd eenndd oorr ffoooott eenndd
TToooollss RReeqquuiirreedd::
• 1/2” socket
• 3/8” drive ratchet
• 3/8” drive extension
• 3/8” drive torque wrench (in-lb)
• Needle nose pliers
• Bungee cords
1. Raise the product to the highest position.
2. Raise both siderails to the up and latched position.
3. Raise the base hood and support the hood with bungee cords.
4. Put the brake/steer pedal in the neutral position.
5. Using a 1/2” socket with a 3/8” drive extension and a 3/8” drive ratchet, remove the two Nylock flange hex nuts (A) (one
on each side) that secure the brake link assembly (B) to the casters (Figure 3).
6. Using needle nose pliers, remove the rue ring cotter (C) and clevis pin (D) from the brake rod activator.
7. Apply the brake. Push on the product to make sure that the brake is locked.
8. Remove the brake link assembly (B). Pull outward with equal force on the assembly.
9. Reverse steps to reinstall. Using a 3/8” drive torque wrench (in-lb), torque the two Nylock flange hex nuts (A) that secure
the brake link assembly to the casters to 80 ± 20 in-lb.
NNoottee -- When you install the brake link assembly, be sure to reinstall the bearing (E) which may have fallen off when you
removed the brake link assembly.
10.Verify proper operation before you return the product to service.
0747-109-002 Rev A.3 19 EN