Operations Manual
8
1.7 SET-UP PROCEDURE
CHECKLIST
It is important to ensure that the bed is working properly before putting it into service. The
following list will help ensure that each part of the bed is verified.
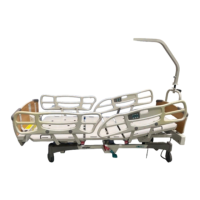
____Install the foot and head boards on the bed. Insert the foot board carefully so that the board
connector connects smoothly to the foot end casing connector.
____Plug the power cord into a properly grounded hospital grade wall receptacle and ensure
that the Power LED light at the foot end of the bed comes on when the "On/Off" switch is
turned on.
The bed is equipped with a hospital grade plug for protection against shock hazard. It must be
plugged directly into a properly grounded receptacle. Grounding reliability can be achieved only
when a hospital grade receptacle is used.
____Depress the red "TOTAL BRAKE" side of the pedal at either side of the bed to apply the
brakes. Push on the bed to make sure it is immobilized. Ensure brakes disengage when
the pedal is toggled to neutral position.
____Depress the green "AXIAL STEER" side of the pedal on either side of the bed to engage
the 5th steer wheel. Ensure the steer wheel is functional. Ensure the steer wheel
disengages when the pedal is toggled to neutral position.
____Ensure the siderails raise and lower smoothly and lock in the up position.
____Run through each function on the foot board control panel and ensure that each function
works properly.
____Ensure all functions work properly on the siderail control panels (inner and outer sides).
Also check the optional nurse call function.
____Fully raise the bed and activate the Trendelenburg function (see "Trendelenburg Switch
(E)", page 16). Ensure the head end fully lowers.
____ Fully raise the bed and activate the reverse Trendelenburg function (see "Trendelenburg
Switch (E)", page 16). Ensure that the foot end fully lowers.
____Ensure that the optional Auto Contour function works properly (see "Auto Contour", page
16).
____Leaving the bed in the Auto Contour position, pull each CPR emergency release handle
(optional) and ensure the Fowler and Knee Gatch will drop completely. Wait about 30
seconds - the time for the Fowler motor to reset itself automatically once the Fowler is
completely lowered - then raise the Fowler to ensure that the motor has indeed reset itself.
Note that during the resetting process, the Fowler controls will not be available.
____Verify the following optional equipment for proper operation: 120V auxiliary outlet,
photoelectric night light, two or three function pendant control, etc.
If any problems are found during bed set-up, contact our Technical Service department (see
section 1.2).
W
W
A
R
R
N
N
I
I
N
N
G
G