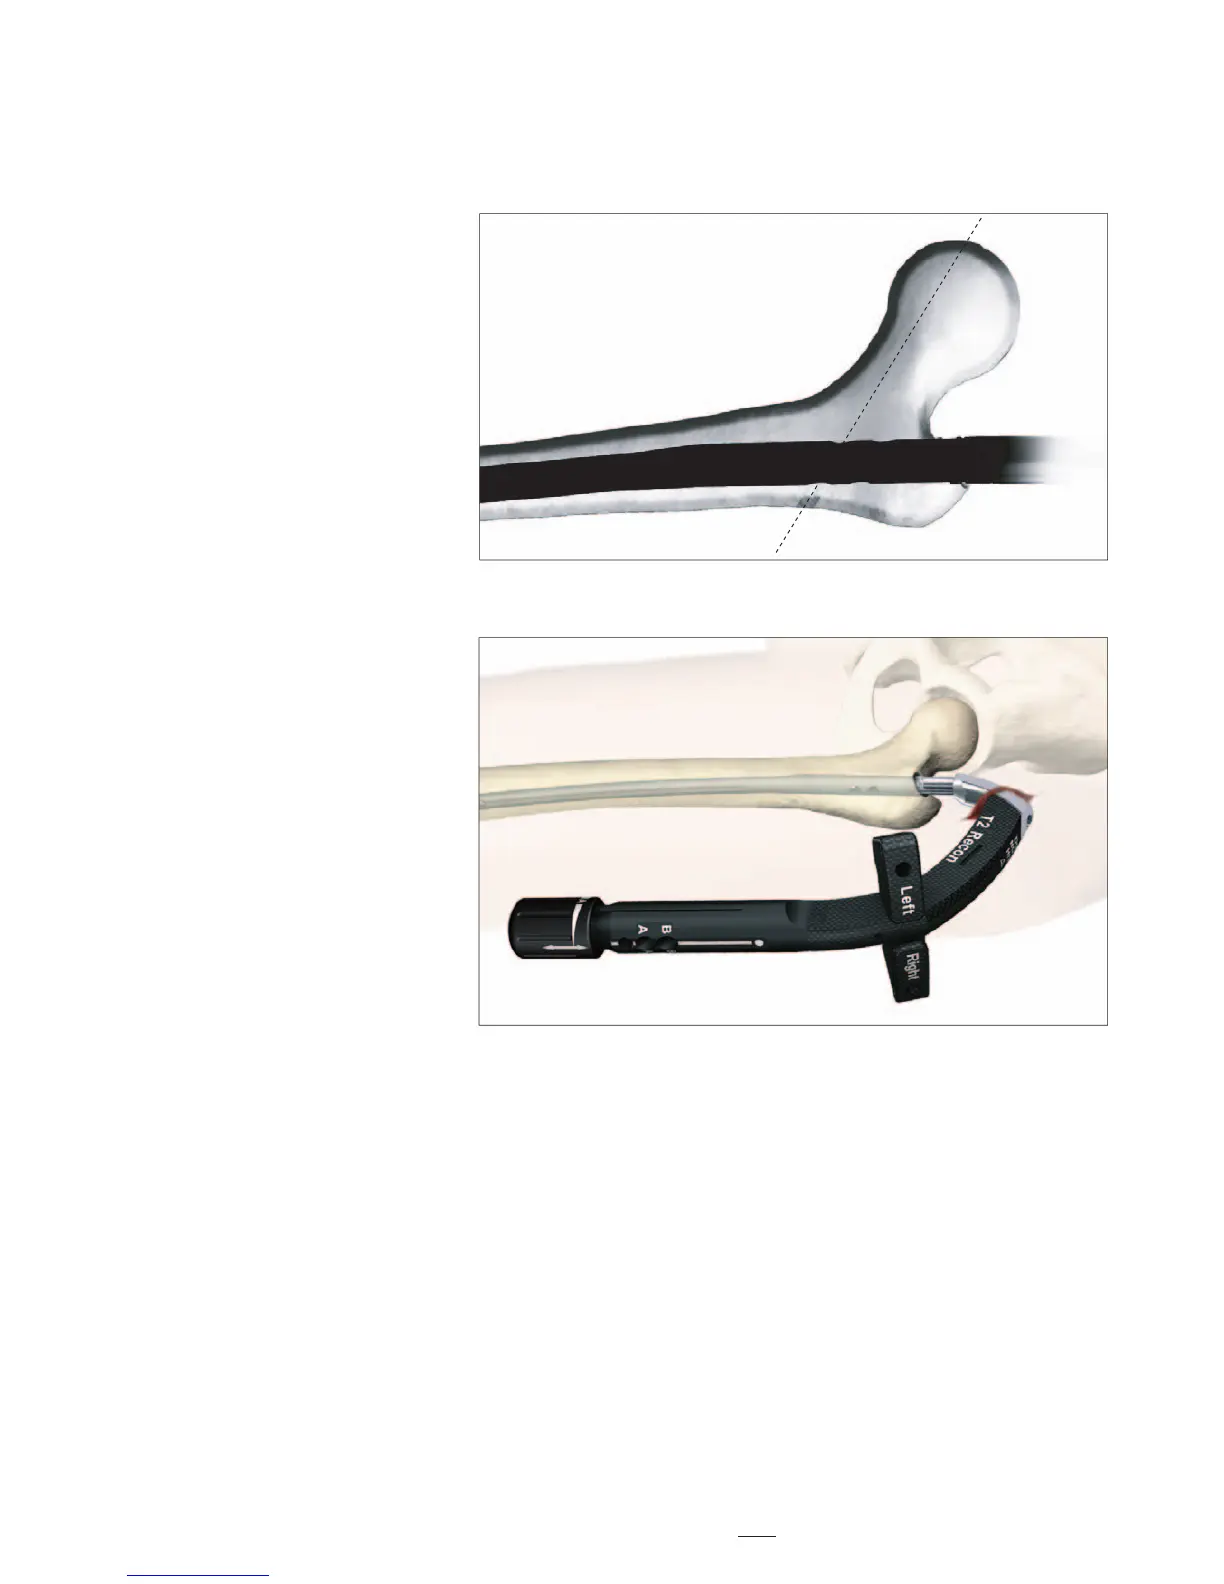
Nail / Lag Screws Positioning
Drive the T2 Recon Nail to the depth
that correctly aligns the proxi mal
screw holes parallel with the femoral
head and neck under fluoroscopic
control (Fig. 20).
Two aspects regarding the Nail/Lag
Screws position must be carefully
checked with the image intensifier
before drilling into the femoral head:
- Alignment of the anteversion (M//L
view)
- Depth of nail insertion (A/P view).
The distal Lag Screw should run along
the calcar region (on the A/P view) and
centered into the femoral neck and
head (on the M/L view).
Note:
TheuseoftheOneShotDevice
(1213-3010) is recommended to
predetermine the optimal Lag
Screwplacement.Detailsare
described on Page 20 to 21.
Fig. 20
Fig. 20a
Operative Technique
Guided Locking for the Recon Mode
19