Operative Technique
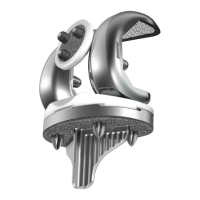
Therefore, if the end of the Drill
is 3mm beyond the far cortex, the
end of the screw will also be 3mm
beyond (Fig. 46). Check the position
oftheendoftheDrillwithimage
intensification before measuring
the screw length. If the screw
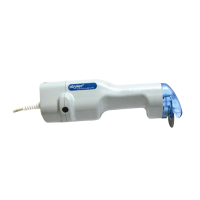
measurement using the Long Screw
Gauge is preferred, first remove the
Long Drill Sleeve and read the screw
length directly at the end of the Long
Tissue Protection Sleeve.
Note:
• Before starting to measure,
ensure that the Tissue Protection
Sleeve/DrillSleeveAssemblyand
K-WireSleeveassemblyisfirmly
pressed against the lateral cortex
of the femur (Fig. 46, 47).
• TheLongScrewGaugeis
calibrated so that with the bend
at the end pulled back flush with
the far cortex, the screw tip will
end 3mm beyond the far cortex
(Fig. 47).
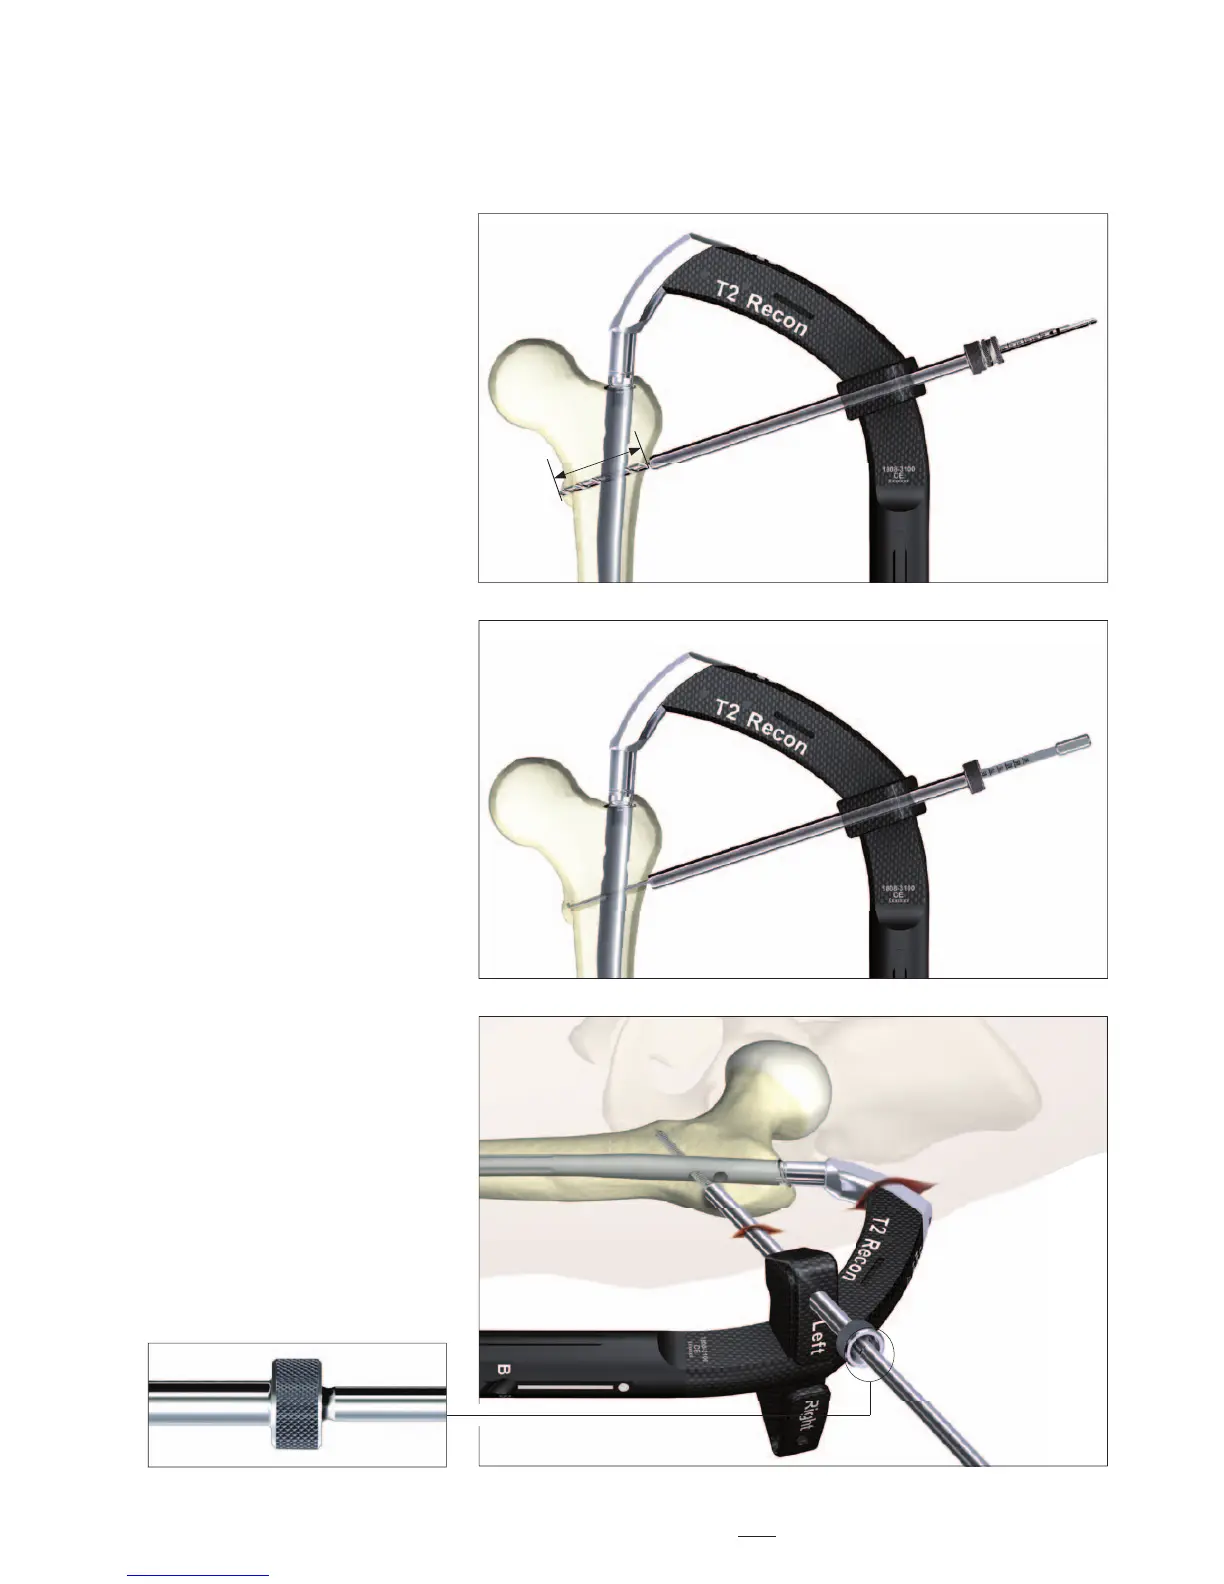
When the Drill Sleeve is removed,
the correct Locking Screw is inserted
through the Tissue Protection Sleeve
using the Long Screwdriver Shaft with
Teardrop Handle (Fig. 48). The screw
is ad vanced through both cortices.
The screw is near its proper seating
posi tion when the groove around the
shaft of the screwdriver is approach -
ing the end of the Tissue Protection
Sleeve (Fig. 48a).
Fig. 47
65mm
Fig. 46
Fig. 48
Fig. 48a
31